Page 2 - WARNING
2 GENERAL POWER TOOL SAFETY WARNINGS WARNING Read all safety warnings, instruc- tions, illustrations and specifica - tions provided with this power tool. Failure to follow all instructions listed below may result in electric shock, fire and/or serious injury. Save all warnings and instructions for f...
Page 3 - SYMBOLOGY; SPECIFICATIONS
3 • When battery pack is not in use, keep it away from other metal objects, like paper clips, coins, keys, nails, screws or other small metal objects, that can make a connection from one terminal to another. Shorting the battery terminals together may cause burns or a fire. • Under abusive condition...
Page 4 - OPERATION; Fuel Gauge; ASSEMBLY; Removing/Inserting the Battery; Attaching and Removing Accessories
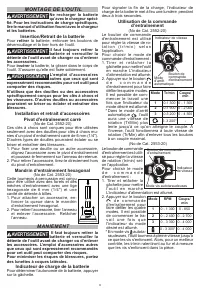
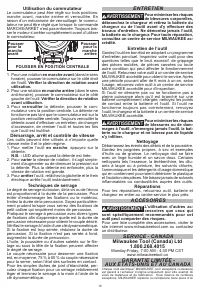
4 OPERATION WARNING Always remove battery pack before changing or removing accesso- ries. Only use accessories specifically recom - mended for this tool. Others may be hazardous. To reduce the risk of injury, always wear safety goggles or glasses with side shields. Fuel Gauge To determine the amount...
Page 5 - MAINTENANCE; battery pack from the charger or tool before; Maintaining Tool; your tool, battery pack or charger in liquid or; Cleaning; ACCESSORIES; SERVICE - UNITED STATES
5 Using the Control Switch The control switch may be set to three positions: forward, reverse and lock. Due to a lockout mecha - nism, the control switch can only be adjusted when the ON/OFF switch is not pressed. Always allow the motor to come to a complete stop before using the control switch. Pus...
Page 6 - AVERTISSEMENT
6 LIMITED WARRANTY USA & CANADA Every MILWAUKEE power tool* (see exceptions below) is warranted to the original purchaser only to be free from defects in material and workmanship. Subject to certain exceptions, MILWAUKEE will repair or replace any part on an electric power tool which, after exam...
Page 7 - dans un endroit humide, utiliser une source; SÉCURITÉ INDIVIDUELLE; • Rester attentif, prêter attention au travail et faire; ne permet pas de le mettre en marche ou de; UTILISATION ET ENTRETIEN; entre en contact avec les yeux, consulter un
7 débrancher ce dernier en tirant sur le cordon. Garder le cordon à l'écart de la chaleur, de l'huile, des objets tranchants et des pièces en mouvement. Un cordon endommagé ou emmêlé accroît le risque de choc électrique. • Pour les travaux à l’extérieur, utiliser un cordon spécialement conçu à cet e...
Page 9 - retirer; MANIEMENT; Il faut toujours retirer la; Utilisation de la commande
9 MONTAGE DE L'OUTIL AVERTISSEMENT Ne recharger la batterie qu’avec le chargeur spéci - fié. Pour les instructions de charge spécifiques, lire le manuel d’utilisation fourni avec le chargeur et les batteries. Insertion/Retrait de la batterie Pour retirer la batterie, enfoncer les boutons de déverrou...
Page 10 - ENTRETIEN; Entretien de l’outil; Nettoyage; ACCESOIRES; GARANTIE LIMITÉE -
10 Utilisation du commutateur Le commutateur peut être réglé sur trois positions: marche avant, marche arrière et verrouillée. En raison d’un mécanisme de verrouillage, le commu- tateur ne peut être réglé que lorsque la commande MARCHE/ARRÊT n’est pas enfoncée. Toujours lais - ser le moteur s’arrête...
Page 11 - ADVERTENCIA; • Mantenga a los niños y a los espectadores ale-
11 outil électrique qui, après examen par MILWAUKEE, s’est avérée être affectée d’un vice de matériau ou de fabrication et ce pendant une période de cinq (5) ans** à compter de la date d’achat, sauf indication contraire. Le retour de l’outil électrique, à un centre de réparations en usine MILWAUKEE ...
Page 14 - ENSAMBLAJE; Como se inserta/quita la batería en la; Cómo Colocar y Desmontar Accesorios; OPERACION; Uso del control de accionamiento
14 ENSAMBLAJE ADVERTENCIA Recargue la batería sólo con el cargador especificado para ella. Para instrucciones específicas sobre cómo cargar, lea el manual del operador sumin - istrado con su cargador y la batería. Como se inserta/quita la batería en la herramienta Para retirar la batería, presione l...
Page 15 - MANTENIMIENTO; Mantenimiento de las herramientas; Limpieza; ACCESORIOS; SOPORTE DE SERVICIO - MEXICO
15 Utilización del interruptor de control El interruptor de control se puede colocar en tres posiciones diferentes: avance, retroceso y bajo se - guro. Debido a un mecanismo de traba, el interruptor de control se puede cambiar de posición únicamente cuando el interruptor de ENCENDIDO/APAGADO no esté...
Page 16 - MILWAUKEE TOOL; PÓLIZA DE GARANTÍA - VALIDA
58142553d2 961012535-01(B) 03/18 Printed in China MILWAUKEE TOOL 13135 West Lisbon Road Brookfield, WI 53005 USA GARANTÍA LIMITADA - E.U.A. Y CANADÁ Cada herramienta eléctrica* MILWAUKEE (vea las excepciones más adelante) se garantiza al comprador original únicamente contra de - fectos en materiales...