Page 2 - WARNING
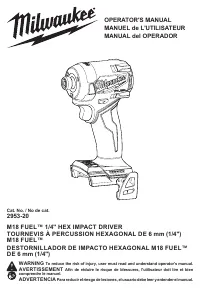
2 GENERAL POWER TOOL SAFETY WARNINGS WARNING Read all safety warnings, instruc- tions, illustrations and specifica - tions provided with this power tool. Failure to follow all instructions listed below may result in electric shock, fire and/or serious injury. Save all warnings and instructions for f...
Page 4 - OPERATION; Using the Control Switch; FUNCTIONAL DESCRIPTION; Removing/Inserting the Battery; Attaching and Removing Accessories
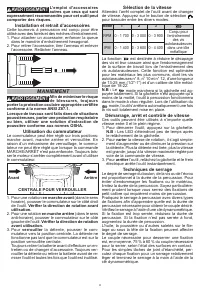
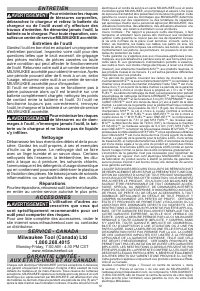
4 OPERATION WARNING To reduce the risk of injury, always wear proper eye protection marked to comply with ANSI Z87.1. When working in dusty situations, wear appro- priate respiratory protection or use an OSHA compliant dust extraction solution. Using the Control Switch The control switch may be set ...
Page 5 - MAINTENANCE; battery pack from the charger or tool before; Maintaining Tool; your tool, battery pack or charger in liquid or; Cleaning; ACCESSORIES; SERVICE - UNITED STATES
5 Starting, Stopping and Controlling Speed These tools may be operated at any speed from 0 to full speed. 1. To start the tool, pull the trigger. NOTE: LEDs will turn off shortly after trigger is released. 2. To vary the driving speed, increase or decrease pressure on the trigger. The further the tr...
Page 6 - AVERTISSEMENT
6 LIMITED WARRANTY USA & CANADA Every MILWAUKEE power tool* (see exceptions below) is warranted to the original purchaser only to be free from defects in material and workmanship. Subject to certain exceptions, MILWAUKEE will repair or replace any part on an electric power tool which, after exam...
Page 7 - teur ne permet pas de le mettre en marche ou; UTILISATION ET ENTRETIEN; • Suivre toutes les instructions de charge et ne; ENTRETIEN
7 • Porter l’équipement de protection individuel requis. Toujours porter une protection oculaire. Selon les conditions, porter aussi un masque an- tipoussières, des bottes de sécurité antidérapantes, un casque protecteur ou une protection auditive afin de réduire les blessures. • Empêcher les démarr...
Page 8 - • Porter des protège-oreilles avec un marteau; reuses, porter une protection respiratoire ou; Insertion/Retrait de la batterie; retirer; Toujours verrouiller la
8 RÈGLES DE SÉCURITÉ SPÉCIFIQUES POUR TOURNEVIS À PERCUSSION HEXAGONAL • Lorsque l’outil électrique est utilisé pour un travail risquant de mettre le dispositif de fixa - tion en contact avec des fils électriques cachés, tenez l’outil par les surfaces de prise isolées. Le contact d’un dispositif de ...
Page 9 - Installation et retrait d’accessoires; MANIEMENT; Utilisation du commutateur
9 AVERTISSEMENT L’emploi d’accessoires autres que ceux qui sont expressément recommandés pour cet outil peut comporter des risques. Installation et retrait d’accessoires Cette tournevis à percussion est conçu pour être utilisé avec des forets et des mèches d’entraînement. 1. Pour attacher un accesso...
Page 10 - Entretien de l’outil; Nettoyage; ACCESOIRES; GARANTIE LIMITÉE -
10 ENTRETIEN AVERTISSEMENT Pour minimiser les risques de blessures corporelles, débranchez le chargeur et retirez la batterie du chargeur ou de l’outil avant d’y effectuer des travaux d’entretien. Ne démontez jamais l’outil, la batterie ou le chargeur. Pour toute réparation, con - sultez un centre d...
Page 11 - ADVERTENCIA
11 ADVERTENCIAS DE SEGURIDAD GENERALES PARA LA HERRAMIENTA ELÉCTRICA ADVERTENCIA Lea todas las advertencias de seguridad, instrucciones, ilustraciones y especificaciones con esta her - ramienta eléctrica. Si no sigue todas las adverten- cias e instrucciones, se pueden provocar una des- carga eléctri...
Page 13 - SIMBOLOGÍA; DESCRIPCION FUNCIONAL; Como se inserta/quita la batería en la; Cómo Colocar y Desmontar Accesorios; OPERACION; Utilización del interruptor de control
13 SIMBOLOGÍA Volts Corriente continua Revoluciones por minuto sin carga (RPM) Impactos por minuto bajo carga (IPM) Leer el manual del operador C US UL Listing Mark para Canadá y Estados Unidos DESCRIPCION FUNCIONAL 1. Portabrocas para destornillador hexagonal de 6 mm (1/4") 2. Tres LEDs 3. Inte...
Page 14 - MANTENIMIENTO; Mantenimiento de las herramientas; Limpieza; ACCESORIOS; SOPORTE DE SERVICIO - MEXICO
14 Selección de velocidad Espere a que la herramienta se detenga por com- pleto antes de cambiar las velocidades. Presione el botón selector para pasar sucesivamente de un modo a otro. Modo 1 2 3 RPM 0 - 1 700 0 - 3 000 0 - 3 900 Diseñado para introducir tornillos autorroscantes en lámina IPM 0 - 1 ...
Page 16 - MILWAUKEE TOOL
58149987d1 961014340-01(C) 11/21 Printed in Vietnam MILWAUKEE TOOL 13135 West Lisbon Road Brookfield, WI 53005 USA