Page 2 - WARNING
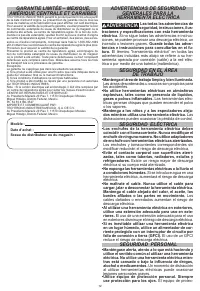
2 GENERAL POWER TOOL SAFETY WARNINGS WARNING Read all safety warnings, instruc- tions, illustrations and specifica - tions provided with this power tool. Failure to follow all instructions listed below may result in electric shock, fire and/or serious injury. Save all warnings and instructions for f...
Page 3 - BPM
3 • When battery pack is not in use, keep it away from other metal objects, like paper clips, coins, keys, nails, screws or other small metal objects, that can make a connection from one terminal to another. Shorting the battery terminals together may cause burns or a fire. • Under abusive condition...
Page 4 - ASSEMBLY; OPERATION
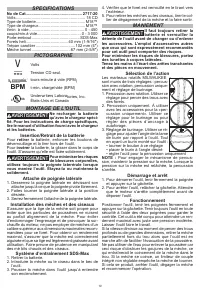
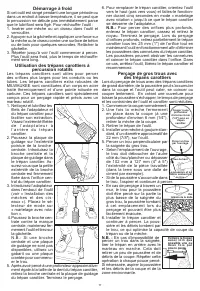
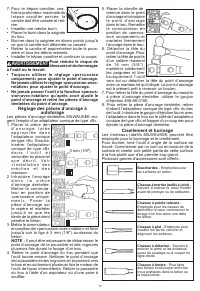
4 Starting and Stopping 1. To start the tool, grasp the handle firmly and pull the trigger. 2. To stop the tool, release the trigger. Make sure the tool comes to a complete stop before laying the tool down. Operating Position the tool, grasp the handles firmly and pull the trigger. Always hold the t...
Page 5 - rotation” until after the anchor has been set; Setting Self-Drilling Anchors
5 4. Press the centering bit firmly against your cen - ter mark, hold the tool firmly and pull the trig - ger. N O T E : I f t h e 48-20-5099 threaded stud is used, or a cen- ter pin and guide plate are not available, use a template or notched board to start the hole. 5. Start the tool. After drill ...
Page 6 - Chiseling and Chipping; MAINTENANCE; Maintaining Tool; Cleaning; ACCESSORIES
6 6. Snap the head off of the anchor. To remove the head of anchors up to 5/8", grasp the handles firmly and pull the tool sharply towards you or snap off the anchor head with a hand ham- mer as shown. The anchor is now ready to receive a bolt. 7. To r e m o v e t h e a n - c h o r h e a d w e d...
Page 7 - SERVICE - UNITED STATES; • to receive important notifications regarding your; LIMITED WARRANTY; Distributor or Store Stamp:
7 SERVICE - UNITED STATES 1-800-SAWDUST (1.800.729.3878) Monday-Friday, 7:00 AM - 6:30 PM CST or visit www.milwaukeetool.com Contact Corporate After Sales Service Technical Support with technical, service/repair, or warranty questions. Email: [email protected]Register your tool at www.milwaukeetool....
Page 8 - AVERTISSEMENT
8 RÈGLES DE SÉCURITÉ GÉNÉRALES RELATIVES AUX OUTILS ÉLECTRIQUES AVERTISSEMENT Lire toutes les consignes de sécurité, consignes, illustrations et spécifications fournies avec cet outil électrique. Ne pas suivre l’ensemble des règles et instructions peut entraîner une électrocution, un incendie ou des...
Page 10 - lire le manuel d’utilisation fourni avec le chargeur; Insertion/Retrait de la batterie; retirer; Attache de poignée latérale; MANIEMENT; Il faut toujours retirer la; Sélection de l’action
10 SPECIFICATIONS No de Cat. ................................................. 2717-20 Volts .............................................................. 18 CD Type de batterie ............................................ M18™ Type de chargeur .......................................... M18™ t/min....
Page 12 - Réglage des pièces d’ancrage à; Ciseaux à détartrer; Ciseaux à pointe robuste; Ciseaux à fendre
12 7. Pour le trépan carottier, une fois la profondeur maximale du trépan carottier percée, la carotte doit être cassée et reti- rée. • Installer une mèche burin. • Placer le burin dans la saignée du trou. • Buriner dans la saignée en divers points jusqu’à ce que la carotte soit détachée ou cassée. ...
Page 13 - ENTRETIEN; chargeur ou de l’outil avant d’y effectuer des; Entretien de l’outil; Nettoyage; ACCESOIRES; a v a n t d e c h a n g e r o u; GARANTIE LIMITÉE -
13 ENTRETIEN AVERTISSEMENT Pour minimiser les risques de blessures corporelles, débranchez le chargeur et retirez la batterie du chargeur ou de l’outil avant d’y effectuer des travaux d’entretien. Ne démontez jamais l’outil, la batterie ou le chargeur. Pour toute réparation, consultez un centre de s...
Page 14 - Sceau du distributeur ou du magasin :; ADVERTENCIA
14 GARANTIE LIMITÉE – MEXIQUE, AMÉRIQUE CENTRALE ET CARAÏBES TECHTRONIC INDUSTRIES' garantit le produit pendant cinq ans à partir de la date d’achat d’origine. Le présent bon de garantie couvre tous les vices de matériau et de fabrication que peut afficher cet outil électrique. Pour assurer la valid...
Page 16 - • Mantenga las manos alejadas de todos los; DESCRIPCION FUNCIONAL; Portador de brocas; ESPECIFICACIONES; ENSAMBLAJE; el cargador especificado; Como se inserta/quita la batería en la; Use los asideros auxiliares; Agarre del mango lateral
16 de corte pueda entrar en contacto con cables ocul - tos. El contacto con un cable “con corriente” hará que las partes de metal expuesto de la herramienta pasen la corriente y produzcan una descarga al operador. • Mantenga las manos alejadas de todos los bordes cortadores y partes en movimiento. •...
Page 17 - OPERACION; batería antes de acoplar o desacoplar accesorios.; Selección de Acción
17 OPERACION ADVERTENCIA Para reducir el riesgo de le- siones, extraiga siempre la batería antes de acoplar o desacoplar accesorios. Utilice únicamente accesorios específicamente recomendados para esta herramienta. El uso de accesorios no recomendados podría resultar peligroso. Para reducir el riesg...
Page 18 - Para reducir el riesgo de le-; Fijación de anclajes auto-perforantes
18 durante cinco segundos para aflojar la broca sacabocados de la espiga del adaptador. NOTA: Para efectuar agujeros más profundos, extraiga la broca sacabocados para fragmentar y extraer el bocado. Reanude el taladro. Cuando taladre agujeros largos o profundos, tras cada par de centímetro taladrado...
Page 19 - Cincelar y triturar; MANTENIMIENTO; Mantenimiento de la herramienta; Limpieza; ACCESORIOS
19 5. Coloque el tapón de expansión en el anc- laje e insértelo en el agujero. Cambie el botón de nuevo a sólo martillo y martille el anclaje firmemente dentro del agujero. 6. Corte la cabeza del anclaje. Para quitar la cabeza de los anc- lajes de hasta 16 mm (5/8"), agarre las asas firmemente y...
Page 20 - MILWAUKEE TOOL; SOPORTE DE SERVICIO; CENTRO DE ATENCION A CLIENTES; Av. Presidente Masarik 29 Piso 7; PÓLIZA DE GARANTÍA - VALIDA; Sello del Distribuidor:
58140016d2 961011657-02(A) 12/15 Printed in China MILWAUKEE TOOL 13135 West Lisbon Road Brookfield, Wisconsin, U.S.A. 53005 SOPORTE DE SERVICIO - MEXICO CENTRO DE ATENCION A CLIENTES Techtronic Industries Mexico, S.A. de C.V. Av. Presidente Masarik 29 Piso 7 11560 Polanco V Seccion Miguel Hidalgo, D...