Page 2 - Contents; Using the minute minder
Contents 2 Warning and Safety instructions .......................................................................... 5 Caring for the environment ................................................................................ 15 Overview .............................................................
Page 3 - Baking
Contents 3 Switching cooking programmes on and off automatically .................................... 42 Setting a cooking duration ............................................................................... 42At the end of the cooking duration: .....................................................
Page 4 - Problem solving guide
Contents 4 Fitting the door ...................................................................................................... 75Removing the shelf runners with FlexiClip telescopic runners.............................. 76Removing the back panel......................................................
Page 5 - Warning and Safety instructions; For the sake of simplicity, cookers and ovens will subsequently be
Warning and Safety instructions 5 For the sake of simplicity, cookers and ovens will subsequently be referred to as the “oven”. This oven complies with all current local and national safetyrequirements. However, inappropriate use can lead to personalinjury and damage to property. Read the operatin...
Page 6 - Correct application; This oven is designed for domestic use and for use in similar
Warning and Safety instructions 6 Correct application This oven is designed for domestic use and for use in similar environments by guests in hotel or motel rooms, bed & breakfastsand other typical living quarters. This does not include common/shared facilities or commercial facilities within ...
Page 7 - Safety with children
Warning and Safety instructions 7 Safety with children Young children must not be allowed to use this appliance. Older children may only use the oven if its operation has been clearly explained to them and they are able to use it safely. Theymust be able to understand and recognise the possible ...
Page 8 - Technical safety
Warning and Safety instructions 8 Technical safety Unauthorised installation, maintenance and repairs (including removal of any cover) can cause considerable danger for the user.Installation, maintenance and repairs must only be carried out by aMiele authorised technician. Damage to the oven can...
Page 9 - If the oven is delivered without a mains connection cable, a
Warning and Safety instructions 9 Miele can only guarantee the safety of the appliance when original Miele spare parts are used. Faulty components must only bereplaced by original spare parts. If the oven is delivered without a mains connection cable, a special cable must be installed by a suita...
Page 10 - Correct use
Warning and Safety instructions 10 Correct use Risk of injury caused by hot surfaces. The oven gets hot during operation. You could burn yourself on the heating elements, ovencompartment, accessories or food.Wear oven gloves when placing food in the oven or removing it, andwhen adjusting oven shel...
Page 12 - The following applies for stainless steel surfaces:
Warning and Safety instructions 12 Preserving and heating food in sealed tins will result in an increase in pressure, which can cause them to explode. Do not use tins forpreserving or heating food. Risk of injury from the open door. You could bang into the open door or trip over it. Avoid leavin...
Page 13 - Cleaning and care; Risk of injury due to electric shock. The steam from a steam
Warning and Safety instructions 13 Cleaning and care Risk of injury due to electric shock. The steam from a steam cleaning appliance could reach electrical components and cause ashort circuit. Never use a steam cleaner for cleaning. Scratches on the door glass can cause the glass to break. Do no...
Page 14 - Accessories; Miele cookers may only be combined with cooktops specified by
Warning and Safety instructions 14 Accessories Miele cookers may only be combined with cooktops specified by Miele as suitable for use with that appliance (see “Installation -Electrical connection”). Only use original Miele accessories. If other parts are used, warranty, performance and product ...
Page 15 - Caring for the environment
Caring for the environment 15 Disposal of the packingmaterial The transport and protective packaginghas been selected from materials whichare environmentally friendly fordisposal, and can normally be recycled. Recycling the packaging reduces theuse of raw materials in themanufacturing process and al...
Page 16 - Overview; Cooker
Overview 16 Cooker a Oven controls, cooktop controls b Top heat/grill element c Catalytic enamelled back panel d Air inlet for the fan with ring heating element behind it e Shelf runners with 5 shelf levels f Oven floor with bottom heat element underneath it g Front frame with data plate h Door
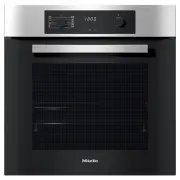
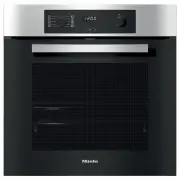
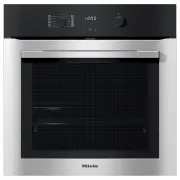
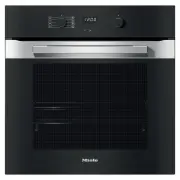
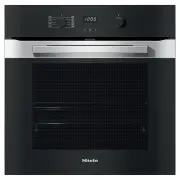
Page 17 - Oven
Overview 17 Oven a Control panel b Top heat/grill element c Catalytic enamelled back panel d Air inlet for the fan with ring heating element behind it e Shelf runners with 5 shelf levels f Oven floor with bottom heat element underneath it g Front frame with data plate h Door
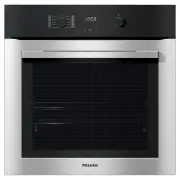
Page 18 - Oven controls; OK
Oven controls 18 a Function selectorFor selecting oven functions b Clock/TimerFor displaying the time of day and settings c sensor For changing times and settings d OK sensor For calling up functions and saving settings e sensor For changing times and settings f Temperature selectorFor setting t...
Page 19 - Function selector
Oven controls 19 Function selector The function selector is used to selectoven functions and to switch on theoven lighting separately. The function selector can be turnedclockwise or anti-clockwise.When the function selector is in the 0 position, it can be retracted by pushing it in. Oven functions...
Page 20 - Features; Data plate; – Operating and installation
Features 20 A list of the models described in theseoperating and installation instructionscan be found on the back page. Data plate The data plate located on the frontframe of the oven is visible when thedoor is open. The data plate states the modelnumber, the serial number as well asconnection data...
Page 21 - Shelf runners
Features 21 Shelf runners Shelf runners for accessories are fittedon either side of the oven cavity forshelf levels . The shelf level numbers are marked onthe front of the oven frame. Each level consists of 2 rails, one abovethe other. Accessories (e.g. the rack) are pushedinto the oven between t...
Page 22 - FlexiClip telescopic runners HFC 70-C
Features 22 FlexiClip telescopic runners HFC 70-C FlexiClip telescopic runners can only befitted on levels 1, 2 and 3. The FlexiClip telescopic runners can bedrawn right out of the oven to give agood overview of the cooking inprogress. Push the FlexiClip telescopic runnersright into the oven compart...
Page 24 - Risk of injury caused by hot
Features 24 Fitting the FlexiClip telescopicrunners Risk of injury caused by hot surfaces.The oven gets hot during operation.You could burn yourself on theheating elements, the ovencompartment, or accessories.Allow the heating elements, ovencompartment and the accessories tocool down before fittin...
Page 26 - FlexiClip telescopic runners HFC 7x
Features 26 FlexiClip telescopic runners HFC 7x You can use the FlexiClip telescopicrunners on shelf levels 1–4. Push the FlexiClip telescopic runnersright into the oven cavity beforeplacing accessories on them. The accessories will thenautomatically sit securely between thestoppers at either end of...
Page 27 - The
Features 27 Then secure the FlexiClip telescopicrunner to the lower rail of the shelflevel as illustrated (3). If the FlexiClip telescopic runners aredifficult to pull out after fitting, youmay need to pull firmly on them onceto release them. To remove a FlexiClip telescopic runner,proceed as foll...
Page 28 - Round baking trays
Features 28 Round baking trays The solid round baking tray HBF 27-1 is suitable for cooking pizzas, flat cakesmade with yeast or whisked mixtures,sweet and savoury tarts, bakeddesserts, flat bread, and can also beused for frozen cakes and pizzas. The perforated round baking tray HBFP 27-1 has been s...
Page 29 - Catalytic enamelled accessories
Features 29 HUB Gourmet oven dishesHBD Gourmet oven dish lids Unlike other oven dishes, the MieleGourmet oven dishes can be placed inthe oven directly on the shelf runners.They have non-tip safety notches likethe rack to prevent them from beingpulled out too far.The surface of the oven dishes has an...
Page 30 - Functions; System lock
Features 30 Functions – Using the different functions for baking, roasting and grilling – Time of day display – Minute minder – Switching cooking processes on and off automatically – Settings that can be customised Safety features – System lock for the oven (see “Clock/Timer - Changingsettings”). ...
Page 31 - PerfectClean treated surfaces; Symbol
Features 31 PerfectClean treated surfaces Surfaces treated with PerfectCleanenamel are characterised by theirexceptional non-stick properties andease of cleaning. Food can be easily removed from thesesurfaces. Soiling from baking androasting can be easily removed fromthese surfaces. Food can be slic...
Page 32 - Before using for the first time
Before using for the first time 32 Before using for the first time The oven must be built into its housing unit before it can be used. Press and release the function andtemperature selectors if they areretracted. The time of day can only be changedwhen the function selector is at 0 . Set the t...
Page 33 - Select Fan Plus
Before using for the first time 33 Heating up the oven for thefirst time When the oven is heated up for the firsttime it may give off a slight smell. Thiscan be eliminated by heating the emptyoven for at least an hour. Ensure that the kitchen is wellventilated while the appliance is beingheated up f...
Page 34 - Overview of functions; Oven functions
Overview of functions 34 Oven functions Recommended value Range Fan Plus 160 °C 30–250 °C Intensive Bake 170 °C 50–250 °C Eco Fan Heat 190 °C 100–250 °C Defrost 25 °C 25–50 °C Booster 160 °C 100–250 °C Conventional Heat 180 °C 30–250 °C Bottom Heat 190 °C 100–250 °C Full Grill ...
Page 35 - Energy saving tips; Cooking programmes
Energy saving tips 35 Cooking programmes – Remove any accessories from the oven that are not required for acooking programme. – In general, if a range of temperatures is given in a recipe or chart, it is bestto select the lower temperature andto check the food after the shortestduration. – Pre-heat ...
Page 36 - Using residual heat; – The temperature in cooking; Energy saving mode
Energy saving tips 36 Using residual heat – The temperature in cooking programmes using temperaturesabove 140 °C which take longer than30 minutes to cook can be turneddown to the lowest possibletemperature about 5 minutes beforethe end of cooking. The residual heatin the oven is sufficient for cooki...
Page 37 - Operation; Basic operation
Operation 37 Basic operation Place the food in the oven. Select the required oven function withthe function selector. The recommended temperature willappear. The oven lighting, heating, and thecooling fan will switch on. Change the temperature with thetemperature selector if necessary. The cur...
Page 38 - Display
Clock/Timer 38 The clock/timer offers the followingfunctions: – Time of day display – Minute minder – Switching cooking processes on and off automatically – Altering various settings The clock/timer is operated via the display and the OK and sensor controls . The functions available are indi...
Page 40 - Setting the minute minder
Clock/Timer 40 Using the minute minder The minute minder can be used to timeother activities in the kitchen,e.g. boiling eggs. The minute minder can also be used atthe same time as a cooking programmefor which the duration and finish timehave been set, e.g. as a reminder to stira dish or add seas...
Page 42 - Setting a cooking duration
Clock/Timer 42 Switching cookingprogrammes on and offautomatically Cooking programmes can be switchedon or off automatically with all ovenfunctions except for Full Grill and Fan Grill . To do this, set a duration or a durationand a finish time after selecting theoven function and temperatu...
Page 47 - Changing the time of day
Clock/Timer 47 Changing the time of day The time of day can only be changedwhen the function selector is at 0 . Turn the function selector to 0 . Press repeatedly until starts flashing. Confirm with OK . The hours will flash. Use or to set the hours. Confirm with OK . The hours ar...
Page 48 - Changing settings
Clock/Timer 48 Changing settings Your appliance is supplied with anumber of default factory settings (see“Settings overview”). A setting is changed by altering its status . Turn the function selector to 0 . Press and hold until appears. If you want to change another setting,pres...
Page 50 - Tips on baking; – Avoid using bright, thin-walled tins as; Notes on the cooking charts; Selecting the
Baking 50 Handling food carefully will helpprotect your health.Cakes, pizzas and chips should becooked until golden, not dark brown. Tips on baking – Set a cooking duration. When baking, the oven should not be set to start along time off. Otherwise the cakemixture or dough will dry out, and theraisi...
Page 51 - Notes on the oven functions
Baking 51 Selecting the cooking duration Unless otherwise stated, the cookingdurations given in the cooking chartsare for an oven compartment which hasnot been pre-heated. With a pre-heatedoven compartment, shorten durationsby around 10 minutes. As a general rule, check whether thefood is cooke...
Page 52 - Roasting; Tips for roasting
Roasting 52 Tips for roasting – You can use any crockery made from temperature-resistant materials, e.g.oven dishes, roasting pans with lid,ovenproof glass dishes, roastingbags, dishes made from earthenwareor cast iron, the universal tray, rackand/or grilling and roasting insert (ifpresent) on top o...
Page 53 - Selecting the cooking duration; Using Fan Plus; Using Conventional Heat
Roasting 53 Selecting the cooking duration Unless otherwise stated, the durationsgiven in the roasting chart are for anoven compartment which has not beenpre-heated. Determine the cooking duration bymultiplying the thickness of the roast[cm] with the time per cm [min./cm]stated below, depending...
Page 54 - Grilling; Tips for grilling; Selecting the temperature
Grilling 54 Risk of injury caused by hot surfaces.If you grill with the door open, hot airwill escape from the oven instead ofbeing cooled by the cooling fan. Thecontrol elements will get hot.Grill with the oven door closed. Tips for grilling – Pre-heating is necessary when grilling. Pre-heat the ...
Page 55 - Place flat food on shelf level 3 or 4.
Grilling 55 Choosing a shelf level Select the shelf level depending onthe thickness of the food to becooked. Place flat food on shelf level 3 or 4. Place thicker food on shelf level 1 or2. Selecting the cooking duration Grill thinner cuts of meat/slices of fishfor approx. 6–8 minutes per ...
Page 56 - Fan Grill; – Use the Fan Grill
Grilling 56 Fan Grill – Use the Fan Grill function for meat, fish, poultry and vegetables. – Always pre-heat for at least 5 minutes before Fan Grilling. – It is not necessary to turn food when Fan Grilling . Only one side of the food, however, will become brown. – The door must be closed whe...
Page 57 - Food to be grilled
Grilling 57 Food to be grilled [°C] [min.] Lean thin sausages 180 4 8–10 Thick sausages 180 4 15–20 Lean beef fillet steak 220 5 6–12 Chicken breast fillet 200 4 14–18 Whole butterflied chicken 200 3 30–35 Thin white fish fillets 220 5 6–10 Thick fish fillets, cutlets or steaks 200 4 10–15 Oil...
Page 58 - Grill; – Use Grill
Grilling 58 Grill – Use Grill for thick toasts, muffins, cheese on toast, focaccia, bruschetta and bacon. – Pre-heat the grill for at least 5 minutes at 200–220 °C. – Select the appropriate shelf level for the thickness of the food. – The door must be closed when using the Grill function. This ...
Page 59 - Other applications; Useful tips
Other applications 59 This section provides information on thefollowing applications: – Defrost – Low temperature cooking – Bottling – Frozen food/Ready meals – Heating crockery Defrost Gentle defrosting of frozen goodsmeans that the vitamins and mineralsare generally retained. Select Defrost ...
Page 60 - Low temperature cooking; Do not cover meat during cooking.
Other applications 60 Low temperature cooking Low temperature cooking is ideal forcooking delicate cuts of beef, pork, vealor lamb when a tender result is desired. First briefly sear the meat all over at ahigh temperature on the cooktop inorder to seal it. Then place the meat in the pre-heatedoven w...
Page 61 - function to; function and a temperature of 120 °C.
Other applications 61 Using Conventional Heat Refer to the information in the cookingcharts at the end of this booklet. Use the universal tray with the rackplaced on top of it.Do not use the Booster function to pre-heat the oven. Place the rack together with theuniversal tray on shelf level ...
Page 62 - Bottling; Risk of infection from bacteria.; function and a
Other applications 62 Bottling Risk of infection from bacteria. Spores producing botulinum toxincan form when preserving pulsesand meat, which can lead to severepoisoning. These spores are onlydestroyed by reheating the foodwithin 2 days after preserving. Always reheat pulses and meat a second tim...
Page 63 - Bottling fruit and gherkins; Removing the jars after bottling
Other applications 63 Bottling fruit and gherkins Set the specified after-warmingtemperature as soon as bubbles arevisible in the jars, then leave the jarsin the warm oven for the timespecified. Bottling vegetables As soon as bubbles are visible in thejars, set the specified bottlingtemperature ...
Page 64 - Frozen food/Ready meals; Tips for cakes, pizza and baguettes
Other applications 64 Frozen food/Ready meals Tips for cakes, pizza and baguettes – Bake cakes, pizza and baguettes on baking paper on the rack.Do not use the baking tray or theuniversal tray for frozen foods with alarge surface area. The tray couldbecome warped and difficult, or evenimpossible, to ...
Page 65 - Heat crockery; Use the; Select; Set the temperature to 50–80 °C.
Other applications 65 Heat crockery Use the Fan Plus function for pre- heating crockery. Only pre-heat heat-resistant dishes. Place the rack on shelf level 1 andplace the crockery to be pre-heatedon it. Depending on the size of thedishes, you can also place them onthe oven floor and take out the...
Page 66 - Unsuitable cleaning agents
Cleaning and care 66 Risk of injury caused by hot surfaces.The oven gets hot during operation.You could burn yourself on theheating elements, the ovencompartment, or accessories.Allow the heating elements, ovencompartment and the accessories tocool before manual cleaning. Risk of injury due to e...
Page 67 - Soiling caused by spilled; Removing normal soiling; Cleaning the seal
Cleaning and care 67 If soiling is left on for any length oftime, it may become impossible toremove. If items are used frequentlywithout being cleaned, it maybecome very difficult to clean them.Remove any soiling immediately. The accessories are not dishwasher-safe. Useful tip: Soiling caused by spi...
Page 68 - Using oven cleaners
Cleaning and care 68 Removing stubborn soiling(excluding the FlexiCliptelescopic runners) Spilled fruit and roasting juices maycause lasting discolouration or mattepatches on surfaces. Thisdiscolouration will not affect thefunctional characteristics of thesurface finish.Do not attempt to remove thes...
Page 69 - Rinse the back panel thoroughly.
Cleaning and care 69 Stubborn soiling on theFlexiClip telescopic runners Do not clean FlexiClip telescopicrunners in a dishwasher. The speciallubricant used in the telescopicrunners will wash out duringdishwashing.This will affect affect their smoothfunctioning. For stubborn surface soiling or if th...
Page 70 - Removing oil and grease soiling; function and
Cleaning and care 70 Removing oil and grease soiling Remove all accessories from theoven, including the shelf runners. Wipe large deposits of soiling fromthe inside of the door and thePerfectClean enamelled surfacesbefore starting the catalytic cleaningprocess to avoid them baking on. Select t...
Page 71 - Removing the door
Cleaning and care 71 Removing the door The door weighs approx. 9 kg. The oven door is connected to thehinges by retainers.Before removing the door from theretainers, the locking clamps on bothhinges have to be released. Open the door fully. Release the locking clamps byturning them as far as the...
Page 72 - Dismantling the door
Cleaning and care 72 Dismantling the door The oven door is an open system with 3glass panes which have a heat-reflective coating on some of theirsurfaces. When the oven is operating, air isdirected through the door to keep theouter pane cool. If soiling has worked its way in betweenthe glass panes, ...
Page 73 - Gently
Cleaning and care 73 Risk of injury caused by the door slamming shut.The door may slam shut if youattempt to disassemble it when it isfitted to the oven.Always remove the door beforedisassembling it. Place the door with the outer glasspane on a soft surface (e.g. a teatowel) to prevent it gettin...
Page 74 - Then reassemble the door carefully.
Cleaning and care 74 Then reassemble the door carefully. Refit the middle pane in such a waythat the material number is legible(not reversed). Push the inner pane with the matteprinted side facing downwards intothe plastic strip and place it betweenthe retainers. Flip both the glass pane retai...
Page 75 - Fitting the door
Cleaning and care 75 Fitting the door Hold the door securely on both sidesand carefully fit it back onto the hingeretainers.Make sure that the door goes backon straight. Open the door fully. If the locking clamps are not locked,the door could work loose resultingin damage.Ensure that the locking...
Page 77 - Removing the back panel; Refit
Cleaning and care 77 Removing the back panel The back panel can be removed forcleaning purposes. Risk of injury caused by hot surfaces.The oven gets hot during operation.You could burn yourself on theheating elements, the ovencompartment, or accessories.Allow the heating element, ovencompartment a...
Page 80 - Problem
Problem solving guide 80 Problem Possible cause and remedy A noise can be heardafter a cooking process. The cooling fan will continue to run for a while after theoven has been switched off to prevent any humiditybuilding up in the oven, on the control panel or in theoven housing unit.The cooling fan...
Page 81 - oven lighting does not switch on with this function.
Problem solving guide 81 Problem Possible cause and remedy The FlexiClip telescopicrunners do not push inor pull out smoothly. The bearings in the FlexiClip telescopic runners arenot sufficiently lubricated. Lubricate the bearings with the special Mielelubricant.Only the special Miele lubricant is...
Page 82 - Service; Contact in case of fault
Service 82 Contact in case of fault In the event of any faults which youcannot remedy yourself, please contactMiele. Contact information for Miele can befound at the end of this booklet. Please quote the model and serialnumber of your appliance whencontacting Miele. This information canbe found on t...
Page 83 - Installation; Building-in dimensions; Dimensions are given in mm.
Installation *INSTALLATION* 83 Building-in dimensions Dimensions are given in mm. Installation in a tall or base unit When building the oven into a base unit underneath a cooktop, please alsoobserve the installation instructions for the cooktop as well as the building-inheight required for the cookt...
Page 84 - Side view H 22xx
Page 86 - Connections and ventilation
Installation *INSTALLATION* 86 Connections and ventilation a Front view b Mains connection cable, length = 2,000 mm c No connections permitted in this area d Ventilation cut-out, min. 150 cm ²
Page 87 - Installing the cooker; Before installation
Installation *INSTALLATION* 87 Installing the cooker For safety reasons, this appliancemust only be used after it has beenbuilt in. The cooker requires a sufficientsupply of cool air for efficientoperation. The required supply ofcool air must not be excessivelyheated by other heat sources (e.g.solid...
Page 89 - Installing the oven
Installation *INSTALLATION* 89 Installing the oven For safety reasons, the oven mayonly be used after it has been fullyinstalled. The oven requires a sufficient supplyof cool air for efficient operation. Therequired supply of cool air must notbe excessively heated by other heatsources (e.g. solid fu...
Page 90 - Electrical connection; Connection to a switched socket
Installation *INSTALLATION* 90 Electrical connection Danger of injury! Installation, repairs and other workby unqualified persons could bedangerous. Miele cannot be heldliable for unauthorised work. Ensure power is not supplied to theappliance until after installation orrepair work has been carrie...
Page 92 - Cooking charts; Creamed mixture
Cooking charts 92 Creamed mixture Cakes/biscuits (accessories) [°C] [min.] Muffins (1 tray) 150–160 2 25–35 Muffins (2 trays) 150–160 1+3 30–40 3 Small cakes (1 tray) 150 2 2 25–35 160 1 3 2 20–30 Small cakes (2 trays) 150 1 2+4 2 25–35 Madeira cake (loaf tin, 30 cm) 150–160 2 60...
Page 93 - Rubbed in mixture
Cooking charts 93 Rubbed in mixture Cakes/biscuits (accessories) [°C] [min.] Cookies (1 tray) 140–150 2 20–30 150–160 2 25–35 Cookies (2 trays) 140–150 1+3 20–30 3 Drop cookies (1 tray) 140 2 2 35–45 160 1 3 2 20–30 Drop cookies (2 trays) 140 1+3 2 35–45 3 Flan base (flan base ti...
Page 94 - Yeast dough; Christmas Stollen
Cooking charts 94 Yeast dough Cakes/biscuits (accessories) [°C] [min.] Bundt cake (Bundt cake tin, 24 cm) 150–160 2 50–60 160–170 1 50–60 Christmas Stollen 150–160 2 55–65 160–170 2 55–65 Streusel cake with/without fruit (tray) 160–170 2 40–50 170–180 3 45–55 Fresh fruit cake ...
Page 95 - Quark dough; Sponge mixture
Cooking charts 95 Quark dough Cakes/biscuits (accessories) [°C] [min.] Fresh fruit cake (tray) 160–170 2 40–50 170–180 3 50–60 Apple turnovers/raisin scrolls (1 tray) 160–170 3 25–35 Apple turnovers/raisin scrolls (2 trays) 150–160 1+3 25–35 1 Function, Temperature, Shelf leve...
Page 97 - Savoury snacks; Food
Cooking charts 97 Savoury snacks Food (accessories) [°C] [min.] Swiss savoury tart (tray) 220–230 2 1 25–35 180–190 1 30–40 Onion tart (tray) 180–190 2 2 25–35 170–180 2 30–40 Pizza, yeast dough (tray) 170–180 2 25–35 210–220 2 2 20–30 Pizza, quark dough (tray) 170–180 2 25–35 ...
Page 98 - Beef
Cooking charts 98 Beef Food (accessories) [°C] [min.] 9 [°C] Braised beef, approx. 1 kg(oven dish with lid) 2 150–160 3 2 120–130 6 -- 2 170–180 3 2 120–130 6 -- 2 180–190 2 160–180 7 -- Fillet of beef, approx. 1 kg(universal tray) 2 180–190 3 2 25–60 53–75 Fillet of beef, “rare”, ...
Page 99 - Veal
Cooking charts 99 Veal Food (accessories) [°C] [min.] 6 [°C] Braised veal, approx. 1.5 kg(oven dish with lid) 2 160–170 3 2 120–130 5 -- 2 170–180 3 2 120–130 5 -- Fillet of veal, approx. 1 kg(universal tray) 2 160–170 3 2 30–60 53–75 Fillet of veal, “rare”, approx. 1 kg 1 ...
Page 100 - Pork
Cooking charts 100 Pork Food (accessories) [°C] [min.] 9 [°C] Pork joint/pork neck roast, approx. 1 kg(oven dish with lid) 160–170 2 130–140 5 80–90 170–180 2 130–140 5 80–90 Pork joint with crackling, approx. 2 kg(oven dish) 180–190 2 130–150 6 80–90 190–200 2 130–150 6 80–90 Fill...
Page 103 - Miele New Zealand Limited
www.miele.com.au Miele Experience Centre and Head Office Melbourne: 1 Gilbert Park DriveKnoxfield, VIC 3180 Miele Experience Centre South Melbourne: 206-210 Coventry StreetSouth Melbourne, VIC 3205 Miele Experience Centre and Office Sydney: 3 Skyline PlaceFrenchs Forest, NSW 2086 Miele Experience Ce...


 Miele 11876420
User Manual
Miele 11876420
User Manual
 Miele H 176 MB
Manual
Miele H 176 MB
Manual
 Miele H 320
Manual
Miele H 320
Manual
 Miele H 373
Manual
Miele H 373
Manual
 Miele H 399 B
Manual
Miele H 399 B
Manual
 Miele H 4140
Manual
Miele H 4140
Manual
 Miele H 4220
Manual
Miele H 4220
Manual
 Miele H 4250
Manual
Miele H 4250
Manual
 Miele H 7890 BP
User Manual
Miele H 7890 BP
User Manual
 Miele H2267-1B
User Manual
Miele H2267-1B
User Manual
 Miele H2267-1BP
User Manual
Miele H2267-1BP
User Manual
 Miele H2760BP
User Manual
Miele H2760BP
User Manual
 Miele H2860B
User Manual
Miele H2860B
User Manual
 Miele H2860BP
User Manual
Miele H2860BP
User Manual
 Miele H 5981 BP
Manual
Miele H 5981 BP
Manual
 Miele H 5688 BP
Manual
Miele H 5688 BP
Manual
 Miele H 5681 BP
Manual
Miele H 5681 BP
Manual
 Miele H 5461 B
Manual
Miele H 5461 B
Manual