Page 3 - Contents
Warning and Safety instructions . . . . . . . . . . . . . . . . . . . . . . . . . . . . . . . . . . . . . 7 Caring for the environment . . . . . . . . . . . . . . . . . . . . . . . . . . . . . . . . . . . . . . . . . 12 Guide to the machine . . . . . . . . . . . . . . . . . . . . . . . . . . . . . ....
Page 4 - Moisture plus
Controls . . . . . . . . . . . . . . . . . . . . . . . . . . . . . . . . . . . . . . . . . . . . . . . . . . . . . . . . 22 Sensors . . . . . . . . . . . . . . . . . . . . . . . . . . . . . . . . . . . . . . . . . . . . . . . . . . . . . . . . . 22Display . . . . . . . . . . . . . . . . . . . . . . ...
Page 5 - Settings; Language
To evaporate residual moisture . . . . . . . . . . . . . . . . . . . . . . . . . . . . . . . . . . . . . . . 44 The residual moisture evaporation process . . . . . . . . . . . . . . . . . . . . . . . . . . . 44To start the residual moisture evaporation process . . . . . . . . . . . . . . . . . . . ....
Page 7 - Warning and Safety instructions
This appliance conforms to currentsafety requirements. Inappropriateuse can, however, lead to personalinjury and damage to property. To avoid the risk of accidents anddamage to the appliance, pleaseread these instructions carefullybefore using it for the first time. Theycontain important notes onins...
Page 8 - Technical safety
Technical safety ~ Installation, maintenance and repairs may only be carried out by asuitably qualified and competentperson in strict accordance with currentnational and local safety regulations.Repairs and other work by unqualifiedpersons could be dangerous. Themanufacturer cannot be held liable fo...
Page 9 - Correct use
~ During installation, maintenance and repair work, the appliance must bedisconnected from the mains electricitysupply. It is only completely isolatedfrom the electricity supply when: – the mains fuse is disconnected, – the screw-out fuse is removed (in countries where this is applicable), – it is s...
Page 11 - Accessories
~ Do not heat up unopened tins or jars of food in the oven. Pressure can buildup and they may explode, resulting ininjury or damage. ~ Do not push pots and pans around on the oven floor, as this could damagethe surface. ~ Do not lean or sit on an open oven door, or place heavy items on it. Makesure ...
Page 12 - Caring for the environment
Disposal of the packingmaterial The transport and protective packinghas been selected from materials whichare environmentally friendly fordisposal, and should be recycled. Ensure that any plastic wrappings,bags, etc. are disposed of safely andkept out of the reach of babies andyoung children. Danger...
Page 13 - Guide to the machine
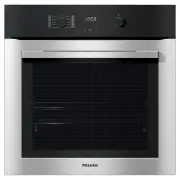
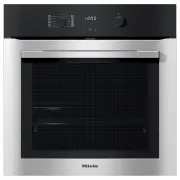
H 5081 BP a Control panel b Door lock for pyrolytic operation c Top heat / grill element with receiver for the wireless food probe d Steam inlets for Moisture plus e Back panel with air inlet for the fan f Water intake tube for the steam injection system g Wireless food probe holder h Side runners w...
Page 14 - Oven controls; Auto sensor; Safety features; System lock; Features
Oven controls In addition to operating the variouscooking programmes to bake, roastand grill, the controls also offer thefollowing: – a time of day display, – a minute minder, – a timer for programming cooking durations, – user programmes, – automatic programmes, – settings that can be customised. A...
Page 15 - Energy saving features; Lighting
Energy saving features Lighting The oven lighting is set to switch off15 seconds after the start of a cookingprogramme (default setting). See"Settings - Lighting". Door contact switch If the oven door is opened duringoperation, the door contact switchautomatically switches off the heatingele...
Page 16 - The; FlexiClip telescopic runners; also; Pyrolytic cleaning
User instructions The User instructions supplied withyour appliance in addition to theseOperating and installation instructionscontains detailed information about thefollowing:– Automatic programmes– Food probe– Baking– Roasting– Slow cooking– Grilling– Defrosting– Cooking ready meals– Automatic pro...
Page 18 - When fitting the FlexiClip runners; do
FlexiClip telescopic runners The FlexiClip telescopic runners can beclipped into any of the existing shelfrunners and pulled out of the oven totheir fullest extent. Push the telescopic runners right inbefore placing a tray or rack onthem. To prevent the risk of a rack or traysliding off the runners,...
Page 21 - Miele
Miele | home communication enabled appliances use the household electrical network c to communicate information about their operational status and the progress of the programme to a master appliance d / e . These instructions are for acommunication enabled oven b that can be linked into the Miele | ...
Page 22 - Sensors; Meaning; Sensors which can be used in a programme are lit up.; Controls
The appliance is operated via the display a and the electronic sensors next to and below the display. These react to finger contact. A keypad tone will soundeach time a sensor is touched. The volume of the keypad tone can be adjusted orswitched off altogether (see "Settings - Volume - Keypad ton...
Page 23 - Display; Main
Display All information about functions,temperature, cooking durations, Auto-matic programmes and settings isshown in the display. After the appliance has been switchedon by touching the K sensor, the Main menu appears in the display with a list of options available: An option ! is selected by touch...
Page 26 - Functions
Your oven has a range of oven functions for preparing a wide variety of recipes. These include: a Top heat/grill element (under the roof of the oven) b Bottom heating element (under the floor of the oven) c Ring heating element (behind the intake vent for the fan) d Fan (behind the intake vent for t...
Page 28 - To enter basic settings; Welcome screen; Before using for the first time
To enter basic settings The oven will switch on automaticallywhen it is connected to the electricitysupply. Welcome screen A welcome screen will appear in thedisplay, and you will then be requestedto select some basic settings which areneeded before the appliance can beused. Follow the instructions ...
Page 30 - Automatic programmes; Operation
Automatic programmes Your appliance has a wide range ofAutomatic programmes to enable youto achieve excellent results withease.Simply select the programme for yourfood, and follow the instructions inthe display. You can call up the Automaticprogrammes by selecting the "Automat-ic" option fro...
Page 31 - Manual operation
To operate the oven manually, switchthe appliance on, select the ovenfunction and temperature, thenswitch it off again once you havefinished cooking. ^ Place the food in the oven. ^ Switch the oven on with the K sensor. The Main menu will appear in thedisplay. ^ Select the required function. The sub...
Page 32 - More about manual operation
Automatic switch-off can be selectedwhen operating the oven manually.You can also adjust the heat-upphase and the humidity level insidethe oven. To select a function ^ Switch the oven on. ^ Select the required function. After selecting an oven function,options which can be entered orchanged for the ...
Page 37 - Activating moisture reduction; Place the food in the oven.; Change function; The times already entered will be kept.
Activating moisture reduction It is a good idea to use this functionwhen cooking items which are moist onthe inside but which should be crispyon the outside, e.g. frozen chips,croquettes or pork with crackling. It is also suitable for deep filled freshfruit cakes, such as plum or applecake. You can ...
Page 38 - The User programmes menu; For altering an existing programme.; User programmes
Up to 25 frequently used recipes can besaved under a user-defined name, andthen called up again as required. Either – Select the Save as option at the end of running an Automatic programmeand give the programme a name ofyour choice, or – select the User programmes menu . You can combine up to four c...
Page 39 - To create a User programme; Finally set the shelf level to be used.; enter; Use the sensors next to arrows
To create a User programme If programmes already exist underUser programmes, the "Create"option has to be selected in order tosave additional programme stages tomemory.Then continue following theinstructions below. ^ Select the "User programme" menu. ^ Select and confirm the cookingf...
Page 41 - Night baking
Automatic programmes Automatic programmes with Moistureplus set the optimum temperature, thedegree of moisture and also theduration automatically. At the beginning of the programme youwill be prompted to allow a specifiedamount of water to be drawn into theoven.The amount of water specified will bem...
Page 42 - Dough mixtures
Moisture plus d When using the Moisture plus functionyou will need to enter– the temperature (at least 130 °C), and – the number of bursts of steam. You can also enter the cooking durationor you can use the food probe. Number of bursts of steam and whenthey are injected The number of bursts of steam...
Page 43 - Using Moisture plus; Automatic burst of steam; When it is time to inject steam:
Using Moisture plus d ^ Place the food in the oven. ^ Select Moisture plus d . ^ Select a temperature. ^ Select Automatic burst of steam orselect the number of bursts of steam. ^ Fill a suitable container with thequantity of water specified.Automatic/1 burst of steam: approx. 100 ml2 bursts of steam...
Page 44 - To evaporate residual moisture; programme that uses Moisture plus.
To evaporate residual moisture If there is still water in the steaminjection system at the end of aprogramme or if the programme iscancelled, you will be prompted toevaporate the residual moisture. This prompt will appear– when the appliance is switched on,– when selecting "Moisture plus", o...
Page 45 - Descaling
To cancel the residual moistureevaporation process After the appliance has beenswitched on , the prompt to evaporate residual moisture will appear in thedisplay. Touch the sensor next to"Cancel". You will only be able to runfunctions and Automatic programmeswithout Moisture plus. If you sele...
Page 46 - To set the minute minder
The minute minder can be used to timeany activity in the kitchen, e.g. boilingeggs. You can enter a time of up to amaximum of 9 hours, 59 minutes and59 seconds. You can set the minute minder at thesame time as another timedprogramme, e.g. as a reminder to stir adish or add seasoning etc. With "M...
Page 48 - Time
Time The options are: ß Display ß Clock format ß Set If there is a power cut, the currenttime of day will reappear oncepower has been restored. Theappliance will store this data forapprox. 200 hours. After 200 hours itwill show " 12:00 " and will need to be re-set. Display Select how you wan...
Page 50 - lead to corrosion in the oven.; Pyrolytic; With reminder
Cooling fan run-on The cooling fan will continue to run for awhile after the oven has been switchedoff to prevent any humidity building upin the oven, on the control panel or inthe oven housing unit. ß Sensor controlled(Factory default)The auto sensor will switch off thecooling fan. ß Temperature co...
Page 51 - Contrast; Brightness
Start ß Automatic(Factory default setting)A programme will start automaticallyapprox. 20 seconds after makingyour last entry without having toselect Start. ß ManualIf "Manual" has been selected, "Start"will appear at the beginning of eachprogramme and must be confirmedbefore the prog...
Page 52 - Volume; Buzzer tones; Frequency; Keypad tone
Volume Buzzer tones The volume is represented by a barwith seven segments. P P P P G G GM Factory default: Three blockedsegments. To change the volume touch the"quieter" or "louder" sensor. If all segments are blocked out thevolume is on maximum.If none of the segments are blocked ou...
Page 53 - Safety
Safety System lock 0 The system lock prevents the appliancebeing switched on unintentionally, bychildren for example. The system lock has to be set to"Permitted" (activated) in order to use it. ß PermittedThe system lock is active.The 1 symbol appears in the display, as soon as the appliance...
Page 54 - Units; Temperature; Showroom programme; All settings
Units Temperature ß °C(Factory default) ß °F Showroom programme ß Off(Factory default) ß Demo programme ß Continuous loop ß Demo mode This programme is for dealers whowant to demonstrate the appliancewithout the heater elements working. Do not activate this setting for domesticuse! If you select and...
Page 55 - Appliance front; Cleaning and care
Miele branded cleaning andconditioning products are availablefrom the Miele Spare Parts Departmentor via the internet onwww.miele-shop.com. , Do not use a steam cleaner to clean the appliance. The steamcould reach electrical componentsand cause a short circuit. Appliance front Remove any soiling imm...
Page 56 - PerfectClean enamel
Accessories Remove all accessories as well asthe runners and any extraaccessories such as FlexiCliprunners from the oven interior beforestarting the pyrolytic cleaningprocess. This also applies to shelfrunners and any optionalaccessories.The high temperatures needed forpyrolysis will damage theacces...
Page 58 - PerfectClean; anti-stick properties
PerfectClean The following have been treated with aspecial finish called PerfectClean: – baking tray – universal tray – anti-splash insert (if applicable) PerfectClean surfaces have very good anti-stick properties and are much easier to keep clean than conventional oven enamel, if cleaned regularly....
Page 59 - Normal soiling; should be cleaned as; Stubborn soiling; can be more difficult; extremely stubborn soiling; – Soiling such as spilt juices and cake
After cleaning, rinse thoroughly withclean water to remove any residualcleaning agents as these candiminish the anti-stick properties. Normal soiling should be cleaned as soon as possible after each use with asoft sponge and a solution of hot waterand a little washing up liquid. Thelonger soiling is...
Page 60 - Oven interior; The oven interior is coated with dark; pyrolytic enamel; which facilitates; Manual cleaning of the oven interior; To make cleaning easier
Oven interior The oven interior is coated with dark pyrolytic enamel which facilitates cleaning. This is a particularly hard enamel withan extremely smooth surface and verygood anti-stick properties. Manual cleaning of the oven interior Allow the oven to cool down beforecleaning by hand.Danger of bu...
Page 62 - After the pyrolytic process; pyrolytic process will be; – if the oven is switched off.
After the pyrolytic process , any debris (e.g. ash) can easily be wipedaway. Remember to wait until the oven hascooled down before doing so!Danger of burning. Try not to wipe over the fibre-glassseal when cleaning the oven cavity.It is particularly sensitive and shouldnot be cleaned unless absolutel...
Page 63 - To remove the oven door
To remove the oven door The oven door is connected to the ovenby hinges. Before removing the door, the lockingclamps on both hinges have to bereleased. ^ Open the door fully. ^ To release the locking clamps on thehinges turn them upwards as far asthey will go until they are at an angle.See illustrat...
Page 64 - To dismantle the oven door
To dismantle the oven door The oven door is made up of fourpanes of glass and has vents at the topand bottom. When the oven is operating, air iscirculated through the door to keep theouter pane cool. If condensate has worked its way inbetween the glass panes, the door canbe dismantled in order to cl...
Page 65 - Gently; lift the inner pane up and pull
You can now remove the inner and thetwo middle panes. ^ Gently lift the inner pane up and pull out of the cover strip. ^ Remove the seal. ^ Now gently lift up the upper of thetwo middle panes and remove it. ^ Gently lift up the lower of the twomiddle panes and remove it. ^ Clean the glass panes and ...
Page 66 - To reassemble the door:
^ To reassemble the door: The two middle panes are identical.The seven-digit material number isprinted on the panes to help youreassemble them correctly. ^ Place the lower of the two middlepanes in so that the material numberis legible (i.e. so that it is notreversed). ^ Flip the glass pane retainer...
Page 67 - To refit the door
^ Flip the glass pane retainers inwardsto close them. To refit the door ^ Hold the door securely at both sidesand carefully fit it back onto the hingeguides. Make sure that the door goes backon straight. Cleaning and care 67
Page 68 - Refit the runners carefully; as
^ Open the door fully. ^ Flip both locking clamps back up asfar as they will go into a horizontalposition. Turn them as far as they willgo into a horizontal position. It is essential that the clamps arelocked after refitting the door.Otherwise the hinges could workloose, resulting in damage to thedo...
Page 69 - To remove the side runners; , making sure all parts are
To remove the side runners Make sure the oven heatingelements are switched off and cool.Take care not to burn yourself onthem. ^ Pull the runners forwards out of theholder and remove. Reassemble them in the reverseorder , making sure all parts are correctly fitted. To lower the top heat/grillelement...
Page 71 - – the time left for the activation phase
Preparation ^ Dissolve one descaling tablet inapprox. 600 ml of cold tap water. ^ Place the universal tray on the topshelf level to collect the descalingsolution after it has been used. A plastic tube (with clip) is suppliedwith your oven so that you do nothave to hold the container with thedescalin...
Page 72 - to remove all traces
The steam injection system will need tobe cleaned at the end of the descaling process to remove all traces of descaling solution. Prompts to do this will appear in thedisplay. Cleaning is carried out by flushingapprox. 1 litre of mains tap waterthrough the system. The water iscollected in the univer...
Page 73 - Do not attempt to open the appliance casing yourself!; Problem; – Check whether the mains fuse has tripped. If it has not; Problem solving guide
With the aid of the following guide, minor problems can be easily correctedwithout contacting Miele.If you cannot resolve a problem following these instructions please contact MieleService. , Do not attempt to open the appliance casing yourself! Installation, maintenance and repairs may only be carr...
Page 75 - The oven is ready for use again when you switch it on.
Problem Possible cause and remedy "Maximum operatingduration reached"appears in thedisplay. Safety switch-off has been activated.The appliance will be ready for use again after it has beenswitched off and then back on again. The oven hasautomaticallyswitched itself offafter a cookingprogramm...
Page 76 - After sales service; – your Miele Dealer; Guarantee; After Sales / Guarantee
After sales service In the event of a fault which you cannotcorrect yourself, or if the appliance isunder guarantee, please contact – your Miele Dealer or – Miele (see back cover for contact details). A call-out charge will be applied forservice visits where the problemcould have been resolved asdes...
Page 77 - Optional accessories
A range of additional accessories as well as cleaning and care products areavailable for your Miele oven. Depending on product they are available to orderfrom your Miele Dealer, the Miele Spare Parts Department or via the internet onwww.miele-shop.com. FlexiClip telescopic runners More FlexiClip tel...
Page 78 - Gourmet oven dish; It is available in two sizes:; Gourmet oven dish lid
Gourmet oven dish The gourmet oven dish can be placedin the oven directly on the runners. Ithas non-tip safety notches like theuniversal tray to prevent it being pulledout too far.It has an anti-stick coating. It is available in two sizes: – HUB 5000-M (internal dimensions: approx. 38 x 22 x 8 cm) –...
Page 79 - voltage and connected load; are; Electrical connection
All electrical work should beundertaken by a suitably qualifiedand competent person in strictaccordance with current nationaland local safety regulations (BS7671 in the UK).Installation, repairs and other workby unqualified persons could bedangerous. The manufacturercannot be held liable forunauthor...
Page 80 - Appliance dimensions and unit cut-out; Installation in a base unit; Appliances with glass front
Dimensions are give in "mm". Appliance dimensions and unit cut-out Installation in a base unit Installation in a tall unit * Appliances with glass front ** Appliances with metal front Building-in diagrams 80
Page 81 - Front dimensions
Front dimensions * Appliances with glass front ** Appliances with metal front Building-in diagrams 81
Page 82 - Installing the oven
, The appliance must not be operated until it has been correctlyinstalled in its housing unit.Otherwise it poses an electric shockhazard. To ensure adequate ventilation tothe oven once installed:– do not fit a rear panel into thehousing unit. – make sure that the shelf onwhich the appliance is place...


 Miele 11876420
User Manual
Miele 11876420
User Manual
 Miele H 176 MB
Manual
Miele H 176 MB
Manual
 Miele H 320
Manual
Miele H 320
Manual
 Miele H 373
Manual
Miele H 373
Manual
 Miele H 399 B
Manual
Miele H 399 B
Manual
 Miele H 4140
Manual
Miele H 4140
Manual
 Miele H 4220
Manual
Miele H 4220
Manual
 Miele H 4250
Manual
Miele H 4250
Manual
 Miele H 7890 BP
User Manual
Miele H 7890 BP
User Manual
 Miele H2267-1B
User Manual
Miele H2267-1B
User Manual
 Miele H2267-1BP
User Manual
Miele H2267-1BP
User Manual
 Miele H2760B
User Manual
Miele H2760B
User Manual
 Miele H2760BP
User Manual
Miele H2760BP
User Manual
 Miele H2860B
User Manual
Miele H2860B
User Manual
 Miele H2860BP
User Manual
Miele H2860BP
User Manual
 Miele H 5981 BP
Manual
Miele H 5981 BP
Manual
 Miele H 5688 BP
Manual
Miele H 5688 BP
Manual
 Miele H 5681 BP
Manual
Miele H 5681 BP
Manual