Page 2 - Contents
Description of the appliance . . . . . . . . . . . . . . . . . . . . . . . . . . . . . . . . . . . . . . . . . 4 Warning and Safety instructions . . . . . . . . . . . . . . . . . . . . . . . . . . . . . . . . . . . . . 6 Caring for the environment . . . . . . . . . . . . . . . . . . . . . . . . . . ...
Page 4 - Description of the appliance
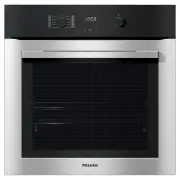
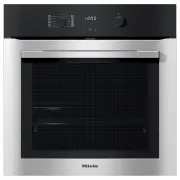
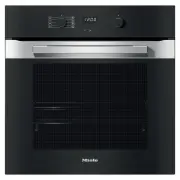
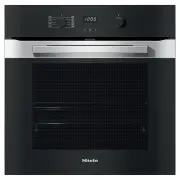
Control panel a Function selector b Timer c Temperature selector d Temperature indicator light Oven interior e Grill element f Oven interior lighting g Three shelf levels h Oven door Description of the appliance 4
Page 5 - Accessories supplied; Glass tray
Accessories supplied Glass tray The glass tray is suitable for use with allcooking functions. Combi rack for use with the glasstray The combi rack must always be usedwith the glass tray.It can be used either way up to vary theheight between it and the grill elementand thus suit the cooking function ...
Page 6 - Warning and Safety instructions
This appliance complies with allrelevant legal safety requirements.Improper use can present a risk ofboth personal injury and materialdamage. To avoid the risk of accidents anddamage to the appliance pleaseread these operating instructionscarefully before installation andbefore using it for the firs...
Page 7 - Use; General notes
Before connecting the appliance tothe mains supply make sure that the rating on the data platecorresponds to the voltage andfrequency of the household supply. Thisdata must correspond in order to avoidrisk of damage to the appliance.Consult a qualified electrician if in anydoubt. Do not connect the ...
Page 9 - placed into the container.
Never place the hot glass tray (orany other hot cooking containers) on a cold surface, such as a tiled orgranite worktop.The glass tray or container could crackor shatter and the worktop surfacecould get damaged. Place it on asuitable pot rest or a wire rack. Do not use a steam-cleaningappliance to ...
Page 10 - specially designed egg-boiling device
This can lead to the liquid boiling oversuddenly and explosively. Danger ofburning. The formation of bubbles can be sostrong that the pressure forces the ovendoor open. The user could be injuredand the appliance damaged.The boiling rod ensures that the liquidboils evenly and that bubbles form atan e...
Page 11 - Disposal of your old appliance
To check food temperature, firstinterrupt the cooking process. Then use a thermometer specificallyapproved for food use to measure thetemperature of the food. Never use athermometer containing mercury orliquid, as these are not suitable for usewith very high temperatures and willbreak very easily. T...
Page 12 - Caring for the environment
Disposal of the packingmaterial The transport and protective packinghas been selected from materials whichare environmentally friendly for disposaland can normally be recycled. Ensure that any plastic wrappings,bags etc. are disposed of safely andkept out of the reach of babies andyoung children. Da...
Page 13 - Set the clock; oven interior; Before using for the first time
Set the clock To enter the time of day the functionselector must be at "0". ^ Connect the appliance to theelectricity supply. In the timer display: – the clock symbol m will light up, – and 12:00 and the triangle V will flash underneath the m symbol. m V ^ Use the + or - button to enter the ...
Page 14 - Microwave function; – food can generally be cooked; Operating modes
Microwave function Microwave cooking offers the benefitsof speed, convenience and nutritionaladvantages when food does not requirebrowning or crisping. How does the microwave ovenfunction? In a microwave oven there is ahigh-frequency tube called amagnetron. This converts electricalenergy into microw...
Page 15 - Traditional oven functions; – Fan plus; Fan plus; Combination programmes; – Microwave + Fan plus
Traditional oven functions This oven offers the following traditionaloven functions: – Fan plus Y – Grill n . These cook and brown the food. Fan plus Y This system works by the circulation ofheated air. A fan in the back wall draws in the air,heats it over a ring element and blows itback into the ov...
Page 16 - Material and shape; Metal; Suitable containers for microwave ovens
Microwaves – are reflected by metal, – pass through glass, porcelain, plastic and card, – and are absorbed by food. When using microwave power youshould always place the food / dishcentrally on the glass tray and slidethe tray into the first shelf level fromthe bottom. Placing the dish on thefloor o...
Page 20 - A cover; Do not use a cover
A cover – prevents too much steam escaping, especially when cooking foods whichneed longer to cook, such aspotatoes. – speeds up the cooking process. – prevents food from drying out. – prevents any loss of aroma. – helps keep the oven interior clean. Always use lids or covers made ofmicrowave-safe g...
Page 21 - Controls; Selecting an oven function; Operation
Controls The oven controls consist of an ovenfunction selector and a temperatureselector. Selecting an oven function The function selector can be turnedclockwise or anti-clockwise. The following settings are available: – Light H / v For switching on the oven lightindependently.This position is also ...
Page 22 - l m; Timer
The timer can: – show the time of day, – be used as a minute minder, – switch the oven off, or on and off automatically. Controls The timer is operated with the V , + and - buttons and the display. -, V and + buttons The V button is used to scroll to the symbol for the setting you wish to selector c...
Page 23 - Setting the time of day
Whilst triangle V is flashing , use the - or + immediately to make any changes to the setting selected: – The + button increases the value shown. – The - button decreases the value shown. Triangle V will flash for approx. 5 seconds.Settings can only be changed usingthe - or + buttons whilst it is fl...
Page 25 - Place the food in the oven.; Call up the
Programming a cookingduration The timer can be used to switch theappliance off or on and offautomatically. It is a good idea to set the oven toswitch on and off automatically forreheating meals and for roasting. When baking, the oven should not beset to start a long time off. Otherwisebatter or doug...
Page 26 - enter the cooking duration; end time
Switching the oven on and offautomatically To use the automatic switch-on andswitch-off functions on the oven, boththe cooking duration and the end timemust be entered. For example:The current time of day is 10:45. Youwish a roast with a cooking duration of1 h 30 min to be ready at 13:30. ^ Place th...
Page 27 - End of cooking duration; reminder
End of cooking duration At the end of the cooking duration – the oven heating switches off automatically. – the cooling fan will continue to run for a while. – the ) symbol flashes. – a buzzer sounds five times, if it is switched on (see "Altering the time ofday display and buzzer"). ^ Turn ...
Page 28 - Microwave
When using microwave power youshould always place the food / dishcentrally on the glass tray and slidethe tray into the first shelf level fromthe bottom.Placing the dish on the floor of theoven will give unsatisfactory anduneven results, as no microwaveswill reach the food from below. The following ...
Page 29 - maximum of 60 minutes
Microwave mode can be combinedwith either Fan plus or Grill. Before starting a combinationprogramme you must first select themicrowave power level and the time forthe process. Microwave + Fan plus h Y ^ Turn the function selector toMicrowave + Fan plus h Y The display shows a suggested powerlevel of...
Page 31 - Time of day display (; P I; time of day display is; time of day display is; Altering the time of day display and buzzer
You can alter the time of day display(Programme 1) and the buzzer(Programme 2). The altered settings are retainedafter a power cut. Time of day display ( P I ) The time of day display can beswitched on or off. When the time of day display isswitched off and the function selector isturned to the "...
Page 32 - buzzer is switched off; quiet setting
Buzzer ( P 2 ) There is a choice of 3 different tones oralternatively, the buzzer can beswitched off. To alter the setting: ^ Turn the function selector to the "Light H / v " position and press the V button. " P I " will appear in the display. ^ Press the + or - button. " P 2 �...
Page 33 - for defrosting everything else.; After defrosting; Defrosting
The microwave function can be used todefrost food gently and quickly. The following settings arerecommended as a general guide: – 80 W for defrosting very delicate food, e.g.cream, butter, gateau and cheese. – 150 W for defrosting everything else. See the chart on the next page fordefrosting duratio...
Page 34 - Chart for defrosting food
Chart for defrosting food Microwave power settings Quantity 150 W Time in mins. 80 W Time in mins. Standing time at room temperature * in mins. Dairy products CreamButterCheese slicesMilkQuark / Cream cheese 250 ml 250 g250 g 500 ml 250 g --- 14 - 1610 - 12 13 - 17 8 - 10 6 - 8 -- 10 - 15 5 - 10 10 ...
Page 35 - After reheating; Reheating
The microwave function is particularlysuitable for reheating food. Select the following microwave powersettings to reheat food drinks . . . . . . . . . . . . . . . . . . . . . 1000 Wfood . . . . . . . . . . . . . . . 850 W or 600 Wbaby food . . . . . . . . . . . . . . . . . . 450 W Food for babies a...
Page 36 - Chart for reheating food
Chart for reheating food Drinks ** Microwave power settings Quantity 1000 W Time in min. 450 W Time in min. Standing time at room temperature * in min. Coffee,drinking temperature 60 – 65 °CMilk,drinking temperature 60 – 65 °CWaterbring to the boilBaby bottles (milk)Glühwein, punchdrinking temperatu...
Page 37 - Cooking
Microwave, traditional and combinationprogrammes are all suitable forcooking. Microwave This method is suitable for cookingcasseroles as well as dishes with pasta,rice and semolina etc. which needwater to help them swell up.First select 850 W to bring the food upto a boil and then turn the power lev...
Page 38 - The following containers are suitable:
Fan plus Y ^ Slide the glass tray with the combirack into the first shelf level from thebottom. The following containers are suitable: Ovenproof glass, china andearthenware pots with heat-resistanthandles and knobs. Cover dishes which are to be cooked intheir own juice and/or steam, e.g.potatoes or ...
Page 39 - Cooking chart
Cooking chart Microwave power settings Quantity 850 W Time in min. + 450 W Time in min. Standing time at room temperature *in min. Meat Meatballs in gravy (400 g meat)Stew (750 g meat) 10 – 12 16 + 15 2 – 32 – 3 Poultry Chicken in mustard sauceChicken curryChicken risotto approx. 800 gapprox. 900 g ...
Page 40 - Chart for cooking, browning and crisping food
Chart for cooking, browning and crisping food Quantity Oven function Time in min. Meat 1) Roast hamHoney roast hamVeal roastMeat loaf 1,000 g1,000 g1,000 g approx. 1,200 g 300 W + Fan plus 160 °C Fan plus 180 °CFan plus 180 °C 300 W + Fan plus 180 °C approx. 65approx. 70 approx. 120 approx. 40 Poult...
Page 41 - – Microwave; is suitable for defrosting; is suitable for; Defrosting and Reheating / Cooking
For simultaneous defrosting andreheating or cooking the followingfunctions are suitable: – Microwave h – Microwave + Grill h n Microwave is suitable for defrosting and then reheating or cooking deepfrozen ready made meals which you donot wish to brown. Microwave + Grill is suitable for ready made me...
Page 42 - Brush the rack with oil; Test to see if cooked; Grilling
The following grill settings are suitablefor browning food: – Grill n – Microwave + Grill h n , Grill n is suitable for flat items which require a crisp finish or browning. With Microwave + Grill h n , the microwave power output is limited to450 W. Preparing food for grilling Meat should be rinsed u...
Page 43 - Chart for grilling
Chart for grilling Pre-heat the grill for approx. 5 minutes. Flat items 1) Total grilling time in min. 2) Steak 25 – 30 Burgers 30 – 35 Sausages 20 – 25 Fish fillet 16 – 20 Toast 2 – 4 Toast with topping 5 – 9 Tomatoes 8 – 10 Peaches 7 – 10 1) Third shelf level2) Turn half way through the grilling t...
Page 44 - is suitable for baking small; Baking
The following settings are suitable forbaking: – Fan plus Y – Microwave + Fan plus h Y . Fan plus is suitable for baking small cakes, swiss roll and pastries. Microwave + Fan plus is suitable for doughs which require longer baking,such as rubbed in and beaten mixtures,yeast recipes and cheesecake. F...
Page 45 - Tips on baking; rectangular tins
Do not use paper based containerscoated with aluminium foil, such asare sometimes provided with packetcake mixes. There is the danger ofthese catching fire. Switch on the microwave setting for thetotal cooking time. The microwavesetting should not be higher than 150W. Tips on baking Temperature sett...
Page 46 - Baking chart
Baking chart Fan plus Microwave + Fan plus Temp. in °C Time in min. Microwave setting in W Temp. in °C Time in min. Creamed mixture Victoria sandwichFarmhouse fruit cake 2) Muffins 1) Marble cakeFresh fruit cakewith topping (glass tray) 1) Fresh fruit cake (glass tray) 1) Fresh fruit cake (tin)Flan ...
Page 47 - – cleaning agents containing soda,; Cleaning and care
Appliance front and controlpanel ^ All surfaces and controls should becleaned using warm water with a littlewashing up liquid applied with a softsponge or cloth. ^ Wipe the surfaces dry using a softcloth. E-cloth A microfibre "E-Cloth" is available fromthe Miele UK Spare Parts Department,whi...
Page 48 - Oven interior
Stainless steel frontedappliances The appliance front and controls aresusceptible to scratches andabrasions. Please observe the separate cleaninginstructions for – stainless steel surfaces, – stainless steel coloured controls. Stainless steel surfaces Stainless steel surfaces can be cleanedusing a p...
Page 49 - Oven interior roof
Clean the oven interior using a solutionof hot water and washing up liquid ormild detergent applied with a sponge,soft brush or damp cloth. Wipe dry witha soft cloth. For more heavy soiling, heat a glass ofwater for 2 to 3 minutes until the waterbegins to boil. The steam will collect onthe walls and...
Page 50 - Lower the grill element gently.; Door interior; Combi rack
^ Lower the grill element gently. Do not use force to lower theelement as this could causedamage. ^ After cleaning the grill element, raiseit gently back up again. Refit the nutand tighten to secure the grillelement back in position. Door interior Always keep the door interior clean. Donot use any s...
Page 51 - Problem solving guide
Installation work, maintenance andrepairs may only be carried out bysuitably qualified and competentpersons in accordance with nationaland local safety regulations toensure safety.Repairs and other work byunqualified persons could bedangerous and the manufacturer willnot be held liable.Ensure curren...
Page 54 - After sales service
In the event of any faults which youcannot easily remedy, please contact – your Miele Dealer or – the Miele Service Department (see back cover for address). When contacting your Dealer or theService Department, please quote themodel and serial number of yourappliance. These are given on the dataplat...
Page 56 - Non-rewireable plugs BS 1363
Non-rewireable plugs BS 1363 If this appliance is fitted with anon-rewireable plug, the followinginformation applies: if the socket outletsare not suitable for the plug suppliedwith this product, it must be cut off andan appropriate plug fitted. The fusecarrier and fuse should be removedfrom the old...
Page 57 - Building-in dimensions; Installation in a tall unit; Installation
Building-in options The appliance is suitable forinstallation: – in a tall unit in combination with an oven – in a tall unit on its own – in a base unit Building-in dimensions Installation in a tall unit incombination with an oven Installation in a tall unit Installation in a base unit If fitted und...


 Miele 11876420
User Manual
Miele 11876420
User Manual
 Miele H 176 MB
Manual
Miele H 176 MB
Manual
 Miele H 320
Manual
Miele H 320
Manual
 Miele H 373
Manual
Miele H 373
Manual
 Miele H 399 B
Manual
Miele H 399 B
Manual
 Miele H 4140
Manual
Miele H 4140
Manual
 Miele H 4220
Manual
Miele H 4220
Manual
 Miele H 4250
Manual
Miele H 4250
Manual
 Miele H 7890 BP
User Manual
Miele H 7890 BP
User Manual
 Miele H2267-1B
User Manual
Miele H2267-1B
User Manual
 Miele H2267-1BP
User Manual
Miele H2267-1BP
User Manual
 Miele H2760B
User Manual
Miele H2760B
User Manual
 Miele H2760BP
User Manual
Miele H2760BP
User Manual
 Miele H2860B
User Manual
Miele H2860B
User Manual
 Miele H2860BP
User Manual
Miele H2860BP
User Manual
 Miele H 5981 BP
Manual
Miele H 5981 BP
Manual
 Miele H 5688 BP
Manual
Miele H 5688 BP
Manual
 Miele H 5681 BP
Manual
Miele H 5681 BP
Manual