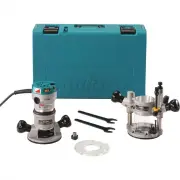
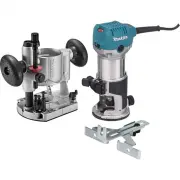
Page 2 - SPECIFICATIONS; Applicable battery cartridge and charger; SAFETY WARNINGS; General power tool safety warnings; Save all warnings and instruc-
2 ENGLISH ENGLISH (Original instructions) SPECIFICATIONS Model: GTR01 Collet chuck capacity 1/4" No load speed 10,000 - 31,000/min Overall height with BL4025 245 mm (9-5/8″) with BL4040 251 mm (9-7/8″) Rated voltage D.C. 36 V - 40 V max Net weight 2.2 - 2.5 kg (4.9 - 5.5 lbs) • Due to our contin...
Page 4 - Cordless trimmer safety warnings; SAVE THESE INSTRUCTIONS.; Symbols; Important safety instructions for
4 ENGLISH Cordless trimmer safety warnings 1. Use clamps or another practical way to secure and support the workpiece to a stable platform. Holding the work by your hand or against the body leaves it unstable and may lead to loss of control. 2. Hold the power tool by insulated gripping surfaces only...
Page 5 - Tips for maintaining maximum
5 ENGLISH 11. When disposing the battery cartridge, remove it from the tool and dispose of it in a safe place. Follow your local regulations relating to disposal of battery. 12. Use the batteries only with the products specified by Makita. Installing the batteries to non-compliant products may resul...
Page 6 - FUNCTIONAL; Installing or removing battery; Indicating the remaining battery; Tool / battery protection system
6 ENGLISH FUNCTIONAL DESCRIPTION CAUTION: Always be sure that the tool is switched off and the battery cartridge is removed before adjusting or checking function on the tool. Installing or removing battery cartridge CAUTION: Always switch off the tool before installing or removing of the battery car...
Page 7 - Overheat protection; Speed adjusting dial
7 ENGLISH Overheat protection When the tool or battery is overheated, the tool stops automatically. In this case, let the tool and battery cool before turning the tool on again. Overdischarge protection When the battery capacity is not enough, the tool stops automatically. In this case, remove the b...
Page 8 - Electronic function; ASSEMBLY; Installing or removing trimmer bit
8 ENGLISH NOTICE: If the tool is operated continuously at low speed for a long time, the motor will get over- loaded, resulting in tool malfunction. NOTICE: The speed adjusting dial can be turned only as far as 5 and back to 1. Do not force it past 5 or 1, or the speed adjusting function may no long...
Page 9 - Installing or removing the trimmer
9 ENGLISH Installing or removing the trimmer base 1. Open the lock lever of the trimmer base, then insert the tool into the trimmer base aligning the groove on the tool with the protrusion on the trimmer base. 2. Close the lock lever. 1 Fig.10 ► 1. Lock lever NOTE: You can use the trimmer base (resi...
Page 10 - Installing or removing the tilt base; Installing or removing the offset
10 ENGLISH Installing or removing the tilt base Optional accessory 1. Open the lock lever of the tilt base, then insert the tool into the tilt base aligning the groove on the tool with the protrusion on the tilt base. 2. Close the lock lever. 1 Fig.14 ► 1. Lock lever To remove the base, follow the i...
Page 12 - Installing or removing the plunge; Installing or removing the parallel; Installing or removing the dust
12 ENGLISH To remove the base, follow the installation procedure in reverse. NOTE: You can also mount the belt to the pulley with- out removing the base plate as shown in the figure. 2 1 Fig.25 ► 1. Pulley 2. Belt Installing or removing the plunge base Optional accessory 1. Open the lock lever of th...
Page 13 - OPERATION; Adjusting cutting depth; Adjusting cutting depth with the
13 ENGLISH OPERATION Adjusting cutting depth To adjust the cutting depth, open the lock lever, then move the tool base up or down by turning the adjusting screw. After the adjustment, close the lock lever firmly. 1 2 Fig.30 ► 1. Lock lever 2. Adjusting screw NOTICE: If the tool is not secured after ...
Page 15 - Using the tool with the trimmer base; Using the straight guide
15 ENGLISH 11. Release the fixing lever. 1 Fig.41 ► 1. Fixing lever By pushing down the tool until the stopper pole meets the stopper screw, you can obtain the depth of cut which you adjusted by above procedure. Using the tool with the trimmer base Set the tool base on the workpiece without the trim...
Page 16 - Using the straight guide for circular
16 ENGLISH 3. Loosen the wing nut on the straight guide and adjust the distance between the trimmer bit and the straight guide. At the desired distance, tighten the wing nut. 1 Fig.46 ► 1. Wing nut 4. Move the tool with the straight guide flush with the side of the workpiece. Fig.47 If the distance ...
Page 17 - Using the templet guide; Using the trimmer guide
17 ENGLISH Align the center hole in the straight guide with the center of the circle to be cut. Drive a nail less than 6 mm (1/4") in diameter into the center hole to secure the straight guide. Pivot the tool around the nail in the clockwise direction. 2 1 Fig.51 ► 1. Nail 2. Center hole Using t...
Page 18 - Using the tool with the tilt base
18 ENGLISH 1. Loosen the clamp screw, then install the trimmer guide on the trimmer base, and then tighten the clamp screw. 1 Fig.56 ► 1. Clamp screw 2. Loosen the clamp screw and adjust the distance between the trimmer bit and the trimmer guide by turn- ing the adjusting screw (1 mm (3/64") per...
Page 20 - Using the tool with the plunge base; Using the parallel ruler
20 ENGLISH Using the tool with the plunge base Always hold the grips firmly with both hands during opera - tion. Operate the tool in the same way as the trimmer base. Using the straight guide Optional accessory 1. Install the straight guide to the guide holder by tight- ening the wing nut. Insert th...
Page 21 - Changing knob type grip to bar type; WIRELESS ACTIVATION; What you can do with the wireless
21 ENGLISH If the distance (A) between the side of the workpiece and the cutting position is too wide for the parallel ruler, or if the side of the workpiece is not straight, the parallel ruler cannot be used. In this case, firmly clamp a straight board to the work - piece and use it as a guide agai...
Page 22 - Tool registration for the vacuum cleaner
22 ENGLISH 1. Open the lid on the tool as shown in the figure. 1 Fig.74 ► 1. Lid 2. Insert the wireless unit to the slot and then close the lid. When inserting the wireless unit, align the projections with the recessed portions on the slot. 1 4 2 3 Fig.75 ► 1. Wireless unit 2. Projection 3. Lid 4. R...
Page 23 - Starting the wireless activation
23 ENGLISH NOTE: The wireless activation lamps finish blinking in green after 20 seconds elapsed. Press the wireless activation button on the tool while the wireless acti- vation lamp on the cleaner is blinking. If the wireless activation lamp does not blink in green, push the wire- less activation ...
Page 24 - Description of the wireless activation lamp status
24 ENGLISH Description of the wireless activation lamp status 1 Fig.82 ► 1. Wireless activation lamp The wireless activation lamp shows the status of the wireless activation function. Refer to the table below for the meaning of the lamp status. Status Wireless activation lamp Description Color On Bl...
Page 26 - Troubleshooting for wireless activation function
26 ENGLISH Troubleshooting for wireless activation function Before asking for repairs, conduct your own inspection first. If you find a problem that is not explained in the manual, do not attempt to dismantle the tool. Instead, ask Makita Authorized Service Centers, always using Makita replace- ment...
Page 27 - MAINTENANCE; TRIMMER BITS; θθθ
27 ENGLISH MAINTENANCE CAUTION: Always be sure that the tool is switched off and the battery cartridge is removed before attempting to perform inspection or maintenance. NOTICE: Never use gasoline, benzine, thinner, alcohol or the like. Discoloration, deformation or cracks may result. To maintain pr...
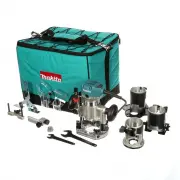
Page 32 - Accessories applicable to this trimmer
32 ENGLISH Accessories applicable to this trimmer The tool can be used with the following accessories for a variety of purposes. Some accessories are not available in your country. 5 8 19 17 18 21 29 26 27 28 20 18 17 22 23 24 25 30 31 32 12 2 6 8 7 9 10 17 18 16 13 14 11 7 8 9 10 15 1 11 1 4 2 3 5 ...
Page 33 - MAKITA LIMITED
33 ENGLISH 17. Bar type grip 18. Knob type grip (grip of the plunge base) 19. Dust nozzle for the plunge base 20. Templet guide for the plunge base 21. Guide holder This allows the straight guide for the trimmer base to be used on the plunge base. 22. Parallel ruler Fine adjustment function of posit...
Page 34 - ESPECIFICACIONES; Cartucho de batería y cargador aplicables; ADVERTENCIAS DE; Advertencias generales de; Conserve todas las advertencias
34 ESPAÑOL ESPAÑOL (Instrucciones originales) ESPECIFICACIONES Modelo: GTR01 Capacidad del mandril de sujeción 1/4″ Velocidad sin carga 10 000 r/min - 31 000 r/min Altura total con el modelo BL4025 245 mm (9-5/8″) con el modelo BL4040 251 mm (9-7/8″) Tensión nominal 36 V - 40 V c.c. máx. Peso neto 2...
Page 37 - GUARDE ESTAS; Símbolos; Instrucciones importantes de
37 ESPAÑOL 19. Algunos materiales contienen sustancias quími- cas que pueden ser tóxicas. Tome precauciones para evitar la inhalación de polvo o que éste tenga contacto con la piel. Consulte la información de seguridad del proveedor de los materiales. 20. Siempre utilice el respirador/máscara indica...
Page 38 - Instrucciones importantes
38 ESPAÑOL 18. Mantenga la batería alejada de los niños. GUARDE ESTAS INSTRUCCIONES. PRECAUCIÓN: Utilice únicamente baterías originales de Makita. El uso de baterías no origina - les de Makita, o de baterías alteradas, puede ocasio - nar que las baterías exploten causando un incendio, lesiones perso...
Page 39 - Instalación o extracción del; Indicación de la capacidad restante; Sistema de protección para la
39 ESPAÑOL DESCRIPCIÓN DEL FUNCIONAMIENTO PRECAUCIÓN: Asegúrese siempre de que la herramienta esté apagada y el cartucho de batería haya sido extraído antes de realizar cualquier ajuste o comprobación en la herramienta. Instalación o extracción del cartucho de batería PRECAUCIÓN: Apague siempre la h...
Page 40 - Selector de ajuste de velocidad
40 ESPAÑOL Protección contra sobrecarga Cuando la batería se esté utilizando de una manera que cause que consuma una cantidad de corriente anormalmente alta, la herramienta se detendrá automáticamente sin indica- ción alguna. En este caso, apague la herramienta y detenga la aplicación que causó que ...
Page 41 - Funcionamiento electrónico; MONTAJE; Instalación o extracción de la fresa
41 ESPAÑOL Número Velocidad 1 10 000 r/min 2 15 000 r/min 3 21 000 r/min 4 26 000 r/min 5 31 000 r/min PRECAUCIÓN: No cambie la velocidad de rotación durante el funcionamiento. De lo contra- rio, una reacción inesperada de la herramienta podría provocar lesiones. AVISO: Si la herramienta es operada ...
Page 45 - Instalación o extracción de la regla
45 ESPAÑOL 10. Inserte la llave hexagonal en el orificio de la base descentrada y luego apriete la tuerca de sujeción con la llave. 1 2 3 Fig.24 ► 1. Tuerca de sujeción 2. Llave 3. Llave hexagonal Para extraer la base, siga el procedimiento de instala- ción en orden inverso. NOTA: Usted también pued...
Page 46 - OPERACIÓN; Ajuste de la profundidad de corte
46 ESPAÑOL Instalación o extracción de la boquilla para polvo en la base de inmersión Inserte la boquilla para polvo en la base de inmersión de manera que la protuberancia en la boquilla para polvo encaje en la muesca en la base de inmersión, y luego apriete el tor - nillo de pulgar en la boquilla p...
Page 48 - Uso de la guía recta
48 ESPAÑOL 10. Apriete la tuerca de fijación de la barra de tope. 1 Fig.40 ► 1. Tuerca de fijación 11. Libere la palanca de fijación. 1 Fig.41 ► 1. Palanca de fijación Si empuja la herramienta hacia abajo hasta que la barra de tope se encuentre con el tornillo de tope, puede lograr la profundidad de...
Page 49 - Uso de la guía recta para hacer un
49 ESPAÑOL 2. Fije la guía recta a la base de la recortadora con el tornillo de fijación. 1 1 Fig.45 ► 1. Tornillo de fijación 3. Afloje la tuerca de mariposa en la guía recta y ajuste la distancia entre la fresa de la recortadora y la guía recta. En la distancia deseada, apriete la tuerca de maripo...
Page 50 - Uso de la guía de plantilla
50 ESPAÑOL Para cortar círculos entre 121 mm (4-3/4″) y 221 mm (8-11/16″) de radio 1 Fig.50 ► 1. Orificio central NOTA: Con esta guía no se pueden cortar círculos de entre 172 mm (6-3/4″) y 186 mm (7-5/16″) de radio. Alinee el orificio central en la guía recta con el centro del círculo a ser cortado...
Page 51 - Uso de la guía de recorte
51 ESPAÑOL NOTA: El tamaño real del corte en la pieza de trabajo difiere ligeramente de la plantilla. La diferencia con - siste en la distancia (X) entre la fresa de la recorta - dora y el exterior de la guía de plantilla. La distancia (X) se puede calcular utilizando la siguiente ecuación:Distancia...
Page 52 - Uso de la herramienta con la base
52 ESPAÑOL Uso de la herramienta con la base de inclinación La base de inclinación se utiliza para recortar el borde de hojas laminadas o materiales similares.La base de inclinación es conveniente para el bise - lado. Afloje los tornillos de mariposa, luego incline la herramienta al ángulo deseado y...
Page 54 - Uso de la regla paralela
54 ESPAÑOL Uso de la guía de plantilla Accesorio opcional 1. Afloje los tornillos en la base y retírelos. Coloque la guía de plantilla sobre la base y luego apriete los tornillos. 1 2 Fig.68 ► 1. Tornillo 2. Guía de plantilla 2. Opere la herramienta de la misma manera que la guía de plantilla para l...
Page 55 - Lo que puede hacer con la función
55 ESPAÑOL FUNCIÓN DE ACTIVACIÓN INALÁMBRICA Lo que puede hacer con la función de activación inalámbrica La función de activación inalámbrica permite una ope - ración limpia y cómoda. Si conecta a la herramienta una aspiradora compatible, podrá hacer que ésta funcione automáticamente al activar el i...
Page 60 - MANTENIMIENTO; FRESAS DE LA RECORTADORA
60 ESPAÑOL Estado de la anomalía Causa probable (avería) Remedio La aspiradora no funciona junto con el interruptor de la herramienta. La unidad inalámbrica no está instalada en la herramienta. La unidad inalámbrica está instalada incorrectamente en la herramienta. Instale la unidad inalámbrica corr...
Page 64 - ACCESORIOS
64 ESPAÑOL Fresa de ensenada con rodamiento de balines Fig.98 D A1 A2 A3 A4 L1 L2 L3 R 6 mm 20 mm 18 mm 12 mm 8 mm 40 mm 10 mm 5,5 mm 3 mm6 mm 26 mm 22 mm 12 mm 8 mm 42 mm 12 mm 5 mm 5 mm 1/4″ 20 mm 18 mm 12 mm 8 mm 40 mm 10 mm 5,5 mm 3 mm 1/4″ 26 mm 22 mm 12 mm 8 mm 42 mm 12 mm 5 mm 5 mm Unidad: mm...
Page 65 - Accesorios funcionales con esta recortadora
65 ESPAÑOL Accesorios funcionales con esta recortadora La herramienta se puede utilizar con los siguientes accesorios para una variedad de propósitos. Algunos accesorios no están disponibles en su país. 5 8 19 17 18 21 29 26 27 28 20 18 17 22 23 24 25 30 31 32 12 2 6 8 7 9 10 17 18 16 13 14 11 7 8 9...
Page 66 - GARANTÍA LIMITADA DE; Ésta Garantía no aplica para México
66 ESPAÑOL 15. Placa base (resina) 16. Base de la empuñadura 17. Empuñadura tipo barra 18. Empuñadura tipo perilla (empuñadura de la base de inmersión) 19. Boquilla para polvo para la base de inmersión 20. Guía de plantilla para la base de inmersión 21. Sujetador de la guía Esto permite utilizar la ...
Page 68 - Makita Corporation
Some dust created by power sanding, sawing, grinding, drilling, and other construction activities contains chemicals known to the State of California to cause cancer, birth defects or other reproductive harm. Some examples of these chemicals are: • lead from lead-based paints, • crystalline silica f...


 Makita RD1101
User Manual
Makita RD1101
User Manual
 Makita RF1101
User Manual
Makita RF1101
User Manual
 Makita RF1101KIT2
User Manual
Makita RF1101KIT2
User Manual
 Makita RP1800
User Manual
Makita RP1800
User Manual
 Makita RP2301FC
User Manual
Makita RP2301FC
User Manual
 Makita RT0701C
User Manual
Makita RT0701C
User Manual
 Makita RT0701C195559-1
User Manual
Makita RT0701C195559-1
User Manual
 Makita RT0701CX3
User Manual
Makita RT0701CX3
User Manual
 Makita RT0701CX7
User Manual
Makita RT0701CX7
User Manual
 Makita XTR01T7
User Manual
Makita XTR01T7
User Manual
 Makita XTR01Z
User Manual
Makita XTR01Z
User Manual