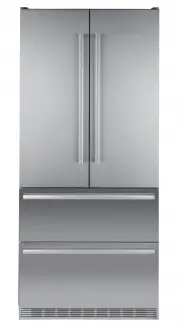
Liebherr UWTGB1682 - Manuals
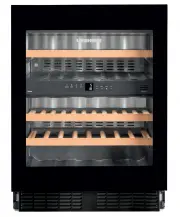
User Manual Liebherr UWTGB1682


Summary
10 Mounting the dust filter The supplied dust filter prevents that dirt enters the motor compartment, reducing the refrigeration performance. Therefore always install the dust filter. Remove the protective film from the dust filter. Insert the filter at the bottom and click into place at the top . A...
11 EN Appliance dimensions 1 In this area, the power cord comes out of the appliance rear. Free length of the power cord = 2000 mm Choose the position of the socket considering these specifications. The socket must not be situated behind the appli- ance and must be easily accessible. Installation di...
12 Installing the appliance 2 . Adjust the height of the appliance to 4 mm less than the recess height by turning the adjustable feet clockwise. Turn the spanner anticlockwise to raise the appliance front and clockwise to lower it. Position the spanner accordingly Important The appliance must be ali...
Liebherr Refrigerators Manuals
-
 Liebherr C 4023
User Manual
Liebherr C 4023
User Manual
-
 Liebherr C5740IM
User Manual
Liebherr C5740IM
User Manual
-
 Liebherr CBN 3656 Premium
User Manual
Liebherr CBN 3656 Premium
User Manual
-
 Liebherr CBNes 5167
User Manual
Liebherr CBNes 5167
User Manual
-
 Liebherr CBNES6256
User Manual
Liebherr CBNES6256
User Manual
-
 Liebherr CBNPes 5167 PremiumPlus
User Manual
Liebherr CBNPes 5167 PremiumPlus
User Manual
-
 Liebherr CBPesf 4033
User Manual
Liebherr CBPesf 4033
User Manual
-
 Liebherr CN 4003 NoFrost
User Manual
Liebherr CN 4003 NoFrost
User Manual
-
 Liebherr CN 5156 Premium NoFrost
User Manual
Liebherr CN 5156 Premium NoFrost
User Manual
-
 Liebherr CNes 4013 Comfort NoFrost
User Manual
Liebherr CNes 4013 Comfort NoFrost
User Manual
-
 Liebherr CNes 4013_CNes 4023
User Manual
Liebherr CNes 4013_CNes 4023
User Manual
-
 Liebherr CNes 4066 Premium NoFrost
User Manual
Liebherr CNes 4066 Premium NoFrost
User Manual
-
 Liebherr CNesf 4003 Comfort NoFrost
User Manual
Liebherr CNesf 4003 Comfort NoFrost
User Manual
-
 Liebherr CNesf 5113 Comfort NoFrost
User Manual
Liebherr CNesf 5113 Comfort NoFrost
User Manual
-
 Liebherr CNP 4056 Premium NoFrost
User Manual
Liebherr CNP 4056 Premium NoFrost
User Manual
-
 Liebherr CNPEF4416
User Manual
Liebherr CNPEF4416
User Manual
-
 Liebherr CPesf 3413_CPesf 3813
User Manual
Liebherr CPesf 3413_CPesf 3813
User Manual
-
 Liebherr CS-1400R
User Manual
Liebherr CS-1400R
User Manual
-
 Liebherr CS-1400R-IM
User Manual
Liebherr CS-1400R-IM
User Manual
-
Liebherr CS-1410-L
User Manual