LG OLED55GXPUA - Manuals
User Manual LG OLED55GXPUA


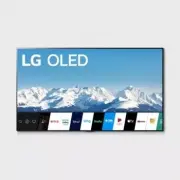
Summary
2 ENGLISH _inde x Important Safety Instruction • Read these instructions. • Keep these instructions. • Heed all warnings. • Follow all instructions. • Do not use this apparatus near water. • Clean only with dry cloth. • Do not block any ventilation openings. Install in accordance with the manufactur...
3 ENGLISH _inde x Warning! Safety Instructions CAUTION RISK OF ELECTRIC SHOCK DO NOT OPEN CAUTION: TO REDUCE THE RISK OF ELECTRIC SHOCK DO NOT REMOVE COVER (OR BACK). NO USER SERVICEABLE PARTS INSIDE. REFER TO QUALIFIED SERVICE PERSONNEL. The symbol is intended to alert the user to the presence of u...
5 ENGLISH _inde x Preparing • When the TV is turned on for the first time after being shipped from the factory, initialization of the TV may take approximately one minute. • Image shown may differ from your TV. • Your TV’s OSD (On Screen Display) may differ slightly from that shown in this manual. •...
LG TVs Manuals
-
 LG 19
User Manual
LG 19
User Manual
-
 LG 37
User Manual
LG 37
User Manual
-
 LG 42
User Manual
LG 42
User Manual
-
 LG 19LD355
User Manual
LG 19LD355
User Manual
-
 LG 19LE3300
User Manual
LG 19LE3300
User Manual
-
 LG 19LS3500
Manual
LG 19LS3500
Manual
-
 LG 19LV2300
User Manual
LG 19LV2300
User Manual
-
 LG 19LV2500
Manual
LG 19LV2500
Manual
-
 LG 19MN43D-PZ
User Manual
LG 19MN43D-PZ
User Manual
-
 LG 22LB491U
User Manual
LG 22LB491U
User Manual
-
 LG 22LD351
User Manual
LG 22LD351
User Manual
-
 LG 22LD355
User Manual
LG 22LD355
User Manual
-
 LG 22LE5500
User Manual
LG 22LE5500
User Manual
-
LG 22LE5500
Manual
-
 LG 22LK330
User Manual
LG 22LK330
User Manual
-
 LG 22LS3510
Manual
LG 22LS3510
Manual
-
 LG 22LV2300
User Manual
LG 22LV2300
User Manual
-
 LG 26LD355
User Manual
LG 26LD355
User Manual
-
 LG 26LE5500
User Manual
LG 26LE5500
User Manual
-
LG 26LE5500
Manual