Page 2 - Before reading this manual; Separate Purchase; Warning! Safety instructions
2 Before reading this manual • Read this manual thoroughly before operating your TV, and keep it for future reference. • On the website you can download the manual including installation, using, troubleshooting, specifications, license etc and view its contents on your PC or mobile device. • User Gu...
Page 4 - Installation; Lifting and moving the TV; Mounting on the Table; Securing TV to the Wall
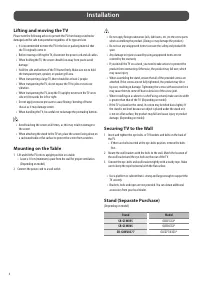
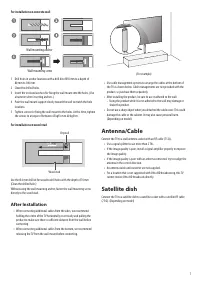
4 Installation Lifting and moving the TV Please note the following advice to prevent the TV from being scratched or damaged and for safe transportation regardless of its type and size. • It is recommended to move the TV in the box or packing material that the TV originally came in. • Before moving o...
Page 6 - Before Installation; How to fix anchors and screws
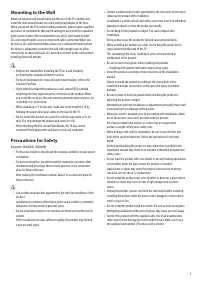
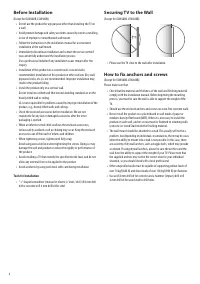
6 Before Installation (Except for OLW480B, LSW440B) • Do not use the product for any purpose other than installing the TV on a wall. • Avoid product damage and safety accidents caused by careless installing or use of improper or unauthorized wall mount. • Follow the instructions in the installation ...
Page 7 - After Installation; Satellite dish
7 For installation on concrete wall Wall mounting anchor Wall mounting screw 1 Drill holes in anchor locations with a drill bit of Ø 8 mm to a depth of 80 mm to 100 mm. 2 Clean the drilled holes.3 Insert the enclosed anchors for fixing the wall mount into the holes. (Use a hammer when inserting anch...
Page 8 - Starting TV; Turning on the TV
8 Starting TV Turning on the TV You can simply operate the TV functions, using the button. Power On (Press)Power Off 1) (Press and Hold) Menu Control (Press 2) ) Menu Selection (Press and Hold 3) ) 1) All running apps will close, and any recording in progress will stop. (Depending on country) 2) You...
Page 9 - Connections; HDMI; USB; IR Blaster; External Devices
9 Connections Connect various external devices to the TV and switch input modes to select an external device. For more information of external device’s connection, refer to the manual provided with each device. HDMI • When connecting the HDMI cable, the product and external devices should be turned ...
Page 10 - Specifications
10 Specifications Power requirement AC 100-240 V~ 50/60 Hz (Depending on country) Broadcasting Specifications Digital TV Analogue TV Television system DVB-T/T2, DVB-C, DVB-S/S2 PAL B/B, PAL B/G, PAL D/K, PAL-I, SECAM B/G, SECAM D/K, NTSC-M Programme coverage DVB-S/S2 DVB-C DVB-T/T2 46 ~ 862 MHz 950 ...
Page 11 - Product Information; Open Source Software Notice
11 Product Information Open Source Software Notice Information To obtain the source code that is contained in this product, under GPL, LGPL, MPL, and other open source licenses that have the obligation to disclose source code, and to access all referred license terms, copyright notices and other rel...
Page 12 - Troubleshooting
12 Troubleshooting In TV / HDMI input, press the button on the remote control three times to display the model name and serial number on the screen. Cannot control the TV with the remote control. • Check the remote control sensor on the product and try again. • Check if there is any obstacle between...
Page 14 - Precautions for Protecting the OLED TV Screen; Images that are likely to cause image
14 Precautions for Protecting the OLED TV Screen Unlike regular LED/LCDs, OLED TVs produce images that emit light for each pixel, achieving a perfect black colour and delivering clear images without blurring.Due to the nature of the organic materials used to achieve high-resolution image quality, OL...
Page 15 - Using Magic Remote Control
15 Using Magic Remote Control Power Turns the TV on or off. Accesses the [Guide].Accesses the saved programmes list.Accesses the [Edit Quick Access]. - [Edit Quick Access] is a feature that allows you to enter a specified app or Live TV directly by pressing and holding the number buttons. Volume but...