Page 2 - TABLE OF CONTENTS
TABLE OF CONTENTS 2 3 IMPORTANT SAFETY INSTRUCTIONS 3 READ ALL INSTRUCTIONS BEFORE USE 3 WARNING 7 INSTALLATION 7 Product Overview 8 Installation Requirements 10 OPERATION 10 Control Panel 11 Before Use 13 Quick Start and Stop 13 Operating the Microwave 20 Operating the Oven 27 Cookware Guide 28 Coo...
Page 3 - IMPORTANT SAFETY INSTRUCTIONS; READ ALL INSTRUCTIONS BEFORE USE; Safety Messages; WARNING; Technical Safety
3 IMPORTANT SAFETY INSTRUCTIONS ENGLISH IMPORTANT SAFETY INSTRUCTIONS READ ALL INSTRUCTIONS BEFORE USE Safety Messages Your safety and the safety of others are very important. We have provided many important safety messages in this manual and on your appliance. Always read and follow all safety mess...
Page 4 - Operation
4 IMPORTANT SAFETY INSTRUCTIONS - Do not immerse cord or plug in water. Keep cord away from heated surfaces.- Do not let cord hang over edge of table or counter. • To reduce the risk of fire in the oven cavity: - Do not overcook food. Carefully attend appliance when paper, plastic, or other combusti...
Page 5 - Maintenance
5 IMPORTANT SAFETY INSTRUCTIONS ENGLISH • The appliance and its accessible parts become hot during use. Care should be taken to avoid touching heating elements inside the oven. Children must be kept away unless continuously supervised. • Do not use recycled paper products. They may contain impuritie...
Page 6 - SAVE THESE INSTRUCTIONS; FEDERAL COMMUNICATIONS COMMISSION RADIO FREQUENCY
6 IMPORTANT SAFETY INSTRUCTIONS SAVE THESE INSTRUCTIONS • Use care when cleaning the vent-hood filter. Corrosive cleaning agents, such as lye-based oven cleaners, may damage the filter. • Suitable for use above both gas and electric cooking equipment 36 inches wide or less. Radio/TV/Wireless Equipme...
Page 7 - INSTALLATION; Product Overview; Front View
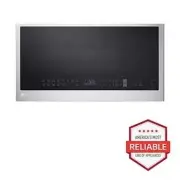
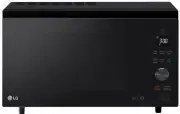
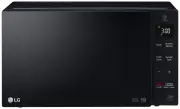
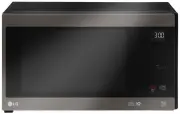
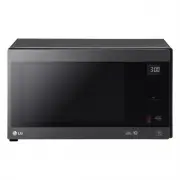
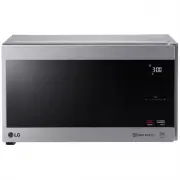
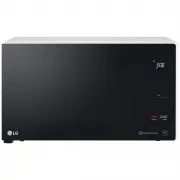
7 INSTALLATION ENGLISH INSTALLATION Product Overview Front View a Vent Grille b Glass Turntable c Location of Model Number d Grease Filter e Cooktop Light f Window with Metal Shield g Safety Door Lock System h Control Panel Accessories Accessories will vary depending on the model purchased. a Glass ...
Page 8 - How to Use Accessories; Specifications; Installation Requirements; Installation Location
8 INSTALLATION How to Use Accessories $ : Recommended method % : Alternate method -: Do not use NOTE • Do not operate the oven when it is empty except when preheating in the convection mode only. Never operate the microwave while the oven is empty. Specifications MHEC173** Model • Power Supply : 120...
Page 9 - Grounding Instructions
9 INSTALLATION ENGLISH constructed of a minimum of 2" x 4" wood studding and 3/8" thick drywall or plaster/lath. • Attach the 2 lag screws supporting the oven to a vertical, 2" x 4" wall stud. • DO NOT mount the microwave oven to an island or peninsula cabinet. • Be sure that the...
Page 10 - OPERATION; Control Panel; Control Panel Features
10 OPERATION OPERATION Control Panel Control Panel Features a MICROWAVE • Select various microwave cooking functions. See Manual Cooking section and Cooking Mode section. b CONVECTION • Select various convection cooking functions. See Cooking Mode section. c Display • Shows the time of day, cook tim...
Page 11 - Before Use; Setting the Clock
11 OPERATION ENGLISH • To set the light, press Hi , Low , or Off to adjust the cooktop light. • To set the ventilation: - Press On/Off to turn the vent fan on or off. - Press 5 Speed to set the vent fan speed. - Press Auto Timeset to set ventilation time. (Turns off after 1, 3, 5, 10 or 30 minutes) ...
Page 12 - Custom Setting; Microwave Power Levels
12 OPERATION Setting the Vent Fan Speed When the fan is on, press 5 Speed to change the vent fan speed.• The fan speed will change in sequence from Level 4 to Level 5, Level 1, Level 2, Level 3 and back to Level 4. • The vent fan maintains the last setting if turned off and on again. Setting the Tim...
Page 13 - Quick Start and Stop; Using Quick Start; Operating the Microwave; Microwave Mode; Cooking for 5 Minutes, 30 Seconds at; Using Express Cook; Using the Sensor Functions
13 OPERATION ENGLISH Wi-Fi Connect the appliance to a home Wi-Fi network to use smart functions. See SMART FUNCTIONS for more details. Setting Up Wi-Fi 1 Press and hold the Settings button for three seconds. The Wi-Fi icon f appears at the top of the display when Wi-Fi is turned on. 2 Follow the ins...
Page 14 - Sensor Cook Mode; Sensor Cook Menu
14 OPERATION • Opening the door or pressing the STOP/Clear button before the steam is detected will stop the process and the oven. • Appropriate containers and coverings help assure good sensor cooking results.- Always use microwavable containers and cover them with lids or vented plastic wrap. - Ne...
Page 15 - Sensor Reheat Mode; Sensor Reheat Menu; Popcorn Mode
15 OPERATION ENGLISH - Instructions: Cover with vented plastic wrap. After cooking, let stand for 3 minutes. • 11 Casserole (1 - 4 cups) - Cookware: Microwave-safe bowl- Food temperature: Room- Instructions: Cover with vented plastic wrap. After cooking, let stand for 3 minutes. • 12 Boiling Water (...
Page 16 - Popcorn Menu; Steam Cook Mode; Steam Cook Menu; Auto Defrost Mode; Using Defrost Menu
16 OPERATION CAUTION • When popping commercially packaged popcorn, remove the rack from the oven. • Do not place the bag of microwave popcorn on the rack or under the rack. Popcorn Menu Refer to the information below to set the desired menu item and see the recommended amounts.• Popcorn (2.0 - 3.5 o...
Page 17 - Using Time Defrost; Defrost Menu; More Modes; Soften Mode
17 OPERATION ENGLISH 1 Press Auto Defrost . 2 Use the number keys to enter the desired menu code from the Auto Defrost Menu . 3 Use the number keys to enter the desired amounts. 4 Press START/Enter . • At the chime, open the oven door and turn the food over. Remove any food that has thawed. Return t...
Page 18 - Soften Menu
18 OPERATION Soften Menu Refer to the information below to set the desired menu item and see the recommended amounts.• 1 Butter (1, 2 or 3 sticks (4 oz/1 stick)) - Cookware: Microwave-safe dish- Food temperature: Refrigerated- Instructions: Unwrap and place food in oven. Butter will be at room tempe...
Page 19 - Kids Meal Menu; Simmer Menu
19 OPERATION ENGLISH Kids Meal Menu Refer to the information below to set the desired menu item and see the recommended amounts.• 1 Mac & Cheese (6 or 12 oz) - Cookware: Microwave-safe dish- Food temperature: Refrigerated • 2 Corn Dog (2 or 4 ea (2 - 2.5 oz/ea)) - Cookware: Microwave-safe dish- ...
Page 20 - Operating the Oven; Convection Bake Mode; Setting the Convection Bake Function
20 OPERATION 3 servings (water 6-1/3 cups/1.5 L, fusilli 9 oz/ 255 g)4 servings (water 6-1/3 cups/1.5 L, fusilli 12 oz/ 340 g) - Instructions: Follow instructions for cooking Farfalle. • 4 Lasagna (1, 2, 3 servings) - Cookware: Microwave-safe bowl † - Food temperature: Room- 1 serving (water 4-1/4 c...
Page 21 - Convection Baking Menu
21 OPERATION ENGLISH 6 Press START/Enter . • When the cook time ends, a melody sounds and COOK END appears in the display. Example: 30 minutes at 375 ℉ without preheating 1 Press Conv. Bake . 350 ℉ appears in the display. 2 Set the oven temperature: Press 3 , 7 , 5 and START/Enter . 3 Set the cook t...
Page 22 - Meat Roasting Menu; Air Fry Mode; Air Fry Menu
22 OPERATION NOTE • The oven temperature indicated in the chart above is recommended over the package instruction temperature. • The baking time in the chart above is only a guideline for your reference. Adjust the time according to conditions or your preference. Check doneness at the minimum time. ...
Page 23 - Combination Mode; Setting the Combination Bake
23 OPERATION ENGLISH - Alternative: Conv. Bake at 450 ℉ for 25 - 27 min. • 2 Chicken Nuggets (1 - 2 servings) - Cookware: Metal tray on the rack- Food temperature: Frozen cooked- 1 serving: 5 ea, 2 servings: 10 ea- Alternative: Conv. Bake at 450 ℉ for 13 - 15 min. • 3 Chicken Tenders (1 - 2 servings...
Page 24 - Combination Bake Menu; Combination Roast Function
24 OPERATION Combination Bake Menu NOTE • The baking time in the chart above is only a guideline for your reference. Adjust the time according to the food condition or your preference. Check doneness at the minimum time. Combination Roast Function Example: 30 minutes at 400 ℉ 1 Press Combi. Roast . ...
Page 25 - Speed Combination Mode; Speed Combination Menu; Warm Mode; Setting the Warm Function
25 OPERATION ENGLISH NOTE • The roasting time in the chart above is only a guideline for your reference. Adjust the time according to the food condition or your preference. Check doneness at the minimum time. Speed Combination Mode This function includes 4 presets for cooking common foods without en...
Page 26 - Proof Mode; Setting the Proof Function; Dehydrate; Dehydrate Menu
26 OPERATION 4 Press STOP/Clear at any time to cancel. NOTE • This function is intended to keep food warm. Do not use it to cool food down. • It is normal for the fan to operate during the Warm mode. Proof Mode This function maintains a warm oven for rising yeast-leavened products before baking. Set...
Page 27 - Cookware Guide; Microwave-Safe Cookware
27 OPERATION ENGLISH • Pineapple - Preparation: Peel, core and cut into 3/8" (8 - 12 mm) slices. - Set temp / Time: 160 ℉ / 6 - 9 hrs - Use: Snacks, baked goods, baked granola • Tomatoes - Preparation: Wash and slice into 1/4" (6 mm) thick circles. - Set temp / Time: 160 ℉ / 6 - 9 hrs - Use:...
Page 28 - Testing Cookware before Use; Convection Cookware; Cooking Guide; Cooking Tips
28 OPERATION cause arcing, an alarming phenomenon that resembles lightning. - Metal shields the food from microwave energy and produces uneven cooking. Also avoid metal skewers, thermometers, foil trays, metal-rimmed or metal-banded dinnerware, casserole dishes, etc. The metal rim interferes with no...
Page 30 - Precautions; Convection Cooking Tips; Combination Cooking Tips
30 OPERATION - Use small pieces of aluminum foil to shield parts of food such as chicken wings, leg tips, fish tails, or areas that start to get warm. Make sure the foil does not touch the sides, top, or bottom of the oven. The foil can damage the oven lining. Precautions WARNING • Do not use your m...
Page 32 - SMART FUNCTIONS; LG ThinQ Application; LG ThinQ Application Features; Installing LG ThinQ Application and; Models with QR Code
32 SMART FUNCTIONS SMART FUNCTIONS LG ThinQ Application This feature is only available on models with Wi-Fi.The LG ThinQ application allows you to communicate with the appliance using a smartphone. LG ThinQ Application Features • Settings - Allows you to set various options on the oven and in the ap...
Page 33 - Wireless LAN Module Specifications; FCC RF Radiation Exposure Statement; Open Source Software Notice
33 SMART FUNCTIONS ENGLISH router. Purchase a Wi-Fi repeater (range extender) to improve the Wi-Fi signal strength. • The network connection may not work properly depending on the Internet service provider. • The Wi-Fi may not connect or the connection may be interrupted because of the home network ...
Page 34 - Smart Diagnosis; Feature; Using LG ThinQ to Diagnose Issues
34 SMART FUNCTIONS Smart Diagnosis TM Feature This feature is only available on models with the c or d logo. Use this feature to help you diagnose and solve problems with your appliance. NOTE • For reasons not attributable to LGE’s negligence, the service may not operate due to external factors such...
Page 35 - MAINTENANCE; Cleaning
35 MAINTENANCE ENGLISH MAINTENANCE Cleaning Cleaning the Interior 1 Use a damp cloth to clean the surfaces of the door and wipe out crumbs between the door and the frame. 2 Remove greasy spatters with a soapy cloth and then rinse and dry.• Wipe spatters immediately with a wet paper towel, especially...
Page 36 - Replacing Parts; Replacing the Charcoal Filter
36 MAINTENANCE 3 Rinse well and shake to dry.• Do not use ammonia or place in a dishwasher. The aluminum will darken. 4 To reinstall, slide the filter in on the back side and push it upward to secure it. NOTE • Do not operate the hood without the filters in place. Replacing Parts Replacing the Charc...
Page 37 - TROUBLESHOOTING; FAQs; Frequently Asked Questions
37 TROUBLESHOOTING ENGLISH TROUBLESHOOTING FAQs Frequently Asked Questions Q: Will the oven be damaged if it operates while empty? A: Yes. Never operate the oven while it is empty or without the glass tray. Q: Does microwave energy pass through the viewing screen in the door? A: No. The metal screen...
Page 39 - Before Calling for Service
39 TROUBLESHOOTING ENGLISH Before Calling for Service Operation Problem Possible Cause & Solution Microwave oven does not start Power cord is unplugged, door is open, or cooking time has not been set. • Plug in power cord. Or, check for a blown circuit fuse or a tripped main circuit breaker.• Cl...
Page 41 - LIMITED WARRANTY; USA; TERMS AND CONDITIONS; THIS LIMITED WARRANTY DOES NOT COVER:
41 LIMITED WARRANTY ENGLISH LIMITED WARRANTY USA TERMS AND CONDITIONS ARBITRATION NOTICE: THIS LIMITED WARRANTY CONTAINS AN ARBITRATION PROVISION THAT REQUIRES YOU AND LG ELECTRONICS ("LG") TO RESOLVE DISPUTES BY BINDING ARBITRATION INSTEAD OF IN COURT, UNLESS YOU CHOOSE TO OPT OUT. IN ARBIT...
Page 42 - NOT COVERED BY WARRANTY
42 LIMITED WARRANTY • Damage or failure of the Product resulting from operating the Product in a corrosive atmosphere or contrary to the Product owner’s manual. • Damage or failure of the Product caused by accidents, pests and vermin, lightning, wind, fire, floods, acts of nature, or any other cause...
Page 44 - PROCEDURE FOR RESOLVING DISPUTES:
44 LIMITED WARRANTY PROCEDURE FOR RESOLVING DISPUTES: ALL DISPUTES BETWEEN YOU AND LG ARISING OUT OF OR RELATING IN ANY WAY TO THIS LIMITED WARRANTY OR THE PRODUCT SHALL BE RESOLVED EXCLUSIVELY THROUGH BINDING ARBITRATION, AND NOT IN A COURT OF GENERAL JURISDICTION. BINDING ARBITRATION MEANS THAT YO...
Page 48 - For inquiries or comments,
LG Customer Information Center Register your product Online! www.lg.com For inquiries or comments, visit www.lg.com or call: 1-800-243-0000 U.S.A. 1-888-542-2623 CANADA


 LG MH-6048SS
Manual
LG MH-6048SS
Manual
 LG MH-685HD
User Manual
LG MH-685HD
User Manual
 LG MHES1738F
User Manual
LG MHES1738F
User Manual
 LG MJ3966ABS
User Manual
LG MJ3966ABS
User Manual
 LG MS2336DB
User Manual
LG MS2336DB
User Manual
 LG MS2596OB
User Manual
LG MS2596OB
User Manual
 LG MS2596OS
User Manual
LG MS2596OS
User Manual
 LG MS2596OW
User Manual
LG MS2596OW
User Manual
 LG MS3840SR
User Manual
LG MS3840SR
User Manual
 LG MS3840SRB
User Manual
LG MS3840SRB
User Manual
 LG MS3840SRSK
User Manual
LG MS3840SRSK
User Manual
 LG MS3842XRL
User Manual
LG MS3842XRL
User Manual
 LG MS4042GR
User Manual
LG MS4042GR
User Manual
 LG MS4236DB
User Manual
LG MS4236DB
User Manual
 LG MS4296OBC
User Manual
LG MS4296OBC
User Manual
 LG MS4296OBSS
User Manual
LG MS4296OBSS
User Manual
 LG MS4296OMBB
User Manual
LG MS4296OMBB
User Manual
 LG MS4296OSS
User Manual
LG MS4296OSS
User Manual
 LG MS4296OWS
User Manual
LG MS4296OWS
User Manual
 LG MS5696OMBS
User Manual
LG MS5696OMBS
User Manual