Page 2 - TABLE OF CONTENTS
TABLE OF CONTENTS SAFETY INSTRUCTIONS .............................................................. 3 IMPORTANT SAFETY INSTRUCTIONS ..........................................................4 PRODUCT OVERVIEW .................................................................. 8 Exterior Parts .........
Page 3 - SAFETY INSTRUCTIONS; READ ALL INSTRUCTIONS BEFORE USE
3 EN SAFETY INSTRUCTIONS READ ALL INSTRUCTIONS BEFORE USE Your safety and the safety of others are very important.We have provided many important safety messages in this manual and on your appliance. Always read and follow all safety messages. This is the safety alert symbol.This symbol alerts you t...
Page 4 - IMPORTANT SAFETY INSTRUCTIONS; WARNING; including the following:
4 EN IMPORTANT SAFETY INSTRUCTIONS WARNING To reduce the risk of explosion, fire, death, electric shock, scalding or injury to persons when using this product, follow basic precautions, including the following: INSTALLATION • Before use, the appliance must be properly installed as described in this ...
Page 6 - CAUTION; To reduce the risk of minor or moderate injury to persons,; INSTALLATION
6 EN CAUTION To reduce the risk of minor or moderate injury to persons, malfunction, or damage to the product or property when using this product, follow basic precautions, including the following: INSTALLATION • Take care when installing the product that exhaust or condensation does not damage near...
Page 7 - SAVE THESE INSTRUCTIONS
7 EN REFRIGERANT (FOR R32 ONLY) WARNING • Do not use means to accelerate the defrosting process or to clean, other than those recommended by the manufacturer. • The appliance shall be stored in a room without continuously operating open flames (for example an operating gas appliance) and ignition so...
Page 8 - PRODUCT OVERVIEW; Exterior Parts
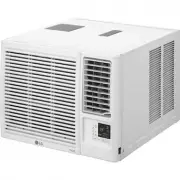
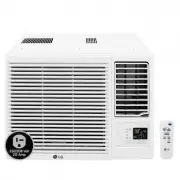
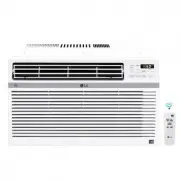
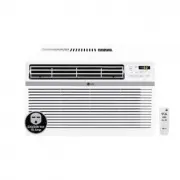
8 EN PRODUCT OVERVIEW Exterior Parts Interior Parts 7 6 1 4 3 2 5 8 9 3 45 6 7 1 2 NOTE • The feature may be changed according to the type of model. 1 Control Panel 1 Evaporator 2 Remote Control 2 Air Guide 3 Air Filter 3 Brace 4 Vertical Air Deflector (Horizontal Louver) 4 Compressor 5 Horizontal A...
Page 9 - Electrical Data
9 EN INSTALLATION Electrical Data Power cord may include a current interrupter device. TEST and RESET buttons are provided on the plug case. The device should be tested on a periodic basis by frist pressing the TEST button and then the RESET button. If the TEST button does not trip or if the RESET b...
Page 10 - Tools Needed
10 EN Parts Included (Appearance May Vary) Heatproof foam (2) (Adhesive backed) Right curtain panel Left curtain panel Foam strip (Non-adhesive) Foam-PE (2) (Adhesive backed) Lower panel guide (2) Window locking bracket Sill support (2) NOTE • The feature may be changed according to the type of mode...
Page 11 - How to Install the Unit; Window Requirements; Storm Window Requirements
11 EN How to Install the Unit 1 To prevent vibration and noise, make sure the unit is installed securely and firmly. 2 Install the unit out of direct sunlight. 3 There should be no obstacles, such as a fence or wall, within 20” from the back of the cabinet because it will prevent heat radiation of t...
Page 12 - Preparation of the Cabinet
12 EN Preparation of the Cabinet 1 Remove 4 screws which fasten the cabinet at both sides and at the back. (Keep the screws for later use.) Shipping Shipping Screws Screws 2 Slide the unit from the cabinet by gripping the base pan handle and pulling forward while bracing the cabinet. CAUTION • The u...
Page 13 - Cabinet Installation
13 EN Cabinet Installation Inside Sill Inside Sill Center Hole Center Hole Outside Sill Outside Sill 1 Open the window. Mark a line on the center of the inside sill.Carefully place the cabinet in the window and align the center hole on the cabinet bottom front with the center line on the sill. Insid...
Page 14 - Unit Installation
14 EN 6 Mount the cabinet to the window sill using 3 type B screws in the holes on the front angle. Sash Track Sash Track Front Angle Front Angle Screws (Type B) Screws (Type B) 7 Pull each curtain panel out until it meets the window sash track. Sash Track Sash Track Front Angle Front Angle Upper Pa...
Page 16 - OPERATION; Control Panel and Remote Control
16 EN OPERATION Control Panel and Remote Control 1 2 3 4 7 5 6 Remote Control 1 4 2 7 3 NOTE • The feature may be changed according to the type of model. 1 Power Press to turn the air conditioner ON or OFF. 4 Operation Mode Press the Mode button to cycle between 4 types of air conditioner operation:...
Page 17 - Wireless Remote Control; Inserting Batteries
17 EN 5 Wi-Fi (Wi-Fi Model Only) Enables connection of the air conditioner to the home Wi-Fi. NOTE • Follow instructions on ThinQ application on how to connect to your unit. 6 Clean Filter The Clean Filter LED lights up to notify you that the filter needs to be cleaned. After cleaning the filter, pr...
Page 18 - Air Direction; Adjusting Horizontal Airflow; Adjusting Vertical Airflow; Additional Features; Slinger Fan
18 EN Air Direction Airflow can be adjusted by changing the direction of the air conditioner’s louvers. Adjusting Horizontal Airflow Direction The horizontal airflow is adjusted by moving the levers of the vertical louvers to the left or right. NOTE • The feature may be changed according to the type...
Page 19 - SMART FUNCTIONS; LG ThinQ Application; LG ThinQ Application Features
19 EN SMART FUNCTIONS LG ThinQ Application This feature is only available on models with the b or ThinQ logo The LG ThinQ application allows you to communicate with the appliance using a smartphone. LG ThinQ Application Features Communicate with the appliance from a smartphone using the convenient s...
Page 20 - Smart Diagnosis
20 EN Installing the LG ThinQ Application Search for the LG ThinQ application from the Google Play Store or Apple App Store on a smartphone. Follow instructions to download and install the application. Open Source Software Notice Information To obtain the source code under GPL, LGPL, MPL, and other ...
Page 22 - MAINTENANCE; Air Filter; Cleaning the Air Filter; Cleaning the Air Conditioner
22 EN MAINTENANCE WARNING • Before cleaning or performing maintenance, disconnect the power supply and wait until the fan stops. Air Filter Check the air filter at least twice a month to see if cleaning is necessary. Trapped particles in the filter can build up and block the airflow, reducing coolin...
Page 23 - TROUBLESHOOTING; Before Calling for Service; Normal Sounds You May Hear
23 EN TROUBLESHOOTING Before Calling for Service The appliance is equipped with an automatic error-monitoring system to detect and diagnose problems at an early stage. If the appliance does not function properly or does not function at all, check the following before you call for service. Normal Sou...
Page 27 - WARRANTY
27 EN WARRANTY ARBITRATION NOTICE: THIS LIMITED WARRANTY CONTAINS AN ARBITRATION PROVISION THAT REQUIRES YOU AND LG TO RESOLVE DISPUTES BY BINDING ARBITRATION INSTEAD OF IN COURT, UNLESS YOU CHOOSE TO OPT OUT. IN ARBITRATION, CLASS ACTIONS AND JURY TRIALS ARE NOT PERMITTED. PLEASE SEE THE SECTION TI...
Page 28 - FOR YOUR RECORDS
28 EN THIS WARRANTY IS IN LIEU OF ANY OTHER WARRANTY, EXPRESS OR IMPLIED, INCLUDING AND WITHOUT LIMITATION TO, ANY WARRANTY OF MERCHANTABILITY OR FITNESS FOR A PARTICULAR PURPOSE. TO THE EXTENT ANY IMPLIED WARRANTY IS REQUIRED BY LAW, THIS WARRANTY IS LIMITED IN DURATION TO THE TERM PERIOD EXPRESSED...
Page 31 - Memo
Page 33 - AIRE; Lea detenidamente el manual del propietario antes de poner el; MANUAL DEL PROPIETARIO
www.lg.com Copyright © 202 3 LG Electronics Inc. Todos los Derechos Reservados. AIRE ACONDICIONADO Lea detenidamente el manual del propietario antes de poner el electrodoméstico en funcionamiento y consérvelo a mano en todo momento para su referencia. MANUAL DEL PROPIETARIO TIPO : VENTANA SP ESPAÑOL...
Page 34 - TABLA DE CONTENIDO
TABLA DE CONTENIDO INSTRUCCIONES DE SEGURIDAD .............................................. 3 INSTRUCCIONES IMPORTANTES DE SEGURIDAD .....................................4 DESCRIPCIÓN GENERAL DEL PRODUCTO ............................... 8 Piezas exteriores..............................................
Page 35 - INSTRUCCIONES DE SEGURIDAD; LEA TODAS LAS INSTRUCCIONES ANTES DE UTILIZAR; Tos siguientes símbolos se muestran en las unidades
3 SP INSTRUCCIONES DE SEGURIDAD LEA TODAS LAS INSTRUCCIONES ANTES DE UTILIZAR Su seguridad y la de los demás son muy importantes.Tanto en este manual como en el equipo, hemos proporcionado muchos mensajes de seguridad importantes. Siempre debe leer y respetar todos los mensajes de seguridad. Este es...
Page 36 - INSTRUCCIONES IMPORTANTES DE SEGURIDAD; ADVERTENCIA; Para disminuir el riesgo de explosiones, incendios, descargas; INSTALACIÓN
4 SP INSTRUCCIONES IMPORTANTES DE SEGURIDAD ADVERTENCIA Para disminuir el riesgo de explosiones, incendios, descargas eléctricas, quemaduras, lesiones o muerte para las personas que usen este artefacto, siga las precauciones básicas, incluidas las siguientes: INSTALACIÓN • Antes de ser utilizado, es...
Page 37 - FUNCIONAMIENTO
5 SP FUNCIONAMIENTO • Use el artefacto únicamente para el fin previsto. • Nunca intente operar este artefacto si se encuentra dañado, si no funciona correctamente, si no está ensamblado por completo o si tiene piezas faltantes o rotas, incluido un cable o enchufe dañado. • Repare o reemplace de inme...
Page 38 - PRECAUCIÓN; Para reducir el riesgo de lesiones leves o moderadas a personas, el
6 SP PRECAUCIÓN Para reducir el riesgo de lesiones leves o moderadas a personas, el mal funcionamiento o daño al producto o propiedad cuando use este producto, siga las precauciones básicas, incluido lo siguiente: INSTALACIÓN • Al instalar el producto, tenga cuidado de que los gases de escape o la c...
Page 39 - GUARDE ESTAS INSTRUCCIONES
7 SP REFRIGERANTE (SOLO PARA R32) ADVERTENCIA • No utilice medios para acelerar el proceso de descongelación ni para limpiar que no sean los recomendados por el fabricante. • El aparato debe almacenarse en una habitación sin llamas de funcionamientocontinuo (por ejemplo, un aparato de gas en funcion...
Page 40 - DESCRIPCIÓN GENERAL DEL PRODUCTO; Piezas exteriores
8 SP DESCRIPCIÓN GENERAL DEL PRODUCTO Piezas exteriores Piezas interiores 7 6 1 4 3 2 5 8 9 3 45 6 7 1 2 NOTA • La función puede cambiar según el tipo de modelo. 1 Panel de control 1 Evaporador 2 Mando a distancia 2 Guía de aire 3 Filtro de aire 3 Abrazadera 4 Deflector de aire Vertical (Lamas horiz...
Page 41 - Datos eléctricos
9 SP INSTALACIÓN Datos eléctricos El cable de alimentación puede incluir un interruptor de corriente. En la carcasa del enchufe hay un botón de TEST (prueba) y otro de RESET (restablecer). El dispositivo debe probarse periódicamente pulsando en primer lugar el botón TEST y, a continuación, el botón ...
Page 42 - Partes incluidas (Apariencia puede variar); Herramientas necesarias
10 SP Partes incluidas (Apariencia puede variar) Aislamiento de espuma (2) Panel de cortina derecho Panel de cortina izquierda Tira de espuma (no adhesiva) Espuma de PE (2) (cara adhesiva) Guía de los panels inferiore (2) Soporte para la ventana Soporte de umbral (2) NOTA • La función puede cambiar ...
Page 43 - Cómo instalar la unidad; Requisitos de la ventana; Requisitos de una ventana
11 SP Cómo instalar la unidad 1 Para prevenir la vibración y el ruido, asegúrese que la unidad esté instalada con seguridad y firmeza. 2 Instale la unidad fuera de la luz solar directa. 3 No debe haber obstáculos, como una cerca o una pared, dentro 20” desde la parte posterior del gabinete porque ev...
Page 44 - Preparación de la carcasa
12 SP Preparación de la carcasa 1 Quite los 4 tornillos que sujetan la carcasa en ambos lados y en la parte posterior. (Guárdelos para utilizarlos más adelante.) Tornillos Tornillos incluidos incluidos 2 Saque la unidad de la carcasa sujetando el asa de la bandeja base y tirando de ella hacia adelan...
Page 45 - Instalación de la carcasa
13 SP Instalación de la carcasa Umbral interno Umbral interno Linea central Linea central Umbral externo Umbral externo 1 Abra la ventana. Marque una línea en el centro del umbral interno.Coloque con cuidado el gabinete en la ventana y alinee el orificio central en la parte inferior frontal del gabi...
Page 46 - Instalación de la unidad
14 SP 6 Monte el gabinete en el alféizar de la ventana con 3 tornillos tipo B en los agujeros en el ángulo frontal. Carril de la Carril de la ventana de ventana de guillotina guillotina Ángulo delantero Ángulo delantero Tornillos (Tipo B) Tornillos (Tipo B) 7 Extraiga cada panel de cortina hasta que...
Page 48 - Panel de control y control remoto
16 SP FUNCIONAMIENTO Panel de control y control remoto 1 2 3 4 7 5 6 Remote Control 1 4 2 7 3 NOTA • La función puede cambiar según el tipo de modelo. 1 Power ( t ) (Alimentación) Pulse este botón para encender o apagar el acondicionador de aire. 4 Operation Mode (Modo de funcionamiento) Pulse el bo...
Page 49 - Control remoto inalámbrico; Inserción de las baterías
17 SP 5 Wi-Fi (Solo Modelo de Wi-Fi) Permite conectar el acondicionador de aire al Wi-Fi doméstico. NOTA • Siga las instrucciones de la Aplicación LG ThinQ sobre cómo conectarse a su unidad. 6 Clean Filter (Limpiar filtro) El LED Clean Filter se enciende para notificar que debe limpiarse el filtro. ...
Page 50 - Dirección del aire; Ajuste de la dirección del flujo de; Funciones adicionales; Ventilador Slinger
18 SP Dirección del aire El flujo de aire puede ajustarse cambiando la dirección de las lamas del acondicionador de aire. Ajuste de la dirección del flujo de aire horizontal El flujo de aire horizontal se ajusta moviendo las palancas de las lamas verticales hacia la izquierda o hacia la derecha. NOT...
Page 51 - FUNCIONES INTELIGENTES; Aplicación LG ThinQ; Funciones de la aplicación LG ThinQ
19 SP FUNCIONES INTELIGENTES Aplicación LG ThinQ Esta característica solo está disponible en el modelo con el logo b o ThinQ . La aplicación LG ThinQ le permite comunicarse con el electrodoméstico usando un teléfono inteligente. Funciones de la aplicación LG ThinQ Comuníquese desde un Smartphone usa...
Page 53 - Aviso de la FCC
21 SP Aviso de la FCC El siguiente aviso cubre el módulo transmisor contenido en este producto.Este equipo fue probado y se determinó que cumple con los límites para los dispositivos digitales de Clase B, en conformidad con la parte 15 de las normas de la FCC. Estos límites están diseñados para ofre...
Page 54 - MANTENIMIENTO; Filtro de aire; Limpieza del filtro de aire; Limpieza del acondicionador de
22 SP MANTENIMIENTO ADVERTENCIA • Antes de limpiar o realizar el mantenimiento, desconecte el suministro de electricidad y espere que el ventilador se detenga. Filtro de aire Revisar el filtro de aire al menos dos veces al mes para comprobar si es necesaria su limpieza. Las partículas atrapadas en e...
Page 55 - SOLUCIÓN DE PROBLEMAS; Antes de llamar al servicio técnico
23 SP SOLUCIÓN DE PROBLEMAS Antes de llamar al servicio técnico El artefacto está equipado con un sistema automático de monitoreo de errores para detectar y diagnosticar problemas en una etapa temprana. Si el artefacto no funciona adecuadamente o si no funciona en absoluto, verifique lo siguiente an...
Page 59 - GARANTÍA
27 SP GARANTÍA AVISO DE ARBITRAJE: ESTA GARANTÍA LIMITADA CONTIENE UNA CLÁUSULA DE ARBITRAJE QUE LE DEMANDA A USTED Y A LG RESOLVER CONFLICTOS A TRAVÉS DE UN ARBITRAJE VINCULANTE EN LUGAR DE HACERLO EN LA CORTE, A MENOS QUE USTED DECIDA NO PARTICIPAR. EN EL ARBITRAJE NO ESTÁN PERMITIDAS LAS ACCIONES...
Page 60 - PARA SUS REGISTROS
28 SP • Los productos cuyos números de serie de fábrica originales hayan sido quitados, borrados o cambiados de ninguna manera. • Las reparaciones cuando el producto se utiliza para cualquier cosa fuera de lo normal y del uso doméstico habitual (por ejemplo su alquiler, uso comercial, en oficinas o ...


 LG B24TS
User Manual
LG B24TS
User Manual
 LG LP0621WSR
User Manual
LG LP0621WSR
User Manual
 LG LP0721WSR
User Manual
LG LP0721WSR
User Manual
 LG LP0821GSSM
User Manual
LG LP0821GSSM
User Manual
 LG LP1021BHSM
User Manual
LG LP1021BHSM
User Manual
 LG LP1021BSSM
User Manual
LG LP1021BSSM
User Manual
 LG LP1419IVSM
User Manual
LG LP1419IVSM
User Manual
 LG LT1016CER
User Manual
LG LT1016CER
User Manual
 LG LT1216CER
User Manual
LG LT1216CER
User Manual
 LG LW1016ER
User Manual
LG LW1016ER
User Manual
 LG LW1017ERSM
User Manual
LG LW1017ERSM
User Manual
 LG LW1017ERSM1
User Manual
LG LW1017ERSM1
User Manual
 LG LW1217ERSM1
User Manual
LG LW1217ERSM1
User Manual
 LG LW1221HRSM
User Manual
LG LW1221HRSM
User Manual
 LG LW1223HR
User Manual
LG LW1223HR
User Manual
 LG LW1516ER
User Manual
LG LW1516ER
User Manual
 LG LW1521ERSM1
User Manual
LG LW1521ERSM1
User Manual
 LG LW1816ER
User Manual
LG LW1816ER
User Manual
 LG LW2423HR
User Manual
LG LW2423HR
User Manual