Page 2 - Window-Type Air Conditioner Owner’s Manual; TABLE OF CONTENTS; FOR YOUR RECORDS; READ THIS MANUAL; PRECAUTION
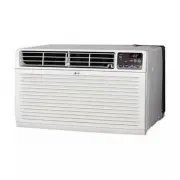
2 Room Air Conditioner Window-Type Air Conditioner Owner’s Manual TABLE OF CONTENTS FOR YOUR RECORDS Write the model and serial numbers here: Model # Serial # You can find them on a label on the side of each unit. Dealer's Name Date Purchased ■ Staple your receipt to this page in the event you need ...
Page 3 - ENGLISH; Safety Precautions; WARNING; WARNING; Installation; Be sure to follow the instruction.
Owner’s Manual 3 ENGLISH Safety Precautions Safety Precautions To prevent injury to the user or other people and property damage, the following instructionsmust be followed. Incorrect operation due to ignoring instruction will cause harm or damage. The seriousnessis classified by the following indic...
Page 4 - Operation
4 Room Air Conditioner Operation Do not place the power cord near a heater. • It may cause fire and electric shock. Do not allow water to run into electric parts. • It will cause failure of machine or electric shock. Use a soft cloth to clean. Do not use wax, thinner, or a strong detergent. • The ap...
Page 5 - CAUTION
Owner’s Manual 5 ENGLISH Safety Precautions CAUTION Installation Do not operate or stop the unit by inserting or pulling out the power plug. • It will cause electric shock or firedue to heat generation. Do not damage or use an unspecified power cord. • It will cause electric shock or fire. Do not op...
Page 7 - No correlation between fan usage and oxygen depletion.
7 2. No correlation between fan usage and oxygen depletion. 3.
Page 8 - This symbol alerts you to the risk of electric shock.; NOTICE; Introduction; Symbols Used in this Manual; THE SLEEVE AND THE REAR GRILLE
8 Room Air Conditioner Introduction This symbol alerts you to the risk of electric shock. This symbol alerts you to hazards that could cause harm tothe air conditioner. This symbol indicates special notes. NOTICE This appliance should be installed in accordance with the National Electric Code. Intro...
Page 9 - Avoid shock hazard. This unit cannot
RESET TEST 9 should be Avoid shock hazard. This unit cannot be user-serviced. Do N 27 open the tamper-resistant sealed portion. All warranties and performance will be voided. This unit is not intended to be used as an ON/OFF switch.
Page 11 - INSTALLATION REQUIREMENTS; ELECTRICAL SERVICE; To avoid risk of personal injury, property
Owner’s Manual 11 ENGLISH Installation Installation Remove packing materials from the wall sleeve and tapefrom the air conditioner. INSTALLATION REQUIREMENTS If you use an existing wall sleeve, you should measure its dimensions.Install the new air conditioner according to theseinstallation instructi...
Page 12 - INSTALLATION; ITEMS IN INSTALLATION HARDWARE; HOW TO INSTALL; We strongly recommend the removal of the
12 Room Air Conditioner Installation INSTALLATION • Pick a location which will allow the conditioned airto blow into the area you want. Good installationwith special attention to the proper position of theunit will lessen the chance that service will beneeded. ITEMS IN INSTALLATION HARDWARE You may ...
Page 13 - PROCEDURE A; Wall
Owner’s Manual 13 ENGLISH Installation PROCEDURE A If you are using the new sleeve (optionallysupplied with your unit), skip to step 3.Otherwise, install the plastic grille from the kit.Cut the plastic grille to 25-1/2" wide and 15-1/4" high. Place the plastic grille to the insideof the wall...
Page 14 - PROCEDURE B
14 Room Air Conditioner Installation PROCEDURE B Redirect the louvers at the back of the wall . 8 e r u g i F n i n w o h s s a e l g n a ° 0 6 o t e v e e l sThe use of pliers is recommended. If the wall sleeve already has a rear grille, skipto step 4. If the wall sleeve does not have a reargrille ...
Page 16 - PROCEDURE C
16 Room Air Conditioner Installation PROCEDURE C Redirect the louvers at the back of the wallsleeve to 60° angle as shown in Figure 14. The use of pliers is recommended. If the wall sleeve already has a rear grille, skipto step 4. If the wall sleeve does not have a reargrille or louvered panel, inst...
Page 18 - Operating Instructions; OPERATION MODE SELECTOR; Delay OFF; Delay ON; Energy Saver
18 Room Air Conditioner Operating Instructions Operating Instructions MODE TIMER POWER FAN SPEED Fan Energy Saver Cool Timer TEMP ' F F1 LOW F2 MED F3 HIGH REMOTE CONTROLLER Power Temp Fan Speed Timer Mode - when the air conditioner is off, it can be set to automatically turn OPERATION MODE SELECTOR...
Page 19 - TEMPERATURE CONTROL
Owner’s Manual 19 ENGLISH Operating Instructions TEMPERATURE CONTROL The thermostat monitors room temperature to maintain the desired temperature. The thermostat can be set between 60 F~86 F (16 C~30 C). REMOTE CONTROL SENSOR During operation in failure of electric power, the unit runs as previous s...
Page 21 - Maintenance and Service; Air Filter Cleaning; How To Attach Front Grille To Cabinent
Owner’s Manual 21 ENGLISH Maintenance and Service Maintenance and Service Air Filter Cleaning TURN THE AIR CONDITIONER OFF AND REMOVE THE PLUG FROM THE POWER OUTLET. The air filter should be checked at least twice a month to see if cleaning is necessary. Trapped particles in the filter will build up...
Page 24 - Manual del usuario del acondicionador de aire tipo Ventana; TABLA DE CONTENIDOS; PARA SUS ARCHIVOS; Precauciones de Seguridad
24 Aire Acondicionador Manual del usuario del acondicionador de aire tipo Ventana TABLA DE CONTENIDOS PARA SUS ARCHIVOS Escriba aquí el modelo y número de serie: Modelo n°: Serie n°: Puede encontrar estos datos en la etiqueta situada en ellateral de cada unidad. Nombre del distribuidor: Fecha de com...
Page 25 - ESP; Significados de los símbolos utilizados en este manual.; Instalación; Siga estas instrucciones.; ADVERTENCIA; Este símbolo indica la posibilidad de muerte o de seria lesión.
Manual del Propietario 25 ESP AÑOL Precauciones de Seguridad Precauciones de Seguridad Para evitar lesiones al usuario o a otras personas y daños a la propiedad, estas instruccionesestén seguirse. Una operación incorrecta por ignorar las instrucciones provocará lesiones o daños. La seriedad se clasi...
Page 26 - Operación
26 Aire Acondicionador Precauciones de Seguridad Operación No ponga el cable de alimentación cerca de un calentador. • Puede ocasionar un incendio y una descarga eléctrica. No permita que entre agua en las piezas eléctricas. • Puede provocar fallos en el producto o descargas eléctricas. Utilice un p...
Page 27 - un incendio o una descarga electrónica.
Manual del Propietario 27 ESP AÑOL Precauciones de Seguridad ADVERTENCIA Instalación No opere ni detenga la unidad insertando o estirando de enchufe. • De lo contrario, puede provocar una descarga eléctrica o incendio debido a la generación de calor. No dañe ni use un enchufe de alimentación no espe...
Page 29 - Preparación para el funcionamiento; Antes de poner el equipo en funcionamiento; de tiempo podría resultar peligroso para su salud.
Antes de poner el equipo en funcionamiento Manual del Propietario 29 Para cuestiones de reparación y mantenimiento, póngase en contacto con sudistribuidor de servicio autorizado. Preparación para el funcionamiento Uso Limpieza y mantenimiento Servicio Antes de poner el equipo en funcionamiento 1. Pó...
Page 30 - Este símbolo significa condicciones especiales.; CONSEJO; Introducción; Símbolos Utilizados en Este Manual; EL UNIDAD
30 Aire Acondicionador Introducción Este símbolo lo advierte de un peligro de accidente porcorriente eléctrica. Este símbolo lo adiverte de un peligro que pueda causar undaño del ventliador. Este símbolo significa condicciones especiales. CONSEJO Introducción Símbolos Utilizados en Este Manual Carac...
Page 31 - Seguraida Electrica; Datos Electricos; diseñada para
Seguraida Electrica Seguraida Electrica Datos Electricos y después RESET. Si el botón TEST no se desconecta o si el botón RESET No presione nunca el botón de prueba durante el funcionamiento,de lo contrario el enchufe podría resultar dañado. Este dispositivo contiene productos químicos, incluyendo p...
Page 32 - A. SITUACIONES EN LAS CUALES EL APARATO
Seguraida Electrica IMPORTANTE(FAVORLEA CON ATENCIÓN) POR LA SEGURIDAD PERSONAL DEL USUARIO, ESTE APARATO DEBE SER DEBÍDAMENTE NEUTRALIZADO. El cord ó n de energ í a de é ste aparato esta equipado con tres patas(cable a tierra). Utilice é ste con un enchufe de pared de tres salidas(a tierr a) para m...
Page 33 - Instalacion; REQUISITOS DE INSTALACIÓN
Manual del Propietario 33 ESP AÑOL Instalacion Instalacion Retire los materiales de embalaje del soporte de pared depared y la cinta del aire acondicionado. REQUISITOS DE INSTALACIÓN Si utiliza un soporte de pared de pared ya existente, deberá medir sus dimensiones. Instale el nuevo aireacondicionad...
Page 34 - INSTALACIÓN
Instalacion INSTALACIÓN • Escoja una ubicación que permita al aire acondicionado soplar hacia el área que desee. Una buena instalación,prestando especial atención a la posición correcta de launidad reducirá la necesidad de reparaciones. ARTÍCULOS EN EL HARDWARE DEINSTALACIÓN Usted puede no necesitar...
Page 35 - PROCEDIMIENTO A
Manual del Propietario 35 ESPAÑOL Instalacion PROCEDIMIENTO A Si está utilizando un nuevo soporte de pared(incluido opcionalmente con su unidad), salte alpaso 3. Si no es así, instale la rejilla plástica. Cortela rejilla plástica a 25-1/2" de ancho y 15-1/4” dealto. Coloque la rejilla plástica e...
Page 36 - PROCEDIMIENTO B
Instalacion PROCEDIMIENTO B Redireccione las rejillas de ventilación en la parteposterior del soporte de pared a un ángulo de 60°según muestra la FIG. 8 . Recomendamos el uso de alicates. Si el soporte de pared ya cuenta con una rejillaposterior, salte al paso 4. Si el soporte de pared notiene una r...
Page 38 - PROCEDIMIENTO C
38 Aire Acondicionador Instalacion PROCEDIMIENTO C Redireccione las rejillas de ventilación en la parteposterior del soporte de pared a un ángulo de 60°según muestra la Figure 14. Recomendamos el uso de alicates. Si el soporte de pared ya cuenta con una rejillaposterior, salte al paso 4. Si el sopor...
Page 40 - Instruccionnes de Funcionamiento; POWER
40 Aire Acondicionador Instruccionnes de Funcionamiento Instruccionnes de Funcionamiento MODE TIMER POWER FAN SPEED Fan Energy Saver Cool Timer TEMP ' F F1 LOW F2 MED F3 HIGH Power Temp Fan Speed Timer Mode POWER El funcionamiento se inicia cuando se pulsa esta tecla y se detiene cuando se la presio...
Page 41 - CONTROL DE TEMPERATURA; Insertar las baterías del control remoto; Vuelva a colocar la cubierta
Manual del Propietario 41 ESP AÑOL Instruccionnes de Funcionamiento CONTROL DE TEMPERATURA El termostato monitorea la temperature de la habitacion para mantener la temperatura deseada. El termostato puede ser colocado entre 60 . SENSOR DEL CONTROL REMOTO PRECAUTIÓN: El mando a distancia no funcionar...
Page 43 - Cuidado y Mantenimiento; Limpieza del filtro de aire
Manual del Propietario 43 ESP AÑOL Cuidado y Mantenimiento Cuidado y Mantenimiento MODE TIMER POWER FAN SPEED Fan Energy Saver Cool Timer TEMP ' F F1 LOWF2 MEDF3 HIGH APAGUE EL ACONDICIONADOR DE AIRE Y DESENCHÚFELO DE LA FUENTE DE PODER. El filtro de aire debe ser controlado al menos dos veces al me...
Page 46 - Garantía
Garantía GARANTÍA LIMITADA DEL AIRE ACONDICIONADO LG - EE.UU. COBERTURA DE LA GARANTÍA:LG Electronics Inc. (“LG”) garantiza que reparará o sustituirá, gratuitamente, su producto si resulta defectuoso en materiales o mano de obra bajo condiciones normales de uso durante el periodo de garantía mencion...
Page 47 - WARRANTY; LG ROOM AIR CONDITIONER LIMITED WARRANTY - USA
WARRANTY LG ROOM AIR CONDITIONER LIMITED WARRANTY - USA WHAT THIS WARRANTY COVERS:LG Electronics U.S.A., Inc. (“LG”) warrants your LG Room Air Conditioner ("product") against defect in materials or workmanshipunder normal household use, during the warranty period set forth below, LG will, at...