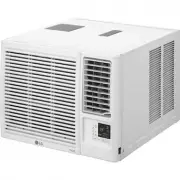
LG LT1030HR - Manuals
LG LT1030HR Air Conditioner – User Manual in PDF format online.
Manuals:
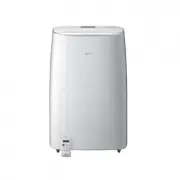
User Manual LG LT1030HR


Summary
2 Room Air Conditioner FOR YOUR RECORDS Write the model and serial numbers here: Model # Serial # You can find them on a label on the side of each unit. Dealer's Name Date Purchased ■ Staple your receipt to this page in the event you need itto prove date of purchase or for warranty issues. READ THIS...
Owner’s Manual 3 ENGLISH Safety Precautions Safety Precautions To prevent injury to the user or other people and property damage, the following instructionsmust be followed. ■ Incorrect operation due to ignoring instruction will cause harm or damage. The seriousnessis classified by the following ind...
4 Room Air Conditioner Safety Precautions ■ Operation Do not place the power cord near a heater. • It may cause fire and electric shock. Do not allow water to run into electric parts. • It will cause failure of machine or electric shock. Use a soft cloth to clean. Do not use wax, thinner, or a stron...
LG Air Conditioners Manuals
-
 LG B24TS
User Manual
LG B24TS
User Manual
-
LG B24TS
Manual
-
 LG B60LH
User Manual
LG B60LH
User Manual
-
 LG LB-H368GSS0
User Manual
LG LB-H368GSS0
User Manual
-
 LG LP0621WSR
User Manual
LG LP0621WSR
User Manual
-
 LG LP0721WSR
User Manual
LG LP0721WSR
User Manual
-
 LG LP0821GSSM
User Manual
LG LP0821GSSM
User Manual
-
 LG LP1021BHSM
User Manual
LG LP1021BHSM
User Manual
-
 LG LP1021BSSM
User Manual
LG LP1021BSSM
User Manual
-
 LG LP1419IVSM
User Manual
LG LP1419IVSM
User Manual
-
 LG LT1016CER
User Manual
LG LT1016CER
User Manual
-
 LG LT1216CER
User Manual
LG LT1216CER
User Manual
-
 LG LT-B2861HL
User Manual
LG LT-B2861HL
User Manual
-
 LG LW1016ER
User Manual
LG LW1016ER
User Manual
-
 LG LW1017ERSM
User Manual
LG LW1017ERSM
User Manual
-
 LG LW1017ERSM1
User Manual
LG LW1017ERSM1
User Manual
-
 LG LW1216ER
User Manual
LG LW1216ER
User Manual
-
 LG LW1217ERSM1
User Manual
LG LW1217ERSM1
User Manual
-
 LG LW1221HRSM
User Manual
LG LW1221HRSM
User Manual
-
 LG LW1223HR
User Manual
LG LW1223HR
User Manual