LG LP0817WSR - Manuals
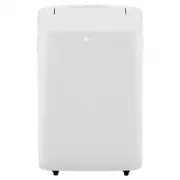
User Manual LG LP0817WSR


Summary
2 .................................8 ........................................10 ...................................................................12 ........................................7 ...........................................................6 ......................................3 ..........
SAFETY INSTRUCTIONS IMPORTANT SAFETY INSTRUCTIONS WARNING Installation Your safety and the safety of others are very important. We have provided many important safety messages in this manual and on your appliance. Always read and follow all safety messages. This is the safety alert symbol.This symbo...
4 SAFETY INSTRUCTIONS Operation • Use this appliance only for its intended purpose.• Never attempt to operate this appliance if it is damaged, malfunctioning, partially disassembled, or has missing or broken parts, including a damaged cord or plug. • Repair or immediately replace all power cords tha...
LG Air Conditioners Manuals
-
 LG B24TS
User Manual
LG B24TS
User Manual
-
LG B24TS
Manual
-
 LG LP0621WSR
User Manual
LG LP0621WSR
User Manual
-
 LG LP0721WSR
User Manual
LG LP0721WSR
User Manual
-
 LG LP0821GSSM
User Manual
LG LP0821GSSM
User Manual
-
 LG LP1021BHSM
User Manual
LG LP1021BHSM
User Manual
-
 LG LP1021BSSM
User Manual
LG LP1021BSSM
User Manual
-
 LG LP1419IVSM
User Manual
LG LP1419IVSM
User Manual
-
 LG LT1016CER
User Manual
LG LT1016CER
User Manual
-
 LG LT1216CER
User Manual
LG LT1216CER
User Manual
-
 LG LW1016ER
User Manual
LG LW1016ER
User Manual
-
 LG LW1017ERSM
User Manual
LG LW1017ERSM
User Manual
-
 LG LW1017ERSM1
User Manual
LG LW1017ERSM1
User Manual
-
 LG LW1216ER
User Manual
LG LW1216ER
User Manual
-
 LG LW1217ERSM1
User Manual
LG LW1217ERSM1
User Manual
-
 LG LW1221HRSM
User Manual
LG LW1221HRSM
User Manual
-
 LG LW1223HR
User Manual
LG LW1223HR
User Manual
-
 LG LW1516ER
User Manual
LG LW1516ER
User Manual
-
 LG LW1521ERSM1
User Manual
LG LW1521ERSM1
User Manual
-
 LG LW1816ER
User Manual
LG LW1816ER
User Manual