LG LP0522WSR - Manuals
LG LP0522WSR Air Conditioner – User Manual in PDF format online.
Manuals:
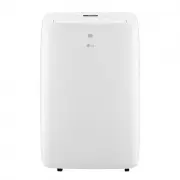
User Manual LG LP0522WSR


Summary
TABLE OF CONTENTS 18 OPERATION 21 SMART FUNCTIONS 21 LG ThinQ Application (On Some Models) 18 Control Panel and Remote Control 3 SAFETY INSTRUCTIONS 3 IMPORTANT SAFETY INSTRUCTIONS 8 PRODUCT OVERVIEW 8 Key Parts and Components 9 INSTALLATION 9 Electrical Information 10 Before Installing the Air Cond...
SAFETY INSTRUCTIONS READ ALL INSTRUCTIONS BEFORE USE Your safety and the safety of others are very important. We have provided many important safety messages in this manual and on your appliance. Always read and follow all safety messages. This is the safety alert symbol. This symbol alerts you to p...
When the power cord is to be replaced, replacement work shall be performed by authorized personnel only using only genuine replacement parts. . Connect to a properly rated, protected, and sized power circuit to avoid electrical overload. Always plug into a grounded outlet. Do not under any circumsta...
LG Air Conditioners Manuals
-
 LG B24TS
User Manual
LG B24TS
User Manual
-
LG B24TS
Manual
-
 LG B60LH
User Manual
LG B60LH
User Manual
-
 LG LB-H368GSS0
User Manual
LG LB-H368GSS0
User Manual
-
 LG LP0621WSR
User Manual
LG LP0621WSR
User Manual
-
 LG LP0721WSR
User Manual
LG LP0721WSR
User Manual
-
 LG LP0821GSSM
User Manual
LG LP0821GSSM
User Manual
-
 LG LP1021BHSM
User Manual
LG LP1021BHSM
User Manual
-
 LG LP1021BSSM
User Manual
LG LP1021BSSM
User Manual
-
 LG LP1419IVSM
User Manual
LG LP1419IVSM
User Manual
-
 LG LT1016CER
User Manual
LG LT1016CER
User Manual
-
 LG LT1216CER
User Manual
LG LT1216CER
User Manual
-
 LG LT-B2861HL
User Manual
LG LT-B2861HL
User Manual
-
 LG LW1016ER
User Manual
LG LW1016ER
User Manual
-
 LG LW1017ERSM
User Manual
LG LW1017ERSM
User Manual
-
 LG LW1017ERSM1
User Manual
LG LW1017ERSM1
User Manual
-
 LG LW1216ER
User Manual
LG LW1216ER
User Manual
-
 LG LW1217ERSM1
User Manual
LG LW1217ERSM1
User Manual
-
 LG LW1221HRSM
User Manual
LG LW1221HRSM
User Manual
-
 LG LW1223HR
User Manual
LG LW1223HR
User Manual