Page 2 - TABLE OF CONTENTS
2 English Version Spanish Version Important Safety Instructions 3-4 Requirements for Ground Connection Parts and Features 5-6 Refrigerator Installation 7-14 - Unpacking 7 Installation 7 How to remove and install Handle 8 How to remove and Install the Refrigerator Doors 9 How to remove and Install Pu...
Page 3 - KEEP THESE INSTRUCTIONS; DO NOT store explosive substances such as aerosol
IMPORTANT SAFETY INSTRUCTIONS 3 This manual contains several important safety notices. Always read and obey all of the following safety messages. This is the safety alert symbol. This symbol is a warning to potential dangers that could cause death, injury or damage to you, others or the product. All...
Page 4 - CHILDREN MAY BECOME TRAPPED
4 This appliance is not intended for use by children, persons with physical or mental disabilities, persons with reduced sensory or mental capacity, or persons with lack of experience or know-how, unless they have supervision or instruction in relation to the use of the appliance by the person respo...
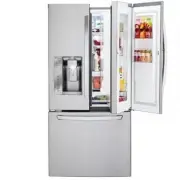
Page 5 - PARTS AND FEATURES
5 PARTS AND FEATURES SPECIAL FEATURES CONTROL PANEL LED DISPLAY SCREEN Simple electronic controls are user-friendly. The LED screen shows refrigerator and freezer temperatures, displays water filter status, dispenser information, and more. ICE PLUS When this feature is activated, the freezer section...
Page 6 - The refrigerator compartment shelves are
6 PARTS AND FEATURES KEY PARTS AND COMPONENTS In addition to the special features and components outlined in the Special Features section , there are several other important components that are referenced in this manual. ADJUSTABLE REFRIGERATOR SHELVING The refrigerator compartment shelves are adjus...
Page 7 - EXCESSIVE WEIGHT HAZARD; WARNING; EXPLOSION HAZARD; This appliance is intended to be used in household
7 REFRIGERATOR INSTALLATION WARNING EXCESSIVE WEIGHT HAZARD Use the assistance of two or more persons to move or install the refrigerator. Not following these instructions may cause injury to the back and other parts of the body. UNPACKING Moving Your Refrigerator: Your refrigerator is extremely hea...
Page 8 - TOOLS YOU MAY NEED; /4 in (6 mm); NOTE: Handle appearance may vary from illustrations on this page.; Allen wrench and remove the handle.; Removing Freezer Drawer Handle; and remove the handle.; DOOR HANDLE INSTALLATION; Reinstalling Freezer Drawer Handle; REFRIGERATOR INSTALLATION
8 TOOLS YOU MAY NEED 1/4 in (6 mm) 3/8 in (10 mm) Hex Socket Wrench Phillips Screwdriver Flat Head Screwdriver Allen Wrench NOTE: It is always recommended that the doors be removed when it is necessary to move the refrigerator through a narrow opening. If it is necessary to remove the handles follow...
Page 9 - HOW TO REMOVE AND INSTALL REFRIGERATOR DOOR; Left Door
9 REFRIGERATOR INSTALLATION HOW TO REMOVE AND INSTALL REFRIGERATOR DOOR 1. Removing Refrigerator DoorsRemove the left-side door first. NOTE: Handle, top hinge and hinge cover appearance may vary from illustrations on this page. WARNING Disconnect electrical supply to the refrigerator before installi...
Page 10 - HOW TO REMOVE AND INSTALL; Righ
10 HOW TO REMOVE AND INSTALL REFRIGERATOR DOOR (CONT.) 2. Refrigerator Door ReinstallationInstall the right-side door first. Righ Image only for reference Image only for reference t Door Lower the door onto the middle hinge pin (1). Make sure the door is aligned with the cabinet.Fit the top hinge (2...
Page 11 - Hook the tab on the door-switch side of the cover; CAUTION; Insert the tube until you can see only one of the lines; Correct
11 Insert the water supply tube into the connector.Insert the tube at least 5/8 in. (15 mm) into the connector. Hook the tab on the door-switch side of the cover under the edge of the wire opening in the cabinet top. Position the cover into place. Insert and tighten the cover screw. CAUTION 1. Inser...
Page 12 - HOW TO REMOVE AND INSTALL THE PULL; Removing Pull out Drawer; Durabase; CAUTION: When removing drawer door, do not; Rail tabes
12 HOW TO REMOVE AND INSTALL THE PULL OUT DRAWER (3 DOORS MODELS). 1. Removing Pull out Drawer IMPORTANT: To avoid possible injury, product or property damage, you will need two persons to perform the following instructions. Pull the drawer open to full lower extension. Remove the durabase by liftin...
Page 13 - HOW TO REMOVE AND INSTALL THE PULL OUT; Installing Pull out Drawer; Lower door into final position and tighten the; Screws
13 Push the rails back into drawer cavity. With both hands, hold the center of the bar and push it in so that both rails go back simultaneously. (Fig.7) (Fig. 8) Fig. 7 Fig. 8 HOW TO REMOVE AND INSTALL THE PULL OUT DRAWER (CONT.) 2. Installing Pull out Drawer IMPORTANT: To avoid possible injury, pro...
Page 14 - CLOSING AND ALIGNING THE DOORS; Door Alignment
14 CLOSING AND ALIGNING THE DOORS Closing the Doors Your refrigerator has two front leveling screws, one on the right and one on the left. If your refrigerator seems unstable or if you would like the doors to close more easily, simply adjust the inclination of the refrigerator by following the instr...
Page 15 - USING YOUR REFRIGERATOR
15 NOTE: The shape of the buttons may not match your model. LED DISPLAY ICE TYPE / ICE PLUS FREEZER BUTTON REFRIGERATOR BUTTON AIR FILTER BUTTON (in some models) LIGHT/WATER FILTER BUTTON DOOR ALARM/LOCK BUTTON 1 2 5 6 7 1 2 3 4 5 6 7 CONTROL PANEL FEATURES USING YOUR REFRIGERATOR 3 4 The LED displa...
Page 16 - THE LED DISPLAY
16 CAUTION Display mode setting and its cancellation USING YOUR REFRIGERATOR THE LED DISPLAY The LED display shows the temperature settings, dispenser options, water filter, door alarm, and locking status messages. DISPENSER SELECTION INDICATOR Shows Cubed ice or Crushed Ice selection that will be d...
Page 17 - TEMPERATURE DISPLAY; or; CAUTION WHEN CLOSING THE DOOR
17 ADJUSTING THE TEMPERATURES AND DISPLAY Adjust Freezer Temperature To adjust the temperature in the freezer compartment, press the FREEZER button to cycle through the the range of available settings. To adjust the temperature in the refrigerator compartment, press the REFRIGERATOR button to cycle ...
Page 18 - OPERATING THE DISPENSER; Incorrect
18 USING YOUR REFRIGERATOR OPERATING THE DISPENSER DISPENSING CRUSHED ICE Press the ICE TYPE button to illuminate the Crushed Ice icon. Press the push ice switch with a glass or other con- tainer and crushed ice will be dispensed. DISPENSING CUBED ICE Press the ICE TYPE button to illuminate the Cube...
Page 19 - SETTING THE FUNCTIONS; The Air Filter has two
19 SETTING THE FUNCTIONS SETTING THE DISPENSER LOCK Press and hold the ALARM/LOCK button for three seconds to lock the dispenser and all of the other control panel functions. Press and hold again for 3 seconds to unlock. NOTE: The function lock in models without Energy Saving do not lock water and I...
Page 20 - SPACEPLUS ICE SYSTEM
20 USING YOUR REFRIGERATOR SPACEPLUS ICE SYSTEM CAUTION Keep hands and tools out of the ice compartment door and dispenser chute. You could break some- thing or injure yourself. The icemaker will stop producing ice when the ice bin is full. If you need more ice, empty the ice bin into the ex- tra ic...
Page 21 - AUTOMATIC ICEMAKER; NOTE: It is normal that a noise is produced when ice; Personal Injury Hazard; NOTE: Do not dispense ice continuously for more
21 AUTOMATIC ICEMAKER Ice is made in the automatic icemaker and sent to the dispenser. The automatic icemaker can make 10 or 12 ice cubes (depending on your device) at a time, above 100 cubes per 24-hour period. This quantity may vary by circumstance, including freezer compartment temperature, room ...
Page 22 - FOOD STORAGE GUIDE
22 USING YOUR REFRIGERATOR ADJUSTING CONTROL SETTINGS Give the refrigerator time to cool down completely before adding food. It is best to wait 24 hours before adding food to the refrigerator. The mid-settings indicated in the previous section should be correct for normal household refrigerator usag...
Page 23 - IMPORTANT: Do not keep bottles in the freezer; compartment, they may explode after freezing and; REFRIGERATOR SHELVES
23 Packaging Recommendations: Use sealed plastic containers. Use plastic containers with a smooth surface. Package with aluminum foil of high resistance. Wrap with paper layered with plastic. Use water proof plastic. Use recommended plastic bags to store frozen foods. Follow these packaging or conta...
Page 24 - In order to remove a shelf from a metal frame; CRISPER HUMIDITY CONTROL (in some models); “High”: keeps moist air in the crisper for best storage; To remove or replace the crisper cover support:; Lift the front of the drawer up, then pull it straight out; NOTE: Removing the fixed door bin is recommended to; reduce the risk of door bin scratches.
24 USING YOUR REFRIGERATOR Sliding Shelves (in some models) You can slide some of the shelves in your refrigerator towards inside or outside like explained below. To slide the shelf towards the outside: Pull towards you, figure A. To slide the shelf towards the inside: Push until it stops, figure B....
Page 25 - Selection Button; DOOR RACKS; NOTE
25 USING YOUR REFRIGERATOR Selection Button Glide‘N’Serve (In some models). DOOR RACKS y WARNING: CAUTION w y NOTE 1 2 DISPENSER DRIP TRAY (in some models) V EG ETA BLE FRU IT V EG ETA BLE FRU IT Select w y y y y
Page 26 - To reinstall Ice Bin:
26 USING YOUR REFRIGERATOR FREEZER SECTION ICE BIN (In some models)To remove Ice Bin: Pull the drawer as much as possible (1). Raise the ice box and take it out carefully (2). To reinstall Ice Bin: Take the drawer off as much as possible and put the ice bin in the right position. DURABASE (in some m...
Page 27 - For best results, do not move the phone while
USING YOUR REFRIGERATOR DOOR-IN-DOOR The Door-in-Door cmpartment allows for easy access for commonly used food items. The outer Door-in-Door includes two door bins, the Cheese&Butter and Condiments bins, that are specially designed for food, this makes spreading butter and slicing cheese easier....
Page 28 - ELECTRICAL SHOCK HAZARD; REFRIGERATOR CARE AND CLEANING
28 WARNING EXPLOSION HAZARD Do not use flammable cleaners. Not following these instructions can cause death, explosion or fire. The refrigerator, as well as the freezer, do their own de-freezing. This process does not prevent the build up of contaminants, therefore it is suggested that you clean bot...
Page 30 - Remove the old cartridge.; NOTE: Replacing the filter causes a small amount
30 REPLACING THE WATER FILTER (TYPE 1) It is recommended that you replace the filter approximately every 6 months, when the water filter indicator reaches 0 months, or when the ice and water dispenser noticeably decreases out-put. Remove the old cartridge. 1. Press the push button to open the filter...
Page 31 - through filter before use (flush for approximately; Filter Bypass Plug
31 REPLACING THE WATER FILTER Replace with a new cartridge. 1. Take the new cartridge out of its packing and remove the protective cover from the o-rings. With cartridge ears in the horizontal position, push the new filter cartridge into the manifold hole until it stops. 2. Firmly lock in the cartri...
Page 32 - Performance Data Sheet; the reduction of substances listed below.
32 REFRIGERATOR CARE AND CLEANING Performance Data Sheet Model: LG ADQ36006101-S Use Replacement Cartridge: ADQ36006101 The concentration of the indicated substances in water entering the system was reduced to a concentration less than or equal to the permissible limit for water leaving the system a...
Page 34 - WATER FILTER; State of California; Water Treatment Device; Asbestos
34 WATER FILTER State of California Department of Public Health Water Treatment Device Certificate Number Date Issued: December 15, 2009 Trademark/Model Designation Replacement Elements - 9 0 8 1 0 2 ADQ36006101-S ADQ36006101 Manufacturer: Cuno Inc. The water treatment device(s) listed on this certi...
Page 35 - A cold water source. Water pressure should be between; INSTALLATION INSTRUCTIONS; CONNECTING THE WATER LINE
35 BEFORE START The water source is not guaranteed by the refrigerator manufacturer. Follow instructions carefully in order to reduce damage. Air located inside the water pipes can cause hammering or tapping causing damage to the inner pipes or water spillage in the inside of the refrigerator. Call ...
Page 36 - DRILL A HOLE FOR THE VALVE; PLACE THE PIPELINE; NOTE: Make sure there is a sufficient amount of extra; CONNECT PIPELINE TO VALVE; NOTE: Codes for 248 CMR pipelines of the state of; CONNECT PIPE TO REFRIGERATOR; IMPORTANT: Never use old or used hoses. Always use
36 3. DRILL A HOLE FOR THE VALVE Drill a 1/4” (6,35 mm) diameter hole in the water pipeline. Remove jagged edges produces after perforation. Make sure water does not reach the drill. Not performing the 1/4” (6,35 mm) perforation can lead to a low or smaller ice production. 4. TIGHTEN THE VALVE Tight...
Page 37 - OPEN THE BYPASS VALVE; ON position. Ice maker
37 Remove the ring plug (1) from the valve located at the top of such device. Place compression nut and the ferule at the end of the pipeline. Insert pipeline into the connection valve as far as possible. Hold tightly while holding pipeline. Compression Nut 1/4” Ferule Hold on to the pipe from the h...
Page 38 - UNDERSTANDING SOUNDS YOU MAY HEAR; THE REFRIGERATOR; TROUBLESHOOTING GUIDE
38 UNDERSTANDING SOUNDS YOU MAY HEAR Your new refrigerator might produce certain noises that your previous refrigerator did not. It is normal if you worry. Most of the new sounds you will be hearing are actually normal and expected. Hard surfaces like walls or floor can increase sounds and make them...
Page 41 - SMART DIAGNOSIS; Using Smart Diagnosis; For best results, do not move the phone while the
41 SMART DIAGNOSIS SMART DIAGNOSIS (In some models). Using Smart Diagnosis NOTE For best results, do not move the phone while the tones are being transmitted.If the call center agent is not able to get an accurate recording of the data, you may be askedto try again. TM TM TM TM TM TM Should you expe...
Page 42 - LIMITED WARRANTY; PURCHASE PRICE PAID BY YOU FOR THE PRODUCT.
42 LIMITED WARRANTY LG ELECTRONICS U.S.A., INC. LG REFRIGERATOR LIMITED WARRANTY - U.S.A. WARRANTY PERIOD Refrigerator/Freezer Sealed System (Condenser, Dryer, Connecting Tube and Evaporator) Compressor One (1) year from the date of original retail purchase Parts and Labor (internal/ functional part...
Page 43 - PROCEDURE FOR RESOLVING DISPUTES:
43 LIMITED WARRANTY PROCEDURE FOR RESOLVING DISPUTES: ALL DISPUTES BETWEEN YOU AND LG ARISING OUT OF OR RELATING IN ANY WAY TO THIS LIMITED WARRANTY OR THE PRODUCT SHALL BE RESOLVED EXCLUSIVELY THROUGH BINDING ARBITRATION, AND NOT IN A COURT OF GENERAL JURISDICTION. BINDING ARBITRATION MEANS THAT YO...
Page 46 - Severability and Waiver.
46 LIMITED WARRANTY by the applicable arbitration rules. If your claim exceeds $25,000, the right to a hearing will be determined by the applicable arbitration rules. Any in-person arbitration hearings will be held at the nearest, most mutually-convenient arbitration location available within the pr...
Page 47 - PAÑOL; MANUAL DE USUARIO; REFRIGERADOR; Lea detenidamente este manual antes de empezar
www.lg.com ES PAÑOL MANUAL DE USUARIO REFRIGERADOR CON CONGELADOR INFERIOR Lea detenidamente este manual antes de empezar a utilizar el refrigerador y guárdelo como referencia para el futuro. Copyright © 2014 - 2018 LG Electronics Inc. Todos los Derechos Reservados
Page 48 - TABLA DE CONTENIDO
48 Versión Inglés Versión Español 48 Instrucciones importantes de seguridad 49-50 Requerimientos de Conexión a Tierra 50 Partes y Características 51-52 Instalación del Refrigerador 53-60 Desempaque 53 Instalación 53 Cómo quitar y cambiar las manijas 54 Cómo quitar y cambiar las puertas del Refrigera...
Page 49 - GUARDE ESTAS INSTRUCCIONES; PELIGRO; MENSAJES DE SEGURIDAD; NOTA: Le recomendamos realizar; cualquier clase d; Evite el uso de; Lávese las manos después de su uso.
49 Hemos incluido muchos mensajes importantes de seguridad en este manual. Lea y obedezca siempre todos los mensajes de seguridad. Este es el símbolo de advertencia de seguridad. Este símbolo le llama la atención sobre peligros potenciales que pueden ocasionar la muerte o una lesión a usted y a los ...
Page 50 - CONEXIÓN; PELIGRO DE CHOQUE ELÉCTRICO; USO DE CABLES DE EXTENSIÓN; REEMPLAZO DE CABLE DE CORRIENTE; LOS NIÑOS PUEDEN QUEDAR ATRAPADOS; Manténgase alejado de las gavetas móviles
50 Este aparato no está destinado para su uso por las personas (incluidos niños) con capacidad física, sensorial o mental reducida, falta de experiencia y conocimientos, a menos que se les haya dado la supervisión o instrucción en relación con el uso del aparato por la persona responsable de su segu...
Page 51 - Esta guía recoge las instrucciones relativas; PARTES Y CARACTERÍSTICAS
51 CARACTERÍSTICAS ESPECIALES PANTALLA DE LED DEL PANEL DE CONTROL Los simples controles electrónicos son fáciles de usar. La pantalla de LED indica temperaturas del refrigerador y del congelador, muestra el estado del filtro de agua, información sobre el dispensador, y más. ICE PLUS Si está activada...
Page 53 - DESEMPAQUE; ADVERTENCIA; INSTALACIÓN; INSTALACIÓN DEL REFRIGERADOR; ADVERTENCIA: Mantener libres de obstrucción las aberturas
53 ADVERTENCIA PELIGRO DE PESO EXCESIVO Use la ayuda de dos o más personas para mover e instalar el refrigerador, no seguir estas instrucciones puede ocasionar lesiones en la espalda u otras partes del cuerpo. DESEMPAQUE Cómo mover su refrigerador: Su refrigerador es muy pesado, cuando lo mueva para...
Page 54 - HERRAMIENTAS QUE USTED PUEDE NECESITAR; CÓMO QUITAR LA MANIJA DE LAS PUERTAS; Llave Allen; Para quitar la manija del Congelador
54 HERRAMIENTAS QUE USTED PUEDE NECESITAR 1/4 in (6 mm) 1/4 in (6 mm) 3/8 in (10 mm) 3/32 Llave Tubular de Cabeza Hexagonal Destornillador Phillips Destornillador Plano Llave Allen NOTA: Para mover el refrigerador a través de la puerta de una casa, puede que sea necesario quitar las manijas de las p...
Page 55 - CÓMO QUITAR Y CAMBIAR LAS PUERTAS DEL REFRIGERADOR; Puerta Izquierda; Abra la puerta. Retire el tornillo de la tapa de la bisagra superior.; Puerta Derecha
55 CÓMO QUITAR Y CAMBIAR LAS PUERTAS DEL REFRIGERADOR 1. Para Quitar las puertas del RefrigeradorNOTA: La apariencia de la manija, bisagra y cubierta de la bisagra puede variar. ADVERTENCIA ţ Desconecte el suministro eléctrico de la refrigeradora antes de la instalación. No hacerlo podría causar les...
Page 56 - Reinstalación de la Puerta del Refrigerador; Instale primero la puerta derecha; Puerta; Asegúrese de que la puerta este alineada con el
56 2. Reinstalación de la Puerta del Refrigerador Instale primero la puerta derecha Puerta Derecha ţ Baje la puerta sobre la clavija de la bisagra del medio (1). ţ Asegúrese de que la puerta este alineada con el gabinete interior. ţ Coloque la bisagra superior (2) sobre el sujetador de la palanca de...
Page 57 - Coloque la tapa en su lugar.; PRECAUCIÓN; Inserte el tubo hasta que sólo pueda ver una línea.; Correcto; Collar
INSTALACIÓN DEL REFRIGERADOR 57 ţ Introduzca el tubo de suministro de agua dentro del conector. ţ Introduzca el tubo por lo menos 5/8 in. (15 mm) dentro del conector. ţ Enganche la lengüeta de la tapa, ubicada en el lado del interruptor de la puerta, bajo el extremo de la ap-ertura del cableado en l...
Page 58 - Para Retirar el Cajón Deslizable; Para evitar una posible lesión, daño al; Canasta Inferior; Retire los tornillos de ambos lados de la guía.; Tornillos; Al colocar el cajón en el piso,; derecho e
58 CÓMO RETIRAR E INSTALAR EL CAJÓNDESLIZABLE (MODELOS 3 PUERTAS). 1. Para Retirar el Cajón Deslizable IMPORTANTE: Para evitar una posible lesión, daño al producto o a la propiedad, Ud. necesitará dos personas para ejecutar las siguientes instrucciones. ţ Abra el cajón al máximo y jálelo. Retire la ...
Page 59 - Instalación del Cajón Deslizable; Para prevenir riesgos de
59 ţ Con ambas manos, sujete el centro de la barra y empuje hacia dentro para que las dos guías encajen a la vez.(Fig. 7) (Fig. 8) Fig. 7 Fig. 8 2. Instalación del Cajón Deslizable IMPORTANTE: Para evitar una posible lesión, daño al producto o a la propiedad, Ud. necesitará dos personas para ejecuta...
Page 60 - CIERRE Y ALINEACIÓN DE PUERTAS; Nivelación; Alineación de las puertas
60 CIERRE Y ALINEACIÓN DE PUERTAS Nivelación Su refrigerador cuenta con dos tornillos niveladores: uno en el lado izquierdo y otro en el lado derecho. Si su refrigerador se encuentra inestable o si Ud. desea que las puertas cierren más fácil, ajuste la inclinación del refrigerador realizando lo sigu...
Page 61 - CARACTERÍSTICAS DEL PANEL DE CONTROL; USO DEL REFRIGERADOR; PANTALLA LED
61 CARACTERÍSTICAS DEL PANEL DE CONTROL NOTA: La forma de los botones puede coincidir o no con los de su modelo. USO DEL REFRIGERADOR PANTALLA LED BOTÓN ‘ICE TYPE / ICE PLUS’ (TIPO DE HIELO / MÁS HIELO) BOTÓN ‘FREEZER’ (CONGELADOR) BOTÓN ‘REFRIGERATOR’ (REFRIGERADOR) BOTÓN ‘AIR FILTER’ (FILTRO DE AI...
Page 62 - PANTALLA DE LED; REFRIGERATOR; REFRIGERATOR; ţ3FBMJDFFMNJTNPQSPDFEJNJFOUPQBSBDBODFMBSFMNPEP
62 PANTALLA DE LED La pantalla de LEDs muestra mensajes sobre los ajustes de temperatura, las opciones del dispensador, el filtro de agua, la alarma de la puerta y los estados de bloqueo. INDICADORES DE SELECCIÓN DELDISPENSADOR Muestra la selección de hielo triturado, agua, o cubitos que se servirá c...
Page 63 - FREEZER; Ajuste de la temperatura del refrigerador
63 CÓMO AJUSTAR LAS TEMPERATURAS Y LA PANTALLA Ajuste de la temperatura del congelador Para ajustar la temperatura del congelador, presione elbotón FREEZER para desplazarse a través de las opciones de configuración. Ajuste de la temperatura del refrigerador Para ajustar la temperatura del refrigerado...
Page 64 - CÓMO OPERAR EL DISPENSADOR; Incorrecto
64 CÓMO OPERAR EL DISPENSADOR CÓMO DISPENSAR HIELO TRITURADO Presione el botón ICE TYPE para iluminar el ícono de hielo triturado. Presione el interruptor de presión con un vaso u otro recipiente y se expenderá hielo triturado. CÓMO DISPENSAR CUBITOS DE HIELO Presione el botón ICE TYPE para iluminar...
Page 65 - CÓMO CONFIGURAR LAS FUNCIONES; ón
65 CÓMO CONFIGURAR LAS FUNCIONES CÓMO CONFIGURAR EL BLOQUEO DEL DISPENSADOR Presione y sostenga el botón ALARM/LOCK (alarma/bloqueo) durante tres segundos para bloquear el dispensador y todos las otras funciones del panel de control. Presione y sostenga de nuevo por 3 segundos para desbloquear. NOTA...
Page 66 - SISTEMA SPACEPLUS ICE; NOTA: Guardar latas u otros artículos en la charola para; Video de funcionamiento; NOTA: Evite tocar el sensor de la cubitera al volver a
66 SISTEMA SPACEPLUS ICE PRECAUCIÓN Mantenga las manos y las herramientas aparte de la puerta del compartimiento para hielo y la rampa del dispensador. Podría romper algo o lastimarse usted. La máquina de hielo dejará de producir hielo cuando la charola para hielo esté llena. Si necesita más hielo, ...
Page 67 - MÁQUINA AUTOMÁTICA PARA HACER HIELO; NOTA: Es normal que se produzcan ruidos cuando el; Peligro de lesiones personales; de 5 celdas; NOTA: No dispense hielo de manera continua
67 MÁQUINA AUTOMÁTICA PARA HACER HIELO El hielo se hace en la cubitera automática y se envía al dispensador. La cubitera automática puede producir de 10 a 12 cubitos de hielo simultáneamente (dependiendo del tipo de màquina) y unos 100 cubitos en un periodo de 24 horas. Esta cantidad puede variar en...
Page 68 - CÓMO REGULAR LOS AJUSTES DEL CONTROL
68 USO DEL REFRIGERADOR CÓMO REGULAR LOS AJUSTES DEL CONTROL Antes de introducir alimentos a su refrigerador, deje que éste se enfríe primero, dejando pasar 24 horas desde el momento en que usted conecta el refrigerador. El ajuste medio indicado en la sección anterior corres-ponde a un enfriamiento ...
Page 69 - PARA GUARDAR ALIMENTOS CONGELADOS; IMPORTANTE; : No guarde botellas en el; SECCIÓN DEL REFRIGERADOR
69 PARA GUARDAR ALIMENTOS CONGELADOS NOTA: Para mayor información acerca de cómo preparar los alimentos para congelarlos así como para ver el tiempo que pueden ser almacenados, consulte una guía sobre congelamiento o una guía para cocinar. Empaque Una buena congelación depende de un empaque correcto...
Page 70 - Parrillas Deslizables (en algunos modelos); Para quitar una parrilla del marco de metal; CONTROL DE HUMEDAD EN LOS CAJONES; Para quitar y colocar las rejillas de control de humedad; ţ-FWBOUFFMWJESJPEFTQV ̈TEFIBCFSJOTFSUBEPVOEFEP; Para quitar y colocar el cajón deslizante; ţ1BSBJOTUBMBSMFWBOUFBQFOBTMBQBSUFGSPOUBMFJOTFSUFFM
70 USO DEL REFRIGERADOR NOTA: Asegúrese de que la parrilla está instalada de manera horizontal. Si no lo hace, puede provocar que la parrilla se caiga, lo que causaría el derrame o caída de alimentos. Parrillas Deslizables (en algunos modelos) Ud. puede deslizar algunas de las parrillas de su refrig...
Page 71 - Botón de selección; ANAQUELES DE LAS PUERTAS
71 USO DEL REFRIGERADOR Botón de selección Glide‘N’Serve (Cajón Deslizante, en algunos modelos). ANAQUELES DE LAS PUERTAS PRECAUCIÓN: NO permita que los niños jueguen con los anaqueles. Las esquinas filosas podrían lesionarlos. ADVERTENCIA: Alguien puede resultar herido si los anaqueles no están fir...
Page 72 - Para remover recipiente para hielos:
72 USO DEL REFRIGERADOR SECCIÓN DEL CONGELADOR RECIPIENTE PARA HIELOS (En algunos modelos). Para remover recipiente para hielos: ţ Jale el cajón tanto como sea posible (1). ţ Levante y extraiga con cuidado el recipiente para hielo (2). ţ Extraiga el cajón tanto como sea posible y coloque el recipien...
Page 73 - NOTA
USO DEL REFRIGERADOR DOOR-IN-DOOR El compartimento “Door-in-Door” permite el fácil acceso a los alimentos comúnmente utilizados. La puerta externa “Door-in-Door” incluye dos cestas , la cesta para quesos y mantequilla, y la cesta para condimentos, que han sido especialmente diseñada para alimentos. ...
Page 74 - PELIGRO DE EXPLOSIÓN; PARA LIMPIAR SU REFRIGERADOR; Desconecte su refrigerador.; EXTERIOR; Evite el contacto de la superficie de la puerta con; CUBIERTA TRASERA; La tapa posterior solo; CUIDADO DE SU REFRIGERADOR
ADVERTENCIA PELIGRO DE EXPLOSIÓN Utilice limpiadores no inflamables. No seguir ésta instrucción puede ocasionar la muerte, explosión o incendio. Tanto el refrigerador como el congelador realizan deshielo automático, a pesar de esto, limpie ambas secciones una al vez al mes para prevenir la formación ...
Page 75 - INTERRUPCIONES DE ENERGÍA
75 CUIDADO DE SU REFRIGERADOR INTERRUPCIONES DE ENERGÍA 1. Si se desconecta la energía de su hogar, llame a su compañía de energía y pregunte cuánto tiempo durará sin suministro eléctrico. 2. Si no habrá energía en las próximas 24 horas o menos, mantenga las puertas del refrigerador cerradas, para q...
Page 76 - Extracción del cartucho usado.; Presione el botón para abrir la cubierta del filtro.
CÓMO CAMBIAR EL FILTRO DE AGUA (TIPO 1) Es recomendable que cambie el filtro cada 6 mesescuando el indicador del filtro alcance los 0 meses ocuando el dispensador de agua y de hielo reduzcasustancialmente el rendimiento. Extracción del cartucho usado. 1. Presione el botón para abrir la cubierta del fil...
Page 77 - CÓMO CAMBIAR EL FILTRO DE AGUA; Extraiga el nuevo cartucho del embalaje y retire la; NOTA: Conexión de bypas del filtro; CANADA
77 CUIDADO DE SU REFRIGERADOR CÓMO CAMBIAR EL FILTRO DE AGUA Reemplace con un cartucho nuevo. 1. Extraiga el nuevo cartucho del embalaje y retire la cubierta de protección de la junta tórica. Con las aletas del cartucho en posición horizontal, empuje el nuevo cartucho en el orificio del distribuidor ...
Page 78 - Hoja de datos de rendimiento; * Basado en el uso de Cryptosporidium parvum oocysts.
78 Hoja de datos de rendimiento Modelo: LG ADQ36006101-S Utilice un recambio de cartucho: ADQ36006101 La concentración de las sustancias indicadas en el agua que entra en el sistema se redujo a una concentración menor o igual al límite permisible para el agua de salida según las especificaciones de l...
Page 79 - Mientras que las pruebas se realizaron en; Use las Instrucciones antes de la
79 CUIDADO DE SU REFRIGERADOR Guías de Uso/Parámetros de Suministro de Agua Flujo de servicio 0.5 gpm (1.9 lpm) Suministro de agua Agua potable Presión de agua 20-120Psi (138~ 827kPa) Temperatura del agua 33°F ~ 100°F (0.6°C ~ 38°C) Es indispensable que se realicen la instalación recomendada por el ...
Page 80 - FILTRO DE AGUA
80 FILTRO DE AGUA State of California Department of Public Health Water Treatment Device Certificate Number Date Issued: December 15, 2009 Trademark/Model Designation Replacement Elements - 9 0 8 1 0 2 ADQ36006101-S ADQ36006101 Manufacturer: Cuno Inc. The water treatment device(s) listed on this cer...
Page 81 - Un suministro de agua fría. La presión del agua debe; INSTRUCCIONES DE INSTALACIÓN; Conectar solamente al suministro; CIERRE EL SUMINISTRO PRINCIPAL DE AGUA; CÓMO CONECTAR LA TUBERÍA DE AGUA
81 ANTES DE COMENZAR La instalación de la tubería de agua no está garantizada por el fabricante del refrigerador o de la fábrica de hielos. Siga las instrucciones cuidadosamente para minimizar el riesgo de daños al producto. El aire en la tubería de agua puede provocar martilleos en las conexiones, ...
Page 82 - NOTA: Los códigos de tubería 248CMR del estado de; NOTA: Asegúrese de que exista suficiente tubería extra
82 CÓMO CONECTAR LA TUBERÍA DE AGUA VÁLVULA Seleccione la localización para la válvula que mejor se le facilite el acceso. Es mejor conectar en una tubería vertical. Cuando sea necesario conectar en una tubería horizontal, haga la conexión en la parte superior o lateral, en vez de hacerlo en la part...
Page 83 - CONECTE LA TUBERÍA AL REFRIGERADOR; No utilice mangueras viejas, gastadas; ABRA LA VÁLVULA DE PASO; Accione el interruptor de la fábrica de hielo a la posición; ON
83 9. CONECTE LA TUBERÍA AL REFRIGERADOR NOTAS: ţ Antes de hacer la conexión al refrigerador, asegúrese de que éste no esté conectado al suministro de energía. ţ Si su refrigerador no cuenta con filtro de agua, le recomendamos que instale uno. Si su suministro de agua contiene arena o partículas que ...
Page 84 - GUÍA DE SOLUCIÓN DE PROBLEMAS; SONIDOS NORMALES; Problema; Está conectado el enchufe.; Instalación
84 GUÍA DE SOLUCIÓN DE PROBLEMAS SONIDOS NORMALES Su nuevo refrigerador puede hacer ruidos que su viejo refrigerador no hacía; como estos sonidos son nuevos para Ud., puede ser que se preocupe. La mayoría de los sonidos nuevos son normales. Superficies duras, como el piso, las paredes y los gabinetes...
Page 87 - El clima está húmedo.; Guia para Almacenar Alimentos.; Vea; Las puertas no cierran completamente.
87 Problema Posibles Causas Soluciones LA TEMPERATURA ESTÁ MUY CALIENTE O SE HA FORMADO HUMEDAD EN EL INTERIOR ţ Las ventilas de aire están bloqueadas. El aire frío circula desde el congelador hacia el refrigerador y regresa a través de las ventilas que dividen estas secciones. ţ Las puertas se abre...
Page 88 - Uso de Smart Diagnosis; Para obtener mejores resultados, no mueva el telé-; Para otros países busque el teléfono de servicio
88 SMART DIAGNOSIS (En algunos modelos) Uso de Smart Diagnosis (Diagnóstico Inteligente) NOTA Para obtener mejores resultados, no mueva el telé- fono mientras se estén trasmitiendo los tonosSi el técnico del centro de atención al cliente no puede grabar con precisión los datos, probable-mente le pid...
Page 89 - GARANTÍA LIMITADA; IMIENTO PARA RESOLVER CONFLICTOS”.
89 GARANTÍA LIMITADA LG ELECTRONICS U.S.A., INC. REFRIGERADOR LG GARANTÍA LIMITADA - U.S.A. PERÍODO DE GARANTÍA Refrigerador/Congelador Sistema Sellado (Condensador, Filtro desecante, Tubo Conector y Evaporador) Compresor Un (1) año a partir de la fecha original de compra Piezas y mano de obra (solo...
Page 90 - PROCEDIMIENTO PARA RESOLVER CONFLICTOS:; Acuerdo de arbitraje vinculante y renuncia de demanda colectiva.
90 GARANTÍA LIMITADA PROCEDIMIENTO PARA RESOLVER CONFLICTOS: TODOS LOS CONFLICTOS ENTRE USTED Y LG QUE SURJAN FUERA DE O RELACIONADOS DE ALGUNA MANERA CON ESTA GARANTÍA LIMITADA O CON EL PRODUCTO, SE RESOLVERÁN EXCLUSIVAMENTE A TRAVÉS DE UN ARBITRAJE VINCULANTE Y NO EN UNA CORTE DE JURISDICCIÓN GENE...
Page 91 - NOTAS
Page 92 - LG Customer Information Center
1-800-243-0000 1-888-865-3026 1-888-542-2623 USA, Consumer User USA, Commercial User CANADA LG Customer Information Center www.lg.com Register your Product Online!


 LG DoorCooling+ GC-B247SEDC
User Manual
LG DoorCooling+ GC-B247SEDC
User Manual
 LG DoorCooling+ GC-B247SMDC
User Manual
LG DoorCooling+ GC-B247SMDC
User Manual
 LG GA-B379PLQA
User Manual
LG GA-B379PLQA
User Manual
 LG GA-B379PVCA
User Manual
LG GA-B379PVCA
User Manual
 LG GA-B409UCA
User Manual
LG GA-B409UCA
User Manual
 LG GA-B419SEUL
Manual
LG GA-B419SEUL
Manual
 LG GA-B419SLUL
Manual
LG GA-B419SLUL
Manual
 LG GA-B419SMHL
Manual
LG GA-B419SMHL
Manual
 LG GA-B419SQGL
Manual
LG GA-B419SQGL
Manual
 LG GA-B419SQUL
Manual
LG GA-B419SQUL
Manual
 LG GA-B419SWJL
Manual
LG GA-B419SWJL
Manual
 LG GA-B459CESL
User Manual
LG GA-B459CESL
User Manual
 LG GA-B459CLSL
User Manual
LG GA-B459CLSL
User Manual
 LG GA-B459CLWL
User Manual
LG GA-B459CLWL
User Manual
 LG GA-B459CQSL
User Manual
LG GA-B459CQSL
User Manual
 LG GA-B509
User Manual
LG GA-B509
User Manual
 LG GA-B509CESL
User Manual
LG GA-B509CESL
User Manual