Page 2 - USER MANUAL; TABLE ON CONTENTS; IMPORTANT SAFETY INSTRUCTIONS AND PRECAUTIONS
NAVC-307 USER MANUAL 2 TABLE ON CONTENTS Important Safety Instructions and Precautions 2 Product Connections and Use 3 What’s in the box 4 Features and Operation 4 Power on/off function (auto on/off) 4 Auto Record when turned on 4 Installation on the car windscreen 4 Recording 5 Change between modes...
Page 3 - PRODUCT CONNECTIONS AND USE
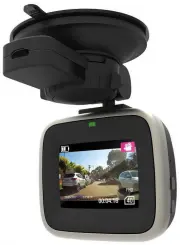
NAVC-307 USER MANUAL 3 PRODUCT CONNECTIONS AND USE 1 Microphone 9 Up Button 2 Suction Mount Fitting 10 Micro SD Card Slot 3 Power Button 11 LED Indicator Light 4 Reset Button 12 Camera 5 Menu Button 13 Speaker (Note: For button sounds only) 6 OK Button 14 Suction Mount 7 Micro USB Port 15 2 nd USB P...
Page 4 - WHATS IN THE BOX
NAVC-307 USER MANUAL 4 WHATS IN THE BOX FEATURES AND OPERATION Note: A memory card is required for operation The NAVC-307 requires a Micro SD card (not included) to record video / image content. (see page 8 for a table showing SD card capacity and the relevant amount of video / image content able to...
Page 5 - Recording; In the event of an incident / accident; STOP the Recording
NAVC-307 USER MANUAL 5 Recording Turn on the NAVC-307. Recording should start automatically. If not press the “OK” button. When recording, the green indicator LED will begin to flash. The recorded file is saved onto the Micro SDHC Card. Stop recording by either pressing the OK button or turning the ...
Page 6 - Digital Video
NAVC-307 USER MANUAL 6 Digital Video Available Options: Video Output Options Action Size Select [FHD, HD, VGA] Select the resolution and size of recorded files Time Stamp Select [On / Off] Records the current date and time onto the video file (date/time is set in the setup options) Video time Select...
Page 7 - Playback
NAVC-307 USER MANUAL 7 Playback Available Options: Play Options Action Delete [Select] Single, All Choose to delete the current image or all images. Protect [Select] Lock One, All or Unlock One or All Protect videos or picture so they cannot be deleted. Thumbnail [Select] Execute, Cancel Select imag...
Page 8 - USB Connection; Resolution
NAVC-307 USER MANUAL 8 USB Connection Connect the NAVC-307 to a Windows PC with the USB cable (included). The LCD screen will display a NOTEBOOK icon. Under “My computer” or “Windows Explorer” you should see a drive which will resemble a “Removable Disk (?:)” (like a USB Flash drive or Hard drive). ...
Page 9 - Connecting the NAVC-307 in the Car
NAVC-307 USER MANUAL 9 Connecting the NAVC-307 in the Car The above wiring diagram shows a left hand drive vehicle. Wiring path is only a suggestion. 1. NAVC-307 device mounted behind the rear vision mirror. 2. 12v DC cable routed behind rear vision mirror 3. Cable hidden behind roof headlining 4. C...
Page 10 - Fault
NAVC-307 USER MANUAL 10 TROUBLE SHOOTING / Q & A Fault Suggestion Device does not turn off If in vehicle: check that the 12V socket is not still powered (on) when the key is removed (as with some European cars). Wait 20 seconds for file finalisation / closure. Disconnect power lead to device Pre...