Page 2 - DANGER; Do not store or use gasoline or other; For residential use only. Do not use; CAUTION; Installation Safety Precautions
If you smell gas: Please Contact Permasteel Customer Service For Help & Parts Product Record IMPORTANT: Fill out the product record information below. Model Number ______________________________ Serial Number _______________________________ See rating label on grill for serial number. Date Purch...
Page 3 - TABLE OF CONTENTS; WARNING
TABLE OF CONTENTS 3 WARNING Combustion by products produced when using this product include carbon monoxide, a chemical known to the State of California to cause birth defects or other reproductive harm. For more information go to www.P65Warnings.ca.gov For Your Safety . . . . . . . . . . . . . . . ...
Page 4 - WARRANTY; have the appropriate certification logo.; Disclaimer of implied warranties limitation of remedies; KENMORE LIMITED WARRANTY; andling of all warranty replacement parts.
WARRANTY 1. Service calls to correct appliance installation, or to repair problems with house fuses, circuit breakers, house wiring, and plumbing or gas supply systems resulting from such installation. 2. Service to an appliance if the model and serial plate is missing, altered, or cannot easily be ...
Page 5 - USE AND CARE; LP Tank Removal, Transport and Storage
5 USE AND CARE • NEVER store a spare LP tank under or near the appliance or in an enclosed area. DANGER • Never fill a tank beyond 80% full. • If the information in the two points above is not followed exactly, a fire causing death or serious injury may occur. • An overfilled or improperly stored ta...
Page 6 - If “growing” bubbles appear, do not
6 Connecting Regulator to the LP Tank LP Tank Exchange 1. The LP tank must be properly secured onto the grill. (Refer to assembly section.) 2. Turn all control knobs to the OFF position. 3. Turn the LP tank OFF by turning the OPD hand wheel clockwise to a full stop. 4. Remove the protective cap from...
Page 7 - Leak Testing Valves, Hose and Regulator; Do not use the grill until a leak test is performed.; Do not insert any tools or foreign objects into the
7 Leak Testing Valves, Hose and Regulator 1. Turn all grill control knobs to OFF. 2. Be sure regulator is tightly connected to the LP tank. 3. Completely open the LP tank valve by turning the OPD hand wheel counterclockwise. If you hear a rushing sound, turn the gas off immediately. There is a major...
Page 8 - Safety Tips; For Safe Use of Your Grill and to Avoid Serious; Electronic Ignition Lighting Instructions
8 Safety Tips Before opening the LP tank valve, check the coupling nut for tightness. When the grill is not in use, turn off all control knobs and LP tank valve. Never move the grill while in operation or still hot. Use long-handled barbecue utensils and oven mitts to avoid burns and splatters. The ...
Page 9 - Turn your controls, gas source or tank; Side Burner Match Lighting; Cast Iron Grate Seasoning (if applicable)
9 WARNING Turn your controls, gas source or tank OFF when not in use. ▲ Do not lean over the grill while lighting. If ignition does NOT occur in 5 seconds, turn the burner controls OFF, wait 5 minutes and repeat the lighting procedure. If the burner does not ignite with the valve open, gas will cont...
Page 10 - Storing Your Grill; Cleaning the Burner Assembly
10 Storing Your Grill • Clean the cooking grates. • Store in dry location. • When the LP tank is connected to the grill, store outdoors in a well-ventilated space and out of reach from children. • Cover the grill if stored outdoors. Choose from a variety of grill covers offered by the manufacturer. ...
Page 14 - PARTS DIAGRAM
14 PARTS DIAGRAM 1 2 3 4 5 6 8 10 11 12 13 1415 16 17 18 19 20 21 22 23 24 25 31 26 9 2 8 2 7 2 30 32 33 34 35 36 37 38 39 40 41 42 43 44 45 46 47 48 49 50 51 52 53 54 55 56 57 58 59 60 7 9
Page 15 - BEFORE ASSEMBLY
15 BEFORE ASSEMBLY NOTICE: Once you have unpacked the grill, check all grill parts against the pictures on page 15-17. If any parts are missing or damaged, call 1-888-287-0735.
Page 18 - ASSEMBLY
18 CAREFULLY READ AND PERFORM ALL ASSEMBLY INSTUCTIONS ON THE FOLLOWING PAGES. Tools Required: • Adjustable wrench (not provided) • Screwdriver (not provided) • The following hardware is provided in the blister pack for convenient use. ASSEMBLY M4 x 10 ScrewQty: 54 pcs AA BatteryQty: 1 pc M5 x 10 Sc...
Page 19 - Left Frame
19 Left Frame Install (4) M4x10 screws as shown to the leg marked “5A”. Do not fully tighten the screws at this time. Leave 1/8-inch gap below the screw head for the rail attachment. (A) Attach one end of a side upper rail “6A” to the leg and tighten the screws. Install and tighten another (1)M4...
Page 20 - Right Frame
20 Right Frame Install (4) M4x10 screws as shown to the leg marked “5C”. Do not fully tighten the screws at this time. Leave 1/8-inch gap below the screw head for the rail attachment. (A) Attach one end of the side upper rail “6A” to the leg and tighten the screws. Install and tighten another (1...
Page 21 - Bottom Shelf
21 Bottom Shelf Install (4) M4x10 screws as shown on the right frame. Do not fully tighten the screws at this time. Leave 1/8-inch gap below the screw head for the panel attachment. (A) Attach the bottom shelf to the right frame with (3) M4x10 screws. Do not yet fully tighten these screws. (A) ...
Page 22 - Front Panel
22 Front Panel Attach the two front panel sections together into a single front panel with (1) M4x10 screw as shown. (A) Note: The front panels will be located at the very bottom of the carton box, underneath the main grill head. Attach the front panel to the cart by slipping the four panel hole...
Page 23 - Wheels to Cart
B 23 Wheels to Cart Turn the cart upside down and attach the legs to bottom shelf with (4) M6x13 screws as shown. (A) Tap both leg extenders onto the left legs. (B) Remove the cotter pin, nut and washer from the axle rod. Insert the axle rod through the wheels and right leg frame. Reattach the...
Page 24 - Grill Head to Cart
24 Grill Head to Cart This step requires two people to lift and position the grill head onto cart. Remove the tie wraps and packing material from the regulator hose, side burner valve and igniter wire. Pull the hose and igniter wire out to the right side of the grill head. Carefully lower the ...
Page 25 - Left Side Shelf; Align the side fascia and control panel.
M5x10 Screw Qty: 2 pcs M4x10 Screw Qty: 5 pcs M6 Compression Washer Qty: 2 pcs M5 Flat Washer Qty: 2 pcs M6x13 Screw Qty: 4 pcs 25 Left Side Shelf Attach the fascia to the left side shelf with (2) M5x10 screws and M5 flat washers. (A) Attach the side shelf support angle bar with (4) M4x10 screws...
Page 26 - Right Side Shelf; Attach the shelf to the firebox as follows:
26 Right Side Shelf Remove the side burner grate from the side burner before assembling and attaching the right side shelf. Attach the fascia to the right side shelf with (2) M5x10 screws and M5 flat washers. (A) Attach the side shelf support angle bar with (4) M4x10 screws. (B) Hang the rig...
Page 27 - Side Burner
27 Side Burner Unscrew and remove the two front screws and washers holding the side burner in place. (A) Remove the side burner from the side shelf. (B) Note: Do not loosen the electrode screw. Remove the 2 pre-installed screws from the valve stem and set them aside. (C) Insert the valve stem ...
Page 28 - Heat Diffusers, Cooking Grates and Warming Rack
28 Heat Diffusers, Cooking Grates and Warming Rack Place the heat diffusers over the burners. Diffusers will fit in the firebox in either direction. Place the cooking grates onto the grate rests in the front and rear of firebox. Insert the warming rack into the brackets at top of the firebox w...
Page 29 - Drip Tray, Drip Cup and LP Tank
29 Drip Tray, Drip Cup and LP Tank Attach the back rail to the cart and grill head with (4) M4x10 screws as shown. (A) Remove the cotter pin and the hose fixed pin from the hose bracket on the cart’s right leg. Insert the hose into the bracket and put back the cotter and retention pin. Hang dr...
Page 30 - Troubleshooting
30 EMERGENCIES: If a gas leak cannot be stopped, or a fire occurs due to gas leakage, call the fire department. Problem Possible Cause Prevention/Solution Gas leaking from cracked/cut/burned a hose. Gas leaking from the LP tank. Gas leaking from the LP tank valve. Gas leaking between the LP tank and...
Page 32 - Troubleshooting – Electronic Ignition
32 Troubleshooting – Electronic Ignition Problem Possible Cause Check Item Prevention/Solution SECTION I No sparks appear at any electrodes when control knob are turned to HI: no noise can be heard from the spark module. • The battery is not installed properly. • Dead battery. • The wire assembly is...
Page 33 - TABLA DE CONTENIDO; ADVERTENCIA; La combustión de los productos producidos al
TABLA DE CONTENIDO ADVERTENCIA La combustión de los productos producidos al usar este producto incluye monóxido de carbono, un químico conocido en el Estado de California como causante de defectos de nacimiento u otros daños reproductivos. Para obtener más información, visite www.P65Warnings.ca.gov ...
Page 34 - Si siente olor a gas :; Póngase en contacto con el servicio al cliente; No guarde ni use gasolina ni otros líquidos; Sólo para uso residencial. No utilice; PRECAUCIÓN; PELIGRO; Precauciones de instalación
Si siente olor a gas : Póngase en contacto con el servicio al cliente de permasteel para obtener ayuda y piezas Inscripción del producto IMPORTANTE: Llene la siguiente información. Número de modelo ___________________________ Número de serie _____________________________ El número de serie se encuen...
Page 35 - GARANTÍA; GARANTÍA LIMITADA DE KENMORE
35 GARANTÍA GARANTÍA LIMITADA DE KENMORE CON LA PRUEBA DE VENTA: se aplica la siguiente cobertura de garantía cuando este dispositivo se instala, opera y mantiene correctamente de acuerdo con todas las instrucciones suministradas. Nota: El consumidor es responsable del envío y manejo de todas las pi...
Page 36 - UOS Y MANTENIMIENTO; Remoción, transporte y almacenamiento del tanque
36 UOS Y MANTENIMIENTO • NUNCA guarde un cilindro de gas de repuesto debajo o cerca del aparato o en un areacerrada. PELIGRO • Nunca llene un tanque más allá del 80 % completo. • Si la información en los dos puntos anteriores no se siguen exactamente, un incendio causando la muerte o pueden producir...
Page 39 - Consejos de seguridad; Para usar su parrilla en forma segura y para; Para personas que viven en apartamentos:; Instrucciones de encendido electrónico de encendido
39 Consejos de seguridad Antes de abrir la válvula del tanque de LP, verifique que la tuerca de acoplamiento esté apretada. Cuando la parrilla no esté en uso, apague todas las perillas de control y la válvula del cilindro LP. Nunca mueva la parrilla mientras está en funcionamiento o aún caliente. Us...
Page 40 - ADVERTENCI; Gire los controles y la fuente de gas o el tanque; Instrucción de iluminación de coincidencia
40 ADVERTENCI A Gire los controles y la fuente de gas o el tanque a la posición OFF cuando no esté en uso. ▲ No se incline sobre la parrilla mientras se enciende. Si la ignición NO ocurre en 5 segundos, apague los controles del quemador, espere 5 minutos y repita el procedimiento de encendido. Si el...
Page 41 - Almacenamiento de su parrilla; Limpieza del conjunto del quemador
41 Almacenamiento de su parrilla • Limpie las parrillas de cocción. • Almacene en un lugar seco. • Cuando el tanque de LP esté conectado a la parrilla, guárdelo al aire libre en un espacio bien ventilado y fuera del alcance de los niños. • Cubra la parrilla si se almacena al aire libre. Elija entre ...
Page 43 - Si le falta hardware o tiene pa rtes dañadas
43 LISTAR DE PIEZASTES (1/2) Clave Descripción Cant. Pieza No. Clave Descripción Cant. Pieza No. 1 Tapa del quemador lateral 1 40800065 19 Regulador 1 408D00115 2 Rejilla del quemador lateral 1 40800119 20 Barra de eje 1 408D00125 3 Clavija de la varilla quemador lateral 2 40800118 21 Cadena del tit...
Page 45 - DIAGRAMA DE PIEZAS
45 DIAGRAMA DE PIEZAS 1 2 3 4 5 6 8 10 11 12 13 1415 16 17 18 19 20 21 22 23 24 25 31 26 9 2 8 2 7 2 30 32 33 34 35 36 37 38 39 40 41 42 43 44 45 46 47 48 49 50 51 52 53 54 55 56 57 58 59 60 7 9
Page 46 - ANTES DEL MONTAJE
46 ANTES DEL MONTAJE AVISO: Una vez que haya desempacado la parrilla, verifique todas las piezas de la parrilla con las imágenes de las páginas 46-48. Si falta alguna pieza o está dañada, llame al 1-888-287-0735.
Page 49 - Las herramientas requiridas:; ASAMBLEA
49 LEA Y REALICE CUIDADOSAMENTE TODAS LAS INSTRUCCIONES DE ASAMBLEA EN LAS PÁGINAS SIGUIENTES. Las herramientas requiridas: • Destornillaror (no proporcionado) • Llave ajustable (no proporcionada) • El hardware siguiente se proporciona en el paquete de ampolla para el uso conveniente. ASAMBLEA Torni...
Page 50 - Marco izquierdo
50 Marco izquierdo Instale (4) tornillos M4x10 como se muestra en la pata marcada "5A". No apriete completamente los tornillos en este momento. Deje un hueco de 1/8 pulgada debajo de la cabeza del tornillo para fijar el riel. (A) Fije un extremo de un riel superior lateral “6A” a la pata...
Page 51 - Marco derecho
51 Marco derecho Instale (4) tornillos M4x10 como se muestra en la pata marcada "5C". No apriete completamente los tornillos en este momento. Deje un hueco de 1/8 pulgada debajo de la cabeza del tornillo para fijar el riel. (A) Fije un extremo del riel superior lateral “6A” a la pata y a...
Page 52 - Estante inferior
52 Estante inferior Instale (4) tornillos M4x10 como se muestra en el marco derecho. No apriete completamente los tornillos en este momento. Deje un espacio de 1/8 de pulgada debajo de la cabeza del tornillo para la fijación del panel. (A) Fije el estante inferior al marco derecho con (3) tornil...
Page 53 - Panel frontal
53 Panel frontal Fije las dos secciones del panel frontal en un único panel frontal con (1) tornillo M4x10 como se muestra. (A) Nota: Los paneles frontales estarán ubicados en la parte inferior de la caja de cartón, debajo del cabezal principal de la parrilla. Fije el panel frontal al carro desl...
Page 54 - Ruedas al carrito; Toque ambos extensores de pierna en las piernas izquierdas. (B)
B 54 Ruedas al carrito Coloque el carro boca abajo y coloque las patas en la plataforma inferior con (4) tornillos M6x13 como se muestra. (A) Toque ambos extensores de pierna en las piernas izquierdas. (B) Quite la chaveta, la tuerca y la arandela de la varilla del eje. Inserte la varilla del ...
Page 55 - Parrilla de cabeza al carro
55 Parrilla de cabeza al carro Este paso requiere dos personas para levantar y colocar la cabeza de la parrilla en el carro. Retire las bridas y el material de empaque de la manguera del regulador, la válvula del quemador lateral y el cable de encendido. Jale la manguera y el cable de ignición h...
Page 56 - Estantería lateral izquierda; Alinee la faja lateral y el panel de control.
56 Estantería lateral izquierda Fijar el tablero al estante izquierdo con (2) tornillos M5x10 y arandelas planas M5. (A) Fije la barra de ángulo de soporte del estante lateral con (4) tornillos M4x10. (B) Alinee la faja lateral y el panel de control. Fije el estante a la cámara de combustión...
Page 57 - Estantería lateral derecha; Fije el estante a la cámara de combustión de la siguiente manera:
57 Estantería lateral derecha Retire la rejilla del quemador lateral del quemador lateral antes de montar y colocar el estante lateral derecho. Fijar el tablero en el estante del lado derecho con (2) tornillos M5x10 y arandelas planas M5. (A) Fije la barra de ángulo de soporte del estante late...
Page 58 - Quemador lateral
58 Quemador lateral Desenrosque y retire los dos tornillos y arandelas frontales que sujetan el quemador lateral en su lugar. (A) Retire el quemador lateral del estante lateral. (B) Nota: No afloje el tornillo del electrodo. Quite los 2 tornillos preinstalados del vástago de la válvula y déjelos...
Page 60 - Bandeja de goteo, Copa de goteo y tanque de LP
60 Bandeja de goteo, Copa de goteo y tanque de LP Fije el riel trasero al carro y la cabeza de la parrilla con (4) tornillos M4x10 como se muestra. (A) Retire la chaveta y el pasador fijo de la manguera del soporte de la manguera en la pata derecha del carro. Inserte la manguera en el soporte y ...
Page 61 - Solución de problemas
61 EMERGENCIAS: si no se puede detener una fuga de gas o si se produce un incendio debido a una fuga de gas, llame al departamento de bomberos. Problema Causa posible Prevención / solución Fuga de gas de mangueras quebradas, cortadas o quemadas. Fuga de gas del cilindro. Fuga de gas de la válvula de...
Page 63 - Solución de problemas – Encendido electrónico
63 Solución de problemas – Encendido electrónico Problema Causa posible Procedimiento de revisión Prevención / solución SECCIÓN I No aparecen chispas en ninguno de los electrodos cuando la perilla de control se gira a HI: no se escucha ningún ruido del módulo de chispas. • La pila no está instalada ...


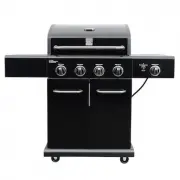
 Kenmore PG-4030400LD
User Manual
Kenmore PG-4030400LD
User Manual
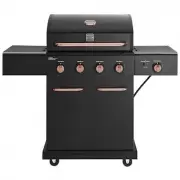
 Kenmore PG-4030400LD-AZ
User Manual
Kenmore PG-4030400LD-AZ
User Manual
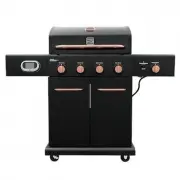
 Kenmore PG-4030400LD-MO
User Manual
Kenmore PG-4030400LD-MO
User Manual
 Kenmore PG-4030400LD-PE
User Manual
Kenmore PG-4030400LD-PE
User Manual
 Kenmore PG-4030400LD-RD
User Manual
Kenmore PG-4030400LD-RD
User Manual
 Kenmore PG-4030400LD-TL
User Manual
Kenmore PG-4030400LD-TL
User Manual
 Kenmore PG-4030400LN-BC
User Manual
Kenmore PG-4030400LN-BC
User Manual
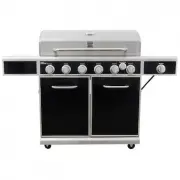
 Kenmore PG-40405S0L-S
User Manual
Kenmore PG-40405S0L-S
User Manual
 Kenmore PG-40405SOL-SE
User Manual
Kenmore PG-40405SOL-SE
User Manual
 Kenmore PG-40406S0L
User Manual
Kenmore PG-40406S0L
User Manual
 Kenmore PG-40406S0L-1
User Manual
Kenmore PG-40406S0L-1
User Manual
 Kenmore PG-40406S0L-SE
User Manual
Kenmore PG-40406S0L-SE
User Manual
 Kenmore PG-40409S0LB
User Manual
Kenmore PG-40409S0LB
User Manual
 Kenmore PG-40409S0LB-1
User Manual
Kenmore PG-40409S0LB-1
User Manual
 Kenmore PG-40409S0LB-2
User Manual
Kenmore PG-40409S0LB-2
User Manual
 Kenmore PG-40409S0LB-COSG
User Manual
Kenmore PG-40409S0LB-COSG
User Manual
 Kenmore PG-40602SRL
User Manual
Kenmore PG-40602SRL
User Manual
 Kenmore PG-40611S0L
User Manual
Kenmore PG-40611S0L
User Manual