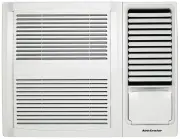
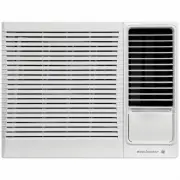
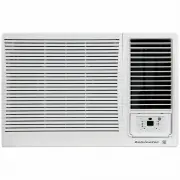
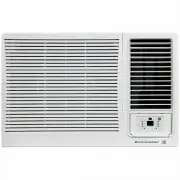
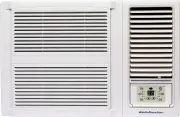
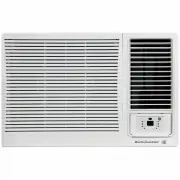
Page 2 - environmental tip; refrigerant warning; caution; Congratulations
2 Contents Kelvinator Air Conditioning Congratulations and thank you for choosing our Electric Window Wall room air conditioner. We are sure you will find your new air conditioner a pleasure to use. Before you use the air conditioner, we recommend that you read through the entire user manual, which ...
Page 3 - warning; Safety precautions; This symbol indicates never to do this
warning Do not use means to accelerate the defrosting process or to clean, other than those recommended by the manufacturer. Do not store the appliance in a room with continuously operating ignition sources (for example open flames, an operating electric heater or an operating gas appliance with a c...
Page 4 - Prior to Operation; Preparing for operation; Operating temperature; Cooling Mode; Heating Mode; Indoor; Do not clean the air conditioner with water.
4 prior to operation/operating temperature Kelvinator Air Conditioning Prior to Operation Preparing for operation 1 Contact an authorised installation specialist for installation.2 Plug in the power plug properly.3 Do not use a damaged or non-standard power cord.4 Do not share the same outlet with o...
Page 5 - Operating instructions; Power cord conductors are distinguished according to; Controls; Cooling only models; Vent control; CLOSE VENT OPEN; Unit parts identification
Kelvinator Air Conditioning unit par ts identification/operation instruc tions 5 Operating instructions 1 Front panel2 Air filter3 Frame4 Cabinet5 Air inlet grille (outdoor side)6 Air outlet grille7 Electronic control keypad8 Power supply cord and plug9 Remote control 1 Power cord conductors are dis...
Page 6 - Note: When heating stops, there may be a slight delay of 30; Temperature settings up:
6 operating instruc tions Kelvinator Air Conditioning Timer: Press the "TIMER" keypad to activate the "auto start/auto stop" timer function.Auto start/stop programs can be set from 1/2-12 hours. Each press of the "TIMER" keypad will increase the selected time in 1/2 hour incr...
Page 7 - Decreases operating TEMPERATURE only.
Kelvinator Air Conditioning remote control features 7 The hand held remote control unit allows you to control all operational aspects of your Air Conditioner, from the convenience of your favourite armchair. Here are some things you should know about how to operate your Air Conditioner with the hand...
Page 8 - Special Locking Function:; Remote Control Operating Instructions:; Note: The LED display will default to show the ambient
8 remote control features Kelvinator Air Conditioning Energy Saver: (only available in "COOLING" and "DRY" mode) Press the ENERGY SAVER button to activate or deactivate the "ENERGY SAVER" function. In this mode, the fan will continue to run for 1 minute after the compressor s...
Page 9 - Air Filter; Removing the air filter; The treatment of condensed water; Maintenance
Kelvinator Air Conditioning remote control features/installation instruc tions 9 Air Filter The air filter behind the inlet grille should be checked and cleaned at least once every 2 weeks (or as necessary) to maintain optimal performance of the air conditioner. SEAL DRAIN JOINT RUBBER PLUG Removing...
Page 10 - AIR IN; B R ICK; AIR OUT; B R ICK; AIR IN; Installation of the unit into the housing; Select the best location; Installation of the Housing; Note: Unit may be supported by a solid frame from below or; Installation instructions
10 installation instruc tions Kelvinator Air Conditioning Note: unit may be supported by a solid frame from below or by a hanger from a solid overhead support. Preferred method of installation into a timberframed wall, partition or window. Flash or seal around externalWall frame or architrave Flash ...
Page 11 - Step 5. Install the air filter and front panel.; Installation Steps; Step 1. Remove the front panel and the air filter
Kelvinator Air Conditioning installation instruc tions 11 4 Reinstall the chassis fixing bracket removed earlier (See Fig.5). Install the frame. 1 Install the frame making sure not to jam the power supply cable (See Fig.8). 2 Fix the screws on the frame. Step 5. Install the air filter and front pane...
Page 12 - Troubleshooting; Troubleshooting Tips; Normal operation
12 troubleshooting Kelvinator Air Conditioning Troubleshooting Troubleshooting Tips Save time and money! Review the chart below first and you may not need to call for service. Normal operation • You may hear a pinging noise caused by water being picked up and thrown against the condenser on rainy da...
Page 13 - Notes
Kelvinator Air Conditioning Specifications 13 Notes
Page 15 - This document sets out the terms and conditions of the product; Warranty; Important Notice; FOR SERVICE; SERVICE AUSTRAlIA
This document sets out the terms and conditions of the product warranties for Electrolux Appliances. It is an important document. Please keep it with your proof of purchase documents in a safe place for future reference should you require service for your Appliance. 1. In this warranty: (a) ‘accepta...