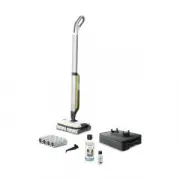
Karcher SC 1122 - Manuals
Karcher SC 1122 – Manual in PDF format online.
Manuals:
Manual Karcher SC 1122


Summary
English 3 Description of the Appliance .................... 3Safety instructions.................................... 4Preparing the Appliance........................... 5Quick Reference ...................................... 6Operation ................................................. 7How to Use th...
4 English Danger The appliance may not be used in areas where a risk of explosion is present. If the appliance is used in hazardous ar-eas the corresponding safety provisions must be observed. Never use the appliance in pools con-taining water. The device should not be used to clean electr...
English 5 Never operate or store the appliance in a horizontal position! The steam switch must not be locked during the operation. Protect the appliance from rain. Do not store outside. This steam cleaner is equipped with sever-al safety devices that provide an all-round protection of the appl...
Karcher Manuals
-
 Karcher K5690
User Manual
Karcher K5690
User Manual
-
 Karcher K4400G
User Manual
Karcher K4400G
User Manual
-
Karcher K4400G
Manual
-
 Karcher HD3101
User Manual
Karcher HD3101
User Manual
-
 Karcher FC 7 Cordless Premium
Manual
Karcher FC 7 Cordless Premium
Manual
-
 Karcher FC 5 Cordless Premium
Manual
Karcher FC 5 Cordless Premium
Manual
-
 Karcher FC 5 Premium
Manual
Karcher FC 5 Premium
Manual
-
 Karcher FC 5 Cordless
Manual
Karcher FC 5 Cordless
Manual
-
 Karcher EWM 2
Manual
Karcher EWM 2
Manual
-
 Karcher EWM 2 Limited Edition
Manual
Karcher EWM 2 Limited Edition
Manual
-
 Karcher EWM 2 Premium
Manual
Karcher EWM 2 Premium
Manual
-
 Karcher FC 3 Cordless Premium
Manual
Karcher FC 3 Cordless Premium
Manual
-
 Karcher FC 3 Cordless
Manual
Karcher FC 3 Cordless
Manual
-
 Karcher PSW 18-20 Battery
Manual
Karcher PSW 18-20 Battery
Manual
-
 Karcher BDP 1500
Manual
Karcher BDP 1500
Manual
-
 Karcher High Pressure Cleaner
Manual
Karcher High Pressure Cleaner
Manual
-
 Karcher K 2.29
Manual
Karcher K 2.29
Manual
-
 Karcher K 5.690
Manual
Karcher K 5.690
Manual
-
 Karcher darcher
Manual
Karcher darcher
Manual
-
 Karcher K 5.70 M
Manual
Karcher K 5.70 M
Manual