Page 2 - Posizionamento e livellamento; Collegamento elettrico; Installazione
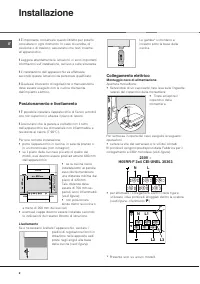
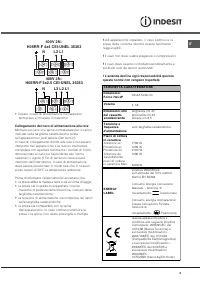
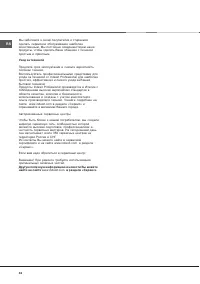
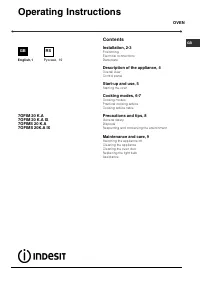
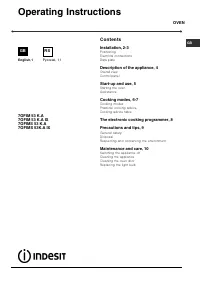
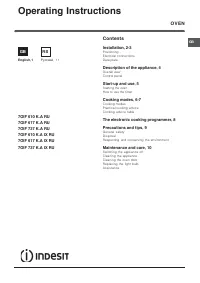
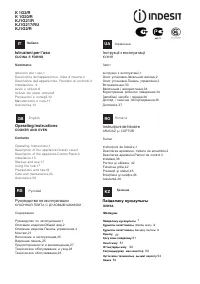
2 IT ! È importante conservare questo libretto per poterlo consultare in ogni momento. In caso di vendita, dicessione o di trasloco, assicurarsi che resti insiemeall’apparecchio. ! Leggere attentamente le istruzioni: ci sono importanti informazioni sull’installazione, sull’uso e sulla sicurezza. ! L...
Page 5 - Avvio e utilizzo; Avviare il forno; Programmi di cottura
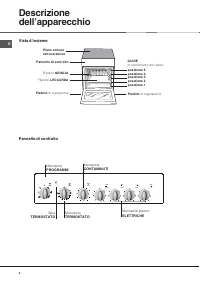
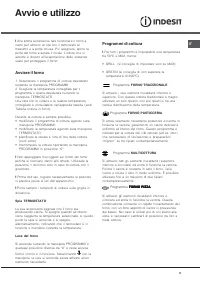
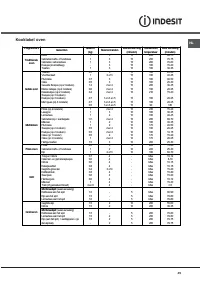
IT 5 Avvio e utilizzo ! Alla prima accensione fare funzionare il forno a vuoto per almeno un’ora con il termostato almassimo e a porta chiusa. Poi spegnere, aprire laporta del forno e aerare il locale. L’odore che siavverte è dovuto all’evaporazione delle sostanzeusate per proteggere il forno. Avvia...
Page 6 - Consigli pratici di cottura
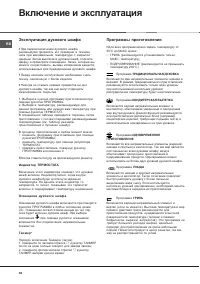
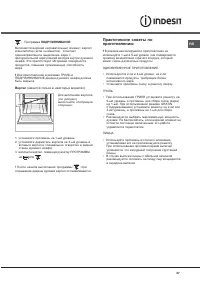
6 IT Programma GRILL Si attiva la parte centrale dell’elemento riscaldantesuperiore e il girarrosto (ove presente). Latemperatura elevata e diretta del grill è consigliataper gli alimenti che necessitano di un’altatemperatura superficiale (bistecche di vitello e dimanzo, filetto, entrecote). È un pr...
Page 7 - Tabella cottura in forno
IT 7 Programmi Alimenti Peso (Kg) Posizione dei ripiani Preriscaldamento (minuti) Temperatura consigliata Durata cottura (minuti) Forno Tradizionale Anatra Arrosto di vitello o manzo Arrosto di maiale Biscotti (di frolla) Crostate 1 1 1 - 1 3 3 3 3 3 15 15 15 15 15 200 200 200 180 180 65-75 70-75 70...
Page 9 - Precauzioni e consigli
IT 9 Precauzioni e consigli ! L’apparecchio è stato progettato e costruito in conformità alle norme internazionali di sicurezza. Queste avvertenze sono fornite per ragioni di sicurezza e devono essere lette attentamente. Sicurezza generale• Queste istruzioni sono valide solo per i paesi di Queste is...
Page 10 - Manutenzione e cura
10 IT • Questo prodotto soddisfa i requisiti imposti dalla nuova Direttiva Europea sulla limitazione dei consumi energetici instandby. Se non si eseguono operazioni per 2 minuti, l’apparecchio si dispone automaticamente in modalità standby. La modalità standby è visualizzata con “Icona Orologio” in ...
Page 11 - Assistenza; Assistenza attiva 7 giorni su 7
IT 11 Assistenza ! Non ricorrere mai a tecnici non autorizzati. Comunicare: • Il tipo di anomalia;• Il modello della macchina (Mod.)• Il numero di serie (S/N) Queste ultime informazioni si trovano sulla targhetta caratteristiche posta sull’apparecchio Assistenza attiva 7 giorni su 7 In caso di neces...
Page 12 - Contents; Description of the appliance, 15; Operating Instructions; COOKER AND OVEN; RS
Contents Installation, 13-14 Positioning and levellingElectrical connectionTable of characteristics Description of the appliance, 15 Overall viewControl panel Start-up and use, 16-18 Starting the ovenCooking modesPractical cooking adviceOven cooking advice table Using the glass ceramic hob, 19 Switc...
Page 13 - Positioning and levelling; Electrical connection; Installation
GB 13 ! Before operating your new appliance please read this instruction booklet carefully. It contains importantinformation concerning the safe installation andoperation of the appliance. ! Please keep these operating instructions for future reference. Make sure that the instructions are kept witht...
Page 15 - THERMOSTAT
GB 15 Descriptionof the appliance Overall view Control panel Control panel GRILL rack Glassceramic hob DRIPPING pan GUIDE RAILS for the sliding racks position 3position 2position 1 Adjustable foot Adjustable foot position 5position 4 THERMOSTATknob ACTIVE HOTPLATEknobs PROGRAMMERknob THERMOSTAT indi...
Page 16 - Starting the oven; Cooking modes
16 GB Start-up and use ! The first time you use your appliance, heat the empty oven with its door closed at its maximumtemperature for at least half an hour. Ensure that theroom is well ventilated before switching the oven offand opening the oven door. The appliance may emita slightly unpleasant odo...
Page 17 - Practical cooking advice
GB 17 GRATIN mode The top heating element and the rotisserie (wherepresent) are activated and the fan begins to operate.This combination of features increases theeffectiveness of the unidirectional thermal radiationprovided by the heating elements through forcedcirculation of the air throughout the ...
Page 18 - Oven cooking advice table
18 GB Oven cooking advice table Cooking modes Foods Weight (in kg) Rack Position Pre-heating time (minutes) Recommended temperature Cooking time (minutes) Traditional Oven Duck Roast veal or beef Pork roast Biscuits (short pastry) Tarts 1 1 1 - 1 3 3 3 3 3 15 15 15 15 15 200 200 200 180 180 65-75 70...
Page 19 - Using the glass ceramic hob; Switching the cooking zones on and off
GB 19 Using the glass ceramic hob ! The glue applied on the gaskets leaves traces of grease on the glass. Before using the appliance, werecommend you remove these with a special non-abrasive cleaning product. During the first few hoursof use there may be a smell of rubber which willdisappear very qu...
Page 20 - Precautions and tips; General safety; D i s p o s a l
20 GB Precautions and tips ! This appliance has been designed and manufactured in compliance with international safety standards. The followingwarnings are provided for safety reasons and must be readcarefully. General safety • These instructions are only valid for the countries whose symbols appear...
Page 21 - Replacing the oven light bulb; Cleaning the glass ceramic hob; Care and maintenance
GB 21 Switching the appliance off Disconnect your appliance from the electricity supplybefore carrying out any work on it. Cleaning the oven ! Never use steam cleaners or pressure cleaners on the appliance. • Clean the glass part of the oven door using a sponge and a non-abrasive cleaning product, t...
Page 22 - Sommaire; Description de l’appareil, 25; Mode d’emploi; CUISINIERE ET FOUR
Sommaire Installation, 23-24 Positionnement et nivellementRaccordement électriqueTableau des caractéristiques Description de l’appareil, 25 Vue d’ensembleTableau de bord Mise en marche et utilisation, 26-28 Mise en marche du fourProgrammes de cuissonConseils de cuissonTableau de cuisson au four Util...
Page 23 - Positionnement et nivellement; Raccordement électrique
23 FR ! Conserver ce mode d’emploi pour pouvoir le consulter à tout moment. En cas de vente, de cessionou de déménagement, veiller à ce qu’il suivel’appareil. ! Lire attentivement les instructions : elles contiennent des conseils importants sur l’installation, l’utilisation etla sécurité de l’appare...
Page 25 - Description de l’appareil; Vue d’ensemble; Bouton foyer; ELECTRIQUE; Bouton; PROGRAMMES; Voyant
25 FR Description de l’appareil Vue d’ensemble Tableau de bord Bouton THERMOSTAT Bouton foyer ELECTRIQUE Bouton PROGRAMMES Voyant THERMOSTAT MINUTEUR
Page 26 - Mise en marche et utilisation; Mise en marche du four; Programmes de cuisson
26 FR Mise en marche et utilisation ! Lors de son premier allumage, faire fonctionner le four à vide, porte fermée, pendant au moins uneheure en réglant la température à son maximum.Puis éteindre le four, ouvrir la porte et aérer la pièce.L’odeur qui se dégage est due à l’évaporation desproduits uti...
Page 27 - Conseils de cuisson
27 FR le plat au milieu de la grille car, dans les coins, lachaleur ne suffit pas à le cuire. Programme GRATIN Mise en marche de la résistance de voûte, de laturbine et du tournebroche (si l’appareil en estéquipé). L’irradiation thermique unidirectionnelles’ajoute au brassage de l’air pour une répar...
Page 28 - Tableau de cuisson au four
28 FR Tableau de cuisson au four Programmes Aliments Poids (Kg) Niveau enfournement Préchauffage (minutes) Température préconisée Durée cuisson (minutes) Four Tradition Canard Rôti de veau ou de bœuf Rôti de porc Biscuits (pâte brisée) Tartes 1 1 1 - 1 3 3 3 3 3 15 15 15 15 15 200 200 200 180 180 65...
Page 30 - Précautions et conseils; Sécurité générale; Mise au rebut
30 FR Précautions et conseils ! Cet appareil a été conçu et fabriqué conformément aux normes internationales de sécurité.Ces consignes de sécurité sont très importantes et doivent êtrelues attentivement. Sécurité générale • Ces instructions ne sont valables que pour les pays dont les symboles figure...
Page 31 - Assistance; Nettoyage et entretien
31 FR Mise hors tension Avant toute opération de nettoyage ou d’entretiencouper l’alimentation électrique de l’appareil. Nettoyage du four ! Ne jamais nettoyer l’appareil avec des nettoyeurs vapeur ou haute pression. • Nettoyer la vitre de la porte avec des produits non abrasifs et des éponges non g...
Page 35 - TANMEP
RS 35 Панель управления РЕШЕТКА ПРОТИВЕНЬ НАПРАВЛЯЮЩИЕ для противеней и решеток Стеклокерамическая варочная панель Регулируемая ножка Регулируемая ножка положение 5 положение 4 положение 3 положение 2 положение 1 TANMEP
Page 43 - Inhoud; Gebruiksaanwijzing
NL FORNUIS EN OVEN Inhoud Installatie, 44-45 Plaatsen en waterpas zettenElektrische aansluitingTabel eigenschappen Beschrijving van het apparaat, 46 AanzichttekeningBedieningspaneel Starten en gebruik, 47-49 De oven startenKookprogramma’sPraktische kooktipsKooktabel oven Gebruik van de glaskeramisch...
Page 44 - Plaatsen en waterpas zetten; Elektrische aansluiting; Installatie
44 NL ! Bewaar dit instructieboekje zorgvuldig voor eventuele raadpleging in de toekomst. In het geval u hetapparaat verkoopt, weggeeft of wanneer u verhuist,moet het boekje bij het apparaat bewaard worden. ! Lees de instructies aandachtig door: er staat belangrijke informatie in over installatie, g...
Page 46 - Beschrijving van het apparaat; Aanzichttekening
46 NL Beschrijving van het apparaat Aanzichttekening Bedieningspaneel Bedieningspaneel Rooster GRILL Rooster LEKPLAAT GELEIDERS van de roosters stand 3stand 2stand 1 Glaskeramischekookplaat Stelvoetje stand 5stand 4 Stelvoetje THERMOSTAATKNOP PROGRAMMAKNOP Controlelampje THERMOSTAAT Knoppen elektris...
Page 47 - Starten en gebruik; Gebruik van de oven; Kookprogramma’s
47 NL Starten en gebruik Gebruik van de oven ! Wij raden u aan bij het eerste gebruik de oven minstens een uur leeg te laten functioneren, opmaximum temperatuur en met de deur dicht. Nadatu de oven heeft uitgeschakeld, opent u de ovendeuren lucht u het vertrek. De lucht die u ruikt komt doorhet verd...
Page 48 - Praktische kooktips
48 NL Programma GRILL Het centrale gedeelte van het bovensteverwarmingselement gaat aan en het draaispit (waaraanwezig) begint te draaien. Het koken onder degrill is vooral aan te raden voor gerechten die eenhoge en directe temperatuur aan de buitenkantnodig hebben (kalfs- en runderbiefstuk, biefstu...
Page 49 - Kooktabel oven
49 NL Kooktabel oven Programma's Gerechten Gewicht (kg) Roosterstanden Voorverwarming (minuten) Aanbevolen temperatuur Duur bereiding (minuten) Traditionele oven Eend Gebraden kalfs- of rundvlees Gebraden varkensvlees Koekjes (kruimeldeeg) Taarten 1 1 1 - 1 3 3 3 3 3 15 15 15 15 15 200 200 200 180 1...
Page 51 - Algemene veiligheid; A f v a l v e r w i j d e r i n g
51 NL Voorzorgsmaatregelen enadvies ! Dit apparaat is ontworpen en vervaardigd volgens de geldende internationale veiligheidsvoorschriften. Deze aanwijzingen zijngeschreven voor uw veiligheid en u dient ze derhalve goed door tenemen. Algemene veiligheid • D e z e i n s t r u c t i e s z i j n a l l ...
Page 52 - Onderhoud en verzorging
52 NL De elektrische stroom afsluiten Sluit altijd eerst de stroom af voordat u tot enigehandeling overgaat. Het reinigen van de oven ! Gebruik nooit stoom- of hogedrukreinigers voor het reinigen van het apparaat. • Reinig het glas van de deur met een spons en niet schurende producten. Droog met een...
Page 53 - HERD UND BACKOFEN; Inhaltsverzeichnis; Beschreibung des Gerätes, 56; Bedienungsanleitung
HERD UND BACKOFEN Inhaltsverzeichnis Installation, 54-55 Aufstellung und AusrichtungElektroanschlussMerkmal-Tabelle Beschreibung des Gerätes, 56 GeräteansichtBedienfeld Inbetriebsetzung und Gebrauch, 57-59 Backofen in Betrieb setzenGarprogrammePraktische TippsTabelle Garen im Backofen Gebrauch des G...
Page 54 - Aufstellung und Ausrichtung; Elektroanschluss
54 DE ! Bewahren Sie diese Bedienungsanleitung bitte sorgfältig auf, damit Sie sie jederzeit zu Rate ziehenkönnen. Sorgen Sie dafür, dass sie im Falle einesVerkaufs, einer Übergabe oder eines Umzugs dasGerät stets begleitet. ! Lesen Sie bitte die nachfolgenden Hinweise aufmerksam durch: sie liefern ...
Page 56 - Beschreibung des Gerätes; Geräteansicht
56 DE Beschreibung des Gerätes Geräteansicht Bedienfeld Bedienfeld Einschub BACKOFENROST Einschub FETTPFANNE GLEITFÜHRUNGEN für die Einschübe Position 3 Position 2 Position 1 Glaskeramik-Kochfeld Höhenverstellbarer Stellfuß Höhenverstellbarer Stellfuß Position 5 Position 4 Drehschalter THERMOSTAT Dr...
Page 57 - Gebrauch des Backofens; Garprogramme
57 DE Inbetriebsetzung undGebrauch Gebrauch des Backofens ! Bei erstmaliger Inbetriebnahme sollte der leere Backofen für etwa eine Stunde bei Höchsttemperaturund geschlossener Backofentür in Betrieb genommenwerden. Schalten Sie das Gerät dann aus, öffnen Siedie Backofentür und lüften Sie die Küche. ...
Page 58 - Praktische Tipps
58 DE Programm GRILL Der mittlere Bereich des oberen Heizelementsschaltet sich ein, und der Drehspieß (fallsvorhanden) wird in Betrieb gesetzt. Die sehr hoheTemperatur und die direkt auf das Grillgut gerichteteHitze empfiehlt sich für Lebensmittel, die zuroptimalen Garung einer hohen Temperatur auf ...
Page 59 - Tabelle Garen im Backofen
59 DE Tabelle Garen im Backofen Programme Speisen Gew. (kg) Einschubhöhe Vorheizzeit (Minuten) Empfohlene Temperatur Garzeit (Minuten) Ober-/Unterhitze Ente Kalbs- oder Rinderbraten Schweinebraten Mürbeteiggebäck Kuchen 1 1 1 - 1 3 3 3 3 3 15 15 15 15 15 200 200 200 180 180 65-75 70-75 70-80 15-20 3...
Page 60 - Nutzung des Glaskeramik-Kochfeldes; Ein- und Ausschalten der Kochzonen
60 DE Nutzung des Glaskeramik-Kochfeldes ! Der auf die Dichtungen aufgetragene Leim hinterlässt Fettspuren auf dem Glas. Wir empfehlenIhnen, diese vor Einsatz des Gerätes mit einemherkömmlichen Reinigungsmittel (einer nichtscheuernden Poliercreme) zu entfernen. Währendder ersten Betriebsstunden kann...
Page 61 - Allgemeine Sicherheit; E n t s o r g u n g
61 DE Vorsichtsmaßregeln undHinweise ! Das Gerät wurde entsprechend den internationalen Sicherheitsvorschriften entworfen und gebaut. Die im Folgendenaus Sicherheitsgründen wiedergegebenen Hinweise solltenaufmerksam gelesen werden. Allgemeine Sicherheit • N a c h f o l g e n d e A n l e i t u n g e ...
Page 62 - Reinigung und Pflege
62 DE Gerät vom Stromnetz trennen Vor jeder Reinigung und Pflege ist das Gerät vomStromnetz zu trennen. Backofen reinigen. ! Verwenden Sie zur Reinigung des Kochfeldes keine Dampf- oder Hochdruckreinigungsgeräte. • Reinigen Sie die Backofentür aus Glas bitte nur mit einem weichen Schwamm und mildemS...