Ikea OVN 918 W- Manuals
Ikea OVN 918 W– User Manual in PDF format online.
Manuals:
User Manual Ikea OVN 918 W
1

2

3

4

5

6

7

8

9

10

11

12

13

14

15

16

17

18

19

20

21

22

23

24

25

26

27

28

29

30

Summary
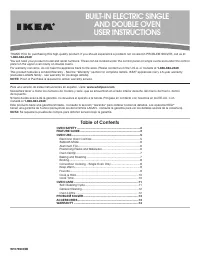
Page 3 - ENGLISH
Page 4 - All safety warnings give specific details of; Safety Information
ENGLISH 4 Your safety and that of others are very important This manual and the appliance itself provide important safety warnings, to be read and observed at all times. This is the danger symbol, pertaining to safety, which alerts users to potential risks to themselves and others. All safety warnin...
Page 5 - with cloths or other flammable materials
ENGLISH 5 The accessible parts of the appliance - may become very hot during use. Young children should be kept away from the appliance and supervised to ensure that they do not play with it. During and after use, do not touch the - heating elements or interior surfaces of the appliance - risk of bu...
Ikea Manuals
-
 Ikea IUD8500BX1
User Manual
Ikea IUD8500BX1
User Manual
-
Ikea IUD8500BX1
Installation Manual
-
 Ikea IMH160DW1
User Manual
Ikea IMH160DW1
User Manual
-
Ikea IMH160DW1
Installation Manual
-
 Ikea IDF320PAFW0
User Manual
Ikea IDF320PAFW0
User Manual
-
Ikea IDF320PAFW0
Installation Manual
-
 Ikea IHI75UC6FS0
User Manual
Ikea IHI75UC6FS0
User Manual
-
 Ikea IBS350PXS01
User Manual
Ikea IBS350PXS01
User Manual
-
Ikea IBS350PXS01
Installation Manual
-
 Ikea IH3402YS0
User Manual
Ikea IH3402YS0
User Manual
-
 Ikea IBS550DS03
User Manual
Ikea IBS550DS03
User Manual
-
Ikea IBS550DS03
Installation Manual
-
Ikea IBS350PYB00
User Manual
-
Ikea IBS350PYB00
Installation Manual
-
 Ikea IBS550PWS00
User Manual
Ikea IBS550PWS00
User Manual
-
Ikea IBS550PWS00
Installation Manual
-
Ikea IBS550PWS00
Manual
-
 Ikea IHW61UC0FS
User Manual
Ikea IHW61UC0FS
User Manual
-
 Ikea IX5BBEXDS00
User Manual
Ikea IX5BBEXDS00
User Manual
-
 Ikea IGS900DS00
User Manual
Ikea IGS900DS00
User Manual