Page 2 - RANGE SAFETY; WARNING
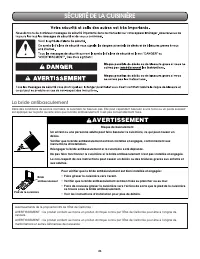
2 RANGE SAFETY Tip Over Hazard A child or adult can tip the range and be killed.Install anti-tip bracket to floor or wall per installation instructions.Slide range back so rear range foot is engaged in the slot of the anti-tip bracket.Re-engage anti-tip bracket if range is moved.Do not operate range...
Page 3 - INSTALLATION REQUIREMENTS; Tools and Parts; Tools Needed
3 INSTALLATION REQUIREMENTS Tools and Parts Gather the required tools and parts before starting installation. Read and follow the instructions provided with any tools listed here. Tools Needed Parts Supplied Check that all parts are included. ■ 10-32 hex nuts (attached to terminal block) (3) ■ Direc...
Page 4 - Location Requirements; Mobile Home - Additional Installation Requirements
4 Location Requirements IMPORTANT: Observe all governing codes and ordinances. ■ It is the installer’s responsibility to comply with installation clearances specified on the model/serial/rating plate. The model/serial/rating plate is located behind the oven door on the top right-hand side of the ove...
Page 5 - Cabinet Dimensions
5 Cabinet Dimensions Cabinet opening dimensions shown are for 25" (64.0 cm) countertop depth, 24" (61.0 cm) base cabinet depth and 36" (91.4 cm) countertop height.IMPORTANT: If installing a range hood or microwave hood combination above the range, follow the range hood or microwave hood ...
Page 6 - Electrical Connection
6 Electrical Requirements ‑ U.S.A. Only If codes permit and a separate ground wire is used, it is recommended that a qualified electrical installer determine that the ground path and wire gauge are in accordance with local codes.Do not use an extension cord.Be sure that the electrical connection and...
Page 7 - Electrical Requirements ‐ Canada Only
7 Electrical Requirements ‑ Canada Only Be sure that the electrical connection and wire size are adequate and in conformance with CSA Standard C22.1, Canadian Electrical Code, Part 1 - latest edition, and all local codes and ordinances.A copy of the above code standards can be obtained from: Canadia...
Page 8 - INSTALLATION INSTRUCTIONS; Unpack Range; Install Anti‐Tip Bracket
8 INSTALLATION INSTRUCTIONS Unpack Range 1. Remove shipping materials, tape and film from the range. Keep cardboard bottom under range. Do not dispose of anything until the installation is complete. 2. Remove oven racks and parts package from oven and shipping materials. 3. To remove cardboard botto...
Page 9 - Adjust Leveling Legs
9 4. Drill two 1 / 8 " (3 mm) holes that correspond to the bracket holes of the determined mounting method. See the following illustrations. Floor Mounting Rear position Front position Diagonal (2 options) Wall Mounting 5. Using the two #10 x 1 5 / 8 " (4.1 cm) Phillips-head screws provided,...
Page 10 - Level Range; Install Using a Power Supply Cord
10 Level Range 1. Place level on the oven bottom, as indicated in one of the 2 figures below, depending on the size of the level. Check with the level side to side and front to back. 2. If range is not level, use a wrench or pliers to adjust leveling legs up or down until the range is level.NOTE: Ra...
Page 12 - Install Using Direct Wire
12 4. Use a Phillips screwdriver to connect the green ground wire from the power supply cord to the range with the ground- link screw and ground-link section. The ground wire must be attached over the ground-link section. 5. Use 3 / 8 " (1.0 cm) nut driver to connect the neutral (white) wire to ...
Page 13 - Direct Wire Installation: Copper or Aluminum Wire
13 4. Assemble a UL Listed conduit connector in the opening. 5. Tighten strain relief screw against the flexible conduit. Direct Wire Installation: Copper or Aluminum Wire This range may be connected directly to the fuse disconnect or circuit breaker box. Depending on your electrical supply, make th...
Page 15 - Bare Wire Torque Specifications; Verify Anti‐Tip Bracket Is Installed; On Ranges Equipped with a Premium Storage Drawer:
15 4. Attach terminal lugs to line 1 (black), neutral (white), and line 2 (red) wires. Loosen (do not remove) the setscrew on the front of the terminal lug and insert exposed wire end through bottom of terminal lugs. Securely tighten setscrew to torque as shown in the following Bare Wire Torque Spec...
Page 16 - Remove/Replace Drawer; Oven Door
16 Remove/Replace Drawer Remove all items from inside the baking drawer, and then allow the range to cool completely before attempting to remove the drawer. To Remove: 1. Open the drawer to its fully open position.2. Using a flat-blade screwdriver, gently loosen the drawer from the glide alignment n...
Page 17 - Complete Installation; If Range Does Not Operate, Check the Following:; If You Need Assistance or Service:
17 Complete Installation 1. Check that all parts are now installed. If there is an extra part, go back through the steps to see which step was skipped. 2. Check that you have all of your tools.3. Check that you have all of the range accessories, especially oven racks. These accessories may be in the...
Page 18 - SÉCURITÉ DE LA CUISINIÈRE; AVERTISSEMENT
18 SÉCURITÉ DE LA CUISINIÈRE Risque de basculement Un enfant ou une personne adulte peut faire basculer la cuisinière, ce qui peut causer un décès.Fixer la bride antibasculement au plancher ou au mur, conformément aux instructions d'installation.Faire glisser de nouveau la cuisinière de façon à ce q...
Page 19 - EXIGENCES D’INSTALLATION; Outillage et pièces; Outils nécessaires
19 EXIGENCES D’INSTALLATION Outillage et pièces Rassembler les outils et pièces nécessaires avant d’entreprendre l’installation. Lire et observer les instructions fournies avec chacun des outils de la liste ci-dessous. Outils nécessaires Pièces fournies Vérifier que toutes les pièces sont présentes....
Page 20 - Exigences d’emplacement; Résidence mobile – Spécifications additionnelles à
20 Exigences d’emplacement IMPORTANT : Observer les dispositions de tous les codes et règlements en vigueur. Ne pas obstruer le flux de combustion et de ventilation. ■ C’est à l’installateur qu’incombe la responsabilité de respecter les distances de séparation spécifiées sur la plaque signalétique. ...
Page 21 - Dimensions du placard
21 Dimensions du placard Les dimensions de l’ouverture entre les placards correspondent à une installation entre des placards de 25" (64,0 cm) de profondeur, avec plan de travail de 24" (61,0 cm) de profondeur et de 36" (91,4 cm) de hauteur.IMPORTANT : En cas d’installation d’une hotte o...
Page 22 - Spécifications électriques – Canada seulement
22 Spécifications électriques – Canada seulement Si l’on utilise un conducteur distinct de liaison à la terre lorsque les codes le permettent, il est recommandé qu’un électricien qualifié vérifie que la liaison à la terre est adéquate et la section des fils conforme aux codes locaux.Vérifier que le ...
Page 23 - INSTRUCTIONS D’INSTALLATION; Déballage de la cuisinière; Installation de la bride antibasculement
23 INSTRUCTIONS D’INSTALLATION Déballage de la cuisinière 1. Ôter les matériaux d’emballage, le ruban adhésif et la pellicule protectrice de la cuisinière. Garder la base de carton sous la cuisinière. Ne rien jeter avant d’avoir complètement terminé l’installation. 2. Retirer les grilles de four et ...
Page 24 - Réglage des pieds de nivellement
24 4. Percer deux trous de 1 / 8 " (3 mm) qui correspondent aux trous de la bride selon la méthode de montage déterminée. Voir les illustrations suivantes. Montage au plancher Position arrière Position avant Diagonale (2 options) Montage mural 5. À l’aide des deux vis à tête Phillips n° 10 x 1 5...
Page 25 - Sur les cuisinières équipées d’un tiroir de remisage de
25 Réglage de l’aplomb de la cuisinière 1. En fonction de la taille du niveau, le placer sur le bas du four tel qu’indiqué dans l’une des deux figures ci-dessous. Contrôler l’aplomb transversal et dans le sens avant/arrière. 2. Si la cuisinière n’est pas horizontale, utiliser une clé ou une pince po...
Page 26 - Dépose et réinstallation du tiroir; Porte du four
26 Dépose et réinstallation du tiroir Enlever tous les articles de l’intérieur du tiroir de cuisson au four et laisser la cuisinière refroidir complètement avant d’essayer d’enlever le tiroir. Dépose : 1. Ouvrir complètement le tiroir.2. À l’aide d’un tournevis à lame plate, desserrer doucement le t...
Page 27 - Achever l’installation; Pour obtenir de l’assistance ou une visite de service :
27 Achever l’installation 1. Vérifier que toutes les pièces sont maintenant installées. S’il reste une pièce, passer en revue les différentes étapes pour découvrir laquelle aurait été oubliée. 2. Vérifier la présence de tous les outils.3. Vérifier que tous les accessoires de la cuisinière sont prése...