Ikea HBT S00 S- Manuals
Ikea HBT S00 S– User Manual in PDF format online.
Manuals:
User Manual Ikea HBT S00 S


Summary
ENGLISH 4 Your safety and the safety of others are very important. This manual and the appliance itself provide important safety messages, to be read and observed at all times. This is the safety alert symbol, pertaining to safety, which alerts users to potential hazards to themselves and others. Al...
ENGLISH 5 supplier from a neighbor’s phone. Follow the gas supplier’s instructions. - If you cannot reach your gas supplier, call the fire department. - Installation and service must be performed by a qualified installer, service agency or the gas supplier. - Use appliance in well ventilated rooms o...
ENGLISH 6 supervised. This appliance can be used by children aged from 8 years and above and persons with reduced physical, sensory or mental capabilities or lack of experience and knowledge if they have been given supervision or instruction concerning use of the appliance in a safe way and understa...
Ikea Manuals
-
 Ikea IUD8500BX1
User Manual
Ikea IUD8500BX1
User Manual
-
Ikea IUD8500BX1
Installation Manual
-
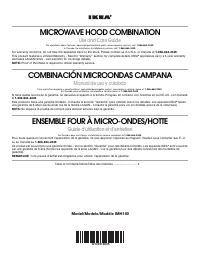 Ikea IMH160DW1
User Manual
Ikea IMH160DW1
User Manual
-
Ikea IMH160DW1
Installation Manual
-
 Ikea IDF320PAFW0
User Manual
Ikea IDF320PAFW0
User Manual
-
Ikea IDF320PAFW0
Installation Manual
-
 Ikea IHI75UC6FS0
User Manual
Ikea IHI75UC6FS0
User Manual
-
 Ikea IBS350PXS01
User Manual
Ikea IBS350PXS01
User Manual
-
Ikea IBS350PXS01
Installation Manual
-
 Ikea IH3402YS0
User Manual
Ikea IH3402YS0
User Manual
-
 Ikea IBS550DS03
User Manual
Ikea IBS550DS03
User Manual
-
Ikea IBS550DS03
Installation Manual
-
Ikea IBS350PYB00
User Manual
-
Ikea IBS350PYB00
Installation Manual
-
 Ikea IBS550PWS00
User Manual
Ikea IBS550PWS00
User Manual
-
Ikea IBS550PWS00
Installation Manual
-
Ikea IBS550PWS00
Manual
-
 Ikea IHW61UC0FS
User Manual
Ikea IHW61UC0FS
User Manual
-
 Ikea IX5BBEXDS00
User Manual
Ikea IX5BBEXDS00
User Manual
-
 Ikea IGS900DS00
User Manual
Ikea IGS900DS00
User Manual