Page 2 - SYMBOLS
WARNING: This product or its power cord may contain chemicals known to the State of California to cause cancer and birth defects or other reproductive harm. Wash hands after handling. Table of Contents Safety Information Read operator ’ s manual To reduce the risk of injury, user must read and under...
Page 3 - TOOL USE AND CARE; TOOL SERVICE
Always assume that the tool contains fasteners. Do not point the tool toward yourself or anyone whether it contains fasteners or not. Wash hands after handling. This product or its power cord may contain chemicals known to the State of California to cause cancer and birth defects or other reproducti...
Page 4 - Warranty; LOADING THE TOOL; Unpacking
Safety Information (Continued) Warranty LOADING THE TOOL Do not load the tool with fasteners when any one of the operating controls is activated. Never place a hand or any part of body in the fastener discharge area of the tool. Never point tool at anyone. 1. 2. 3. WARNING: The warnings and precauti...
Page 5 - Loading cleat nails
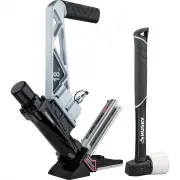
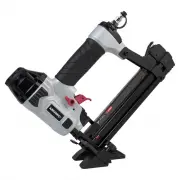
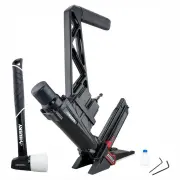
Features Ergonomically designed handle For ease of operation and reduced fatigue. Non-marring design Provides increased protection from marring when working with a finished flooring surface. Anodized aluminum magazine For long lasting durability. Durable construction Lightweight, high-strength alumi...
Page 7 - Maintenance; Lubrication; Recommended hookup; Cleaning
13 Nose bolts (L) Driver guide (M) WARNING: Any time inspection, maintenance, and cleaning are done: Disconnect the tool from the air source. Empty the magazine completely. Maintenance Anti-dust cap Each tool is packed with an anti-dust cap on the air connector, check it after unpacking. Keep the an...
Page 8 - Troubleshooting; Corrective action
Troubleshooting Air leaking in head cap. Loose screw. Worn or damaged o-rings or seals. Tighten screws. Install overhaul kit. Lack of power. Slow to cycle. Tool is too dry. Air pressure too low. Exhaust blocked. Add about 2-3 drops of lubrication into the air connector. Make sure the air compressor ...
Page 9 - Ar culo N; Tabla de Contenido
CLAVADORA PARA PISOS PARA LISTONES EN L DE CALIBRE 18 GRACIAS POR TU COMPRA Apreciamos la confianza que has depositado en Husky al comprar este Nos esforzamos para continuamente crear productos de calidad dise ados para tu hogar. Vis tanos por Internet para ver nuestra l nea completa de propductos d...
Page 10 - S MBOLOS
Informac ó n de Seguridad Informac ó n de Seguridad ó n (Continuaci ) Lea el manual del operador de: Para reducir el riesgo de lesiones, el usuario debe leer y entender el manual del operador antes de usar este producto. Protecci ó n de los ojos: Use siempre gafas de seguridad, gafas de seguridad co...
Page 11 - Informac
Mant é n la herramienta y el mango secos, limpios y libres de aceite o grasa. Usa siempre un pa ñ o limpio para la limpieza. Nunca uses l í quido de freno, gasolina, productos a base de petr ó leo ni solventes para limpiar la herramienta. No utilices la herramienta como martillo. No utilices esta he...
Page 13 - mo cargar listones
Caracter í sticas Manija con dise ñ o ergon ó mico Para un funcionamiento f á cil y menos trabajoso. Dise ñ o que no raya Brinda protecci ó n a las superficies acabadas de los pisos. Cargador de aluminio anodizado Para una mayor durabilidad. Construcci ó n duradera Liviana y duradera contruida de al...
Page 15 - Antipolvo casquillo; Operaci
Mantenimiento (Continuaci ó n) Vuelva a colocar la gu í a de disparo (M) y los pernos con nariz (L). Vuelva a colocar la pata frontal (F), la placa (H) y los pernos (G) en su lugar. Recargue la herramienta con sujetadores y uego vuelva a conectarla a la fuente de aire. Presione la gu í a de disparo ...
Page 16 - Acciones correctivas; Conexi
Soluci ó n de problemas Acciones correctivas Causa posible Problema Hay una filtraci ó n de aire en la tapa. Falta potencia. El ciclo es lento. La herramienta no dispara los sujetadores. Los sujetadores se atascan frecuentemente en la herramienta. Los tornillos est á n sueltos. Hay juntas t ó ricas ...