Page 2 - SYMBOLS
WARNING: This product or its power cord may containchemicals known to the State of California to causecancer and birth defects or other reproductive harm.Wash hands after handling. Do not nail on top of another nail. This can cause the nailto be deflected and hit someone, or cause the tool toreact a...
Page 4 - AIR SUPPLY AND CONNECTIONS; Warranty; LOADING TOOL; Unpacking; HUSKY PNEUMATIC NAILER KIT LIMITED TWO-YEAR WARRANTY
Safety Information(Continued) AIR SUPPLY AND CONNECTIONS The connector on the tool must not hold pressure whenair supply is disconnected. If an incorrect fitting is used,the tool can remain charged with air after disconnectingand thus will be able to drive a fastener even after the airline is discon...
Page 5 - Specifications
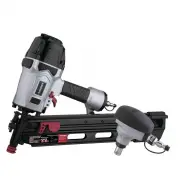
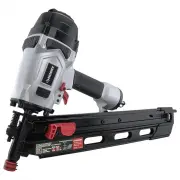
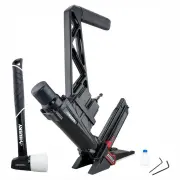
8 9 Air consumption : 8.2 SCFM with 100 fasteners per minute @ 80 psi Air inlet: 1/4 inch NPTMagazine capacity: 60 fasteners, 10-12 gaugeWeight: 7.63 lbsMaximum pressure: 115 psiPressure range: 70 psi – 115 psiPin size range: 2 inch to 3-1/2 inch Specifications 1 21 3-1/2" FULL ROUND HEADFRAMING...
Page 6 - SLIDE FORWARD; Clearing jams
Figure 1 Unloading fasteners 2 10 11 Operation(Model#DPFR2190) Loading fasteners 1 MAXIMUM LOAD Nail Hold Back Spring Connect the tool to the air sourceInsert strip of fasteners from the rear of magazine (A). Besure the fasteners are pointed downward.(See figure 1 & figure 2)This tool uses a spr...
Page 7 - Setting the air pressure; Turn the adjustment knob clockwise; Depth adjustment; Turn the adjustment knob; Firing the tool
Non-marring pad 4 The non-marring pad attached the nose of the tool helpsprevent marring and denting when working with softerwoods . 12 13 WARNING: Disconnect the tool from the air sourcebefore removing or replacing the non marring padFailure to do so could result in serious personal injury . . To r...
Page 8 - Lubrication; Driving a fastener
14 15 WARNING: The tool must be allowed to recoil awayfrom the work piece. Do not drive a nail on top ofanother nail. WARNING: During normal use the tool will recoilimmediately after driving a fastener This is a normalfunction of the tool Do not attempt to prevent therecoil by holding the tool again...
Page 9 - Maintenance; LUBRICATION
16 17 Hold tool with nose pointed toward work surface. Align fastener and tool in the location where fastener is tobe driven. Push gently against nail head to drive fastener. Continue to apply pressure until fastener is drivencompletely or until reaching desired penetration. Setting the air pressure...
Page 10 - Corrective action
18 19 Air hose Quick connector Oiler Regulator Filter Compressor Quickcoupler Quickcoupler Quick connector The air compressor must be able to maintain a minimumof 80 psi when the tool is being used. An inadequate airsupply can cause a loss of power and inconsistentdriving.An oiler can be used to pro...
Page 11 - call Husky Customer Service; Retain this manual for future use.; GU A DE USO Y MANTENIMIENTO; MINI CLAVADORA DE PALMA
Question, problems,missing parts? Before returning to the store, call Husky Customer Service 8 a.m - 6 p.m, EST, Monday- Friday 1-888-HD-HUSKY HUSKYTOOLS.COM Retain this manual for future use. GU A DE USO Y MANTENIMIENTO GU A DE USO Y MANTENIMIENTO Í Preguntas, problemas, o piezas faltantes?Antes de...
Page 12 - S MBOLOS
23Sp Tabla de Contenido Informacón de Seguridad Lea el manual del operador de: Para reducir el riesgode lesiones, el usuario debe leer y entender el manualdel operador antes de usar este producto. Protección de los ojos: Use siempre gafas deseguridad, gafas de seguridad con protección lateralo una c...
Page 13 - USO Y CUIDADO DE LA HERRAMIENTA; Informacón de Seguridad; USO Y CUIDADO DE LA HERRAMIENTA(CONTINUACÓN)
Informacón de Seguridad ón (Continuaci ) Mantén siempre una posición firme y el equilibrioadecuado. Una posición firme y el l equilibrio adecuadopermiten controlar mejor la herramienta en situacionesinesperadas.No la utilices sobre una escalera de tijera o soportesinestables. Una posición estable so...
Page 14 - REPARACIÓN DE LA HERRAMIENTA; CARGAR LA HERRAMIENTA
27Sp Informacón de Seguridad ón (Continuaci ) REPARACIÓN DE LA HERRAMIENTA Usa únicamente accesorios identificados por elfabricante para ese modelo específico de herramienta. la utilización de piezas no autorizadas o el incumplimiento de las instrucciones demantenimiento pueden aumentar el riesgo de...
Page 15 - Desempacar; Especificaciones; Características
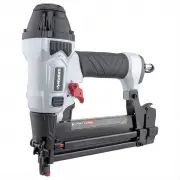
21 50 mm 90 mm 2" 3-1/2" 0.113" - 0.131" ( 2 87 3 33 mm) . - . 0.268" - 0.283" ( ) 6.8 -7.2 mm 28Sp Desempacar Esta herramienta se ha enviado completamenteensamblada.Retira cuidadosamente la herramienta y los accesorios dela caja.Inspecciona la herramienta cuidadosamente para...
Page 16 - Cómo cargar los sujetadores; Cómo descargar los sujetadores; ón; Cómo retirar sujetadores atascados
Jale el disparador (B) DESLICE HACIA ATRÁS Presione la palance de sobrepaso Operación-(Modelo#DPFR2190) 1 Conecte la herramienta a la fuente de aire.Coloque el listón de sujetadores en la parte posterior delcargador (A). Asegúrese de que los sujetadores apuntenhacia abajo. (Vea figura 1 & figura...
Page 17 - Almohadilla que no raya; Gire el pomo de ajuste en el sentido de las agujas del reloj
Operación(Continuaci )-(Modelo#DPFR2190) ón 33Sp Operación(Continuaci )-(Modelo#DPFR2190) ón ADVERTENCIA : Asegúrese de que no hayasujetadores en el cargador antes de retirar unsujetador atascado. ADVERTENCIA : Desconecte la herramienta de lafuente de aire cada vez que retire un sujetadoratascado. L...
Page 18 - Lubricación
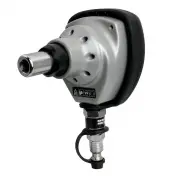
34Sp 35Sp Operación-(Modelo#HDPMPN) Operación(Continuaci )-(Modelo#DPFR2190) ón Interruptor de modo dedisparo seleccionableen la posición hacia abajo Botón de modo dedisparo seleccionable NOTA:Se recomienda este método cuando se requiere unacolocación de clavos menos precisa.Se deberá tener extremo ...
Page 19 - Cómo configurar la presión de aire; FUNCIÓN ANTIPOLVO; Mantenimiento; LUBRICACIÓN
36Sp 37Sp Operación(Continuaci )-(Modelo#HDPMPN) ón Cómo configurar la presión de aire Sujete la herramienta con el extremo dirigido hacia lasuperficie de trabajo. Alinee el sujetador y la herramienta en el lugar en dondecolocará el sujetador. Presione suavemente sobre la cabeza del clavo paracoloca...
Page 20 - LIMPIEZA; Conexión recomendada; Problema
38Sp 39Sp ADVERTENCIA : No conectes la herramienta a uncompresor de aire que pueda exceder las 13,79 bar,La herramienta podría explotar y posiblementeprovocar lesiones. PRECAUCIÓN: El compresor de aire debe ser capazde mantener un mínimo de 5,51 bar mientras laherramienta está en uso. Un suministro ...