Hanover 9710004U - Manuals
Hanover 9710004U Heater – User Manual in PDF format online.
Manuals:
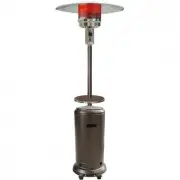
User Manual Hanover 9710004U


Summary
HARDWARE CONTENTS (shown actual size) EXTRA HARDWARE (PRE-ASSEMBLED) 3 AA II DD EE HH CC KK LL MM NN FF BB GG Reflector Spacer Qty. 3 Washer Qty. 9 Washer Qty. 9 ScrewQty. 9 Cap Nut Qty. 9 Screw Qty. 4 Bolt Qty. 4 Washer Qty. 4 Qty. Wrench Qty. JJ Qty. 3 Stainless Steel Bolt Qty. 4 BoltQty. 2 Nut Qt...
6 ASSEMBLY INSTRUCTIONS Hardware Used AA BB Hardware Used CC 1 2 1. Line up holes on the bracket of wheel assembly (O) with the corresponding holes on base (M), then insert M8 x 16 mm bolts (BB) through holes. Tighten with M8 flange nuts (AA). Be sure the wheel assembly (O) is parallel to the base (...
7 ASSEMBLY INSTRUCTIONS Hardware Used 4. Secure post (J) to cylinder housing (H) using the reinforced ring (NN), M6 x 10 mm bolts (DD) and 5. side facing up. coupler (D). Thread the fastening nut (G) Loosen the fastening nut (G) to adjust the position of the EE NN x 4 x 1 Reinforced Ring OO x 1 DD M...
Hanover Heaters Manuals
-
Hanover 9710001U
User Manual
-
Hanover 9710002U
User Manual
-
 Hanover HAN001BR
User Manual
Hanover HAN001BR
User Manual
-
 Hanover HAN001BR-CV
User Manual
Hanover HAN001BR-CV
User Manual
-
 Hanover HAN001BRL
User Manual
Hanover HAN001BRL
User Manual
-
 Hanover HAN002BRSS
User Manual
Hanover HAN002BRSS
User Manual
-
 Hanover HAN002BRSS-CV
User Manual
Hanover HAN002BRSS-CV
User Manual
-
 Hanover HAN002BRSSL
User Manual
Hanover HAN002BRSSL
User Manual
-
 Hanover HAN003SS
User Manual
Hanover HAN003SS
User Manual
-
 Hanover HAN003SS-CV
User Manual
Hanover HAN003SS-CV
User Manual
-
 Hanover HAN003SSL
User Manual
Hanover HAN003SSL
User Manual
-
 Hanover HAN004BLKL
User Manual
Hanover HAN004BLKL
User Manual
-
 Hanover HAN030SSCLL
User Manual
Hanover HAN030SSCLL
User Manual
-
 Hanover HAN101BLK
User Manual
Hanover HAN101BLK
User Manual
-
 Hanover HAN102SS
User Manual
Hanover HAN102SS
User Manual
-
 Hanover HAN102SSL
User Manual
Hanover HAN102SSL
User Manual
-
 Hanover HAN1031IC-SLV
User Manual
Hanover HAN1031IC-SLV
User Manual
-
 Hanover HAN104SSL
User Manual
Hanover HAN104SSL
User Manual
-
 Hanover HAN1051IC-SLV
User Manual
Hanover HAN1051IC-SLV
User Manual
-
 Hanover HAN1051ICSLV-SD
User Manual
Hanover HAN1051ICSLV-SD
User Manual