Page 2 - SAfEty PRECAutionS; to REDuCE tHE RiSK of fiRE, ELECtRiC SHoCK, oR inJuRy to; to REDuCE tHE RiSK of A RAngE toP gREASE fiRE:
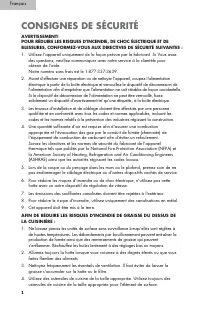
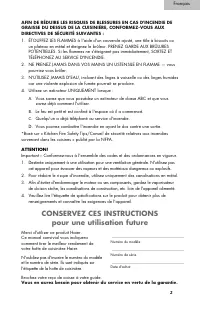
English 1 SAfEty PRECAutionS WARning! to REDuCE tHE RiSK of fiRE, ELECtRiC SHoCK, oR inJuRy to PERSonS, oBSERVE tHE foLLoWing: 1. Use this unit only in the manner intended by the manufacturer. If you have questions, contact our customer service department for assistance. Our Toll-Free number is 1-87...
Page 3 - you will need it to obtain warranty service.; SAVE tHESE inStRuCtionS
English 2 Thank you for using our Haier product. This easy-to-use manual will guide you in getting the best performance from your Haier Range Hood.Remember to record the model and serial number. They are on a label in the range hood. Model number Serial number Date of purchase Staple your receipt to...
Page 4 - Accessories; Range Hood Accessories Provided:; table of Contents
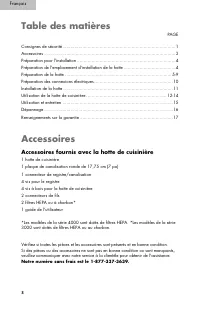
English 3 Accessories Range Hood Accessories Provided: 1 Range Hood1 7” Round Duct Plate1 Damper/Duct Connector4 Damper Screws4 Washers4 Range Hood Wood Screws2 Wire Connectors2 HEPA or Charcoal Filters*1 User Manual*4000 series models come with HEPA filters. 3000 series models come with HEPA or cha...
Page 5 - installation Preparation; tools needed for installation; Preparing Hood Location
English 4 installation Preparation To install this range hood, you will need the following tools and materials: note: this procedure will require 2 people for easier installation. tools needed for installation • Drill • 1/8” Drill bit for drilling pilot holes • 1-1/4” Wood bit for drilling electrica...
Page 6 - Preparing Hood
English 5 1. Remove 7” Round Duct Plate from top of hood. Set duct plate aside - with mounting screws. 2. Remove tape holding filters in place. Pull down on filter tabs and lift filters out. Set filters aside. 3. Remove bottom cover from hood. Set cover and mounting screws aside. Bottom Cover (Held ...
Page 8 - section. the following steps (7 thru 15) are for DuCtED inStALLAtion
English 7 non-Ducted installation - Skip to “Preparing Electrical Connections” section. the following steps (7 thru 15) are for DuCtED inStALLAtion onLy. 7. Remove Light Panel - held in place with (3) #8 screws and (2) #8 screws. Disconnect light assembly wire harness (white connector). 8. Remove Ai...
Page 10 - Connector can be installed up to 1-inch on either side of hood
English 9 14. 3¼” x 10” Ducted Discharge Only: Remove Tape from damper flap and attach Damper/Duct Connector over knockout opening with screws removed in Step 4 under PREPARING HOOD. Make sure damper Pivot is nearest to Top/Back Edge of hood. 15. 7”Round Ducted Discharge Only: Re-install 7 ”Round Du...
Page 11 - Preparing Electrical Connections; Green
English 10 WARning: To reduce the risk of electric shock, make sure power is switched off at the service panel. Lock or tag service panel to prevent power from being switched on accidentally. 1. Connect House Wiring (120 VAC) to hood. Use a piece of Cardboard to protect the cooktop, if necessary. 2....
Page 12 - installing Hood
English 11 1. Hang hood from (4) Mounting Screws (from parts bag). Be sure to place a washer (included) onto each screw before driving in the screw. Slide hood towards wall until mounting screws are engaged in narrow end of (4) Keyholes. Tighten mounting screws securely. 2. Replace bottom cover. 3. ...
Page 13 - Light Settings; operating the Range Hood
English 12 4000 series models (for 3000 series models, see next section.) Light Settings Press the “on/off” button to turn on lights. Once lights are turned on, there are three light settings from which to select. Use “–“ or “+” buttons to set lights to desired brightness level. Press the “on/off” b...
Page 14 - Heat Sensor; filter change signal reset; “filter”
English 13 Heat Sensor This unit is equipped with a Heat Sensor that automatically turns off the fan if a certain temperature is reached from cooktop heat. The fan will go up to high speed until the temperature comes back down to a normal temperature level. Once the normal temperature has been reach...
Page 16 - use and Care; Aluminum filter; Light Bulbs; Exterior Surface
use and Care Aluminum filter For highest efficiency, this filter should be removed and cleaned periodically. Soak the filter in hot water and mild soap or detergent. Rinse thoroughly and repeat if necessary. Heavy grease buildup may not be cleaned easily, thus the filter may need to be replaced. Hin...
Page 17 - troubleshooting; fan does not turn on, but lights turn on.
troubleshooting fan does not turn on, but lights turn on. This is probably due to either a defective fan switch or a burned-out fan motor. Please call a qualified service professional. fan only runs at one speed. Please see instructions above for troubleshooting when your fan does not turn on, but l...
Page 18 - Limited Warranty
English 17 this warranty covers all defects in workmanship or materials for: The mechanical and electrical parts (including labor costs) contained in this Haier product, for a period of 12 months, from the date of purchase (commercial or rental applications will be warranted for 90 days). you must k...
Page 20 - CONSIGNES DE SÉCURITÉ
1 Français CONSIGNES DE SÉCURITÉ AVERTISSEMENT! POUR RÉDUIRE LES RISQUES D'INCENDIE, DE CHOC ÉLECTRIQUE ET DE BLESSURES, CONFORMEZ-VOUS AUX DIRECTIVES DE SÉCURITÉ SUIVANTES : 1. Utilisez l'appareil uniquement de la façon prévue par le fabricant. Si Vous avez des questions, veuillez communiquer avec ...
Page 21 - CONSERVEZ CES INSTRUCTIONS
2 Français AFIN DE RÉDUIRE LES RISQUES DE BLESSURES EN CAS D'INCENDIE DE GRAISSE DU DESSUS DE LA CUISINIÈRE, CONFORMEZ-VOUS AUX DIRECTIVES DE SÉCURITÉ SUIVANTES : 1. ÉTOUFFEZ LES FLAMMES à l'aide d'un couvercle ajusté, une tôle à biscuits ou un plateau en métal et éteignez le brûleur. PRENEZ GARDE A...
Page 22 - Table des matières; Accessoires fournis avec la hotte de cuisinière
3 Français Table des matières PAGE Consignes de sécurité ..................................................................................... 1 Accessoires ................................................................................................... 3 Préparation pour l'installation ............
Page 23 - Préparation pour l'installation; Outils requis pour l'installation
4 Français Préparation pour l'installation Pour l'installation de la hotte de cuisinière, vous aurez besoin des outils et des matériaux suivants : Remarque : deux personnes seront requises pour cette procédure afin de faciliter l'installation. Outils requis pour l'installation • Perceuse • Mèche de ...
Page 24 - Préparation de la hotte
5 Français Préparation de la hotte 1. Retirez la plaque de canalisation ronde de 17,75 cm (7 po) de la partie supérieure de la hotte. Mettez-la de côté, avec les vis de montage. 2. Retirez le ruban maintenant les filtres en place. Tirez sur les languettes des filtres et enlevez les filtres en les so...
Page 26 - AILETTE DE SOUTIEN
7 Français Installation sans canalisation - Passez à la section Préparation des connexions électriques. Les étapes suivantes, de 7 à 15, sont destinées à une INSTALLATION AVEC CANALISATION UNIQUEMENT. 7. Retirez le panneau lumineux, maintenu en place à l'aide de (3) vis #8 et de (2) vis #8. Débranch...
Page 30 - Installation de la hotte
11 Français Installation de la hotte 1. Suspendez la hotte à l'aide des 4 vis de montage (se trouvant dans le sac des pièces). Glissez la hotte vers le mur jusqu'à ce que les vis de montage soient engagées dans l'extrémité étroite des (4) clavettes. Serrez solidement les vis de montage. 2. Replacez ...
Page 31 - Utilisation de la hotte de cuisinière
12 Français Utilisation de la hotte de cuisinière Modèles de la série 4000 (consultez la section suivante au sujet des modèles de la série 3000). Réglages de l'éclairage Appuyez sur le bouton de marche/arrêt « on/off » pour allumer les lumières. Une fois que les lumières seront allumées, trois régla...
Page 34 - Utilisation et entretien
15 Français Utilisation et entretien Filtre d'aluminium Le filtre doit être retiré et nettoyé périodiquement afin d'obtenir l'efficacité la plus élevée. Faites tremper le filtre dans l'eau chaude et un savon ou du détergent doux. Rincez en profondeur et répétez au besoin. De grandes accumulations de...
Page 35 - Dépannage
16 Français Dépannage Le ventilateur ne se met pas en marche, mais les lumières s'allument. Cela est probablement causé par un interrupteur de ventilateur défectueux ou un moteur de ventilateur grillé. Veuillez téléphoner à un professionnel de service qualifié. Le ventilateur fonctionne uniquement à...
Page 36 - Garantie limitée
17 Français Garantie limitée Cette garantie couvre tous les vices de fabrication ou de matériaux pour : Les pièces mécaniques et électriques (incluant les coûts de la main-d’œuvre) contenues dans le produit de Haier pendant une période de 1 2 mois, à compter de la date d'achat (les applications comm...
Page 38 - PRECAUCIONES DE SEGURIDAD
1 Español PRECAUCIONES DE SEGURIDAD ADVERTENCIA PARA REDUCIR EL RIESGO DE INCENDIO, DESCARGA ELÉCTRICA O LESIONES A OTRAS PERSONAS, PRESTE ATENCIÓN A LO SIGUIENTE: 1. Use esta unidad sólo para lo que la diseñó el fabricante. Si tiene preguntas, comuníquese con el departamento de servicio al cliente ...
Page 39 - CONSERVE ESTAS INSTRUCCIONES
2 Español PARA REDUCIR EL RIESGO DE LESIONES FÍSICAS EN CASO DE INCENDIO POR GRASA ACUMULADA EN LA PARRILLA DE LA ESTUFA, PRESTE ATENCIÓN A LO SIGUIENTE*: 1. CONTENGA LAS LLAMAS con una tapa de tamaño adecuado, una bandeja para hornear o una charola de metal, y después apague el quemador. EVITE QUEM...
Page 40 - Índice; Accesorios que se incluyen con el extractor de aire:
3 Español Índice PÁGINA Precauciones de seguridad.............................................................................. 1 Accesorios .................................................................................................... 3 Preparación para la instalación ...........................
Page 41 - Preparación para la instalación; Herramientas necesarias para la instalación
4 Español Preparación para la instalación Para instalar este extractor de aire necesitará las siguientes herramientas y materiales: Nota: Para que el procedimiento de instalación sea más fácil, se requieren 2 personas. Herramientas necesarias para la instalación • Taladro. • Broca de 1/8 de pulg. pa...
Page 42 - Preparación del extractor
5 Español Preparación del extractor 1. Quite la placa para conducto redondo de 7 pulg. de la parte superior del extractor. Deje a un lado la placa para el conducto junto con los tornillos de montaje. 2. Retire la cinta que mantiene los filtros en su lugar. Jale hacia abajo las pestañas de los filtro...
Page 44 - ALETA DE SOPORTE
7 Español En el caso de instalaciones sin conducto, continúe con la sección "Preparación de las conexiones eléctricas". Los siguientes pasos (7 a 15) son ÚNICAMENTE PARA LA INSTALACIÓN CON CONDUCTO. 7. Quite el panel de luz fijado con 3 tornillos n.° 8 y 2 tornillos n.° 8. Desconecte el mazo...
Page 48 - Instalación del extractor
11 Español Instalación del extractor 1. Cuelgue el extractor con los 4 tornillos de montaje (incluidos en la bolsa de partes). Deslice el extractor hacia la pared hasta que los tornillos de montaje se enganchen en el extremo angosto de las 4 ranuras. Apriete firmemente los tornillos de montaje. 2. V...
Page 52 - Uso y cuidado
15 Español Uso y cuidado Filtro de aluminio Para incrementar al máximo la eficiencia, es necesario retirar y limpiar periódicamente este filtro. Sumerja el filtro en agua caliente con jabón o detergente suave. Enjuáguelo perfectamente y vuelva a lavar si es necesario. Una gran acumulación de grasa p...
Page 53 - Solución de problemas
16 Español Solución de problemas El ventilador no enciende, pero las luces sí. Esto probablemente se deba a que el interruptor del ventilador está defectuoso o a que el motor del ventilador está quemado. Llame a un profesional de servicio calificado. El ventilador sólo funciona a una velocidad. Cons...
Page 54 - Garantía limitada
17 Español Garantía limitada Esta garantía cubre todos los defectos de fabricación o de materiales para: Las partes mecánicas y eléctricas (incluidos los costos de mano de obra) de este producto de Haier, durante un período de 1 2 meses, a partir de la fecha de compra (los usos comerciales o de rent...
Page 56 - Do not Return this Product to the Store; iMPoRtAnt; ne pas Réexpédier ce Produit au Magasin; iMPoRtAntE; no regrese este producto a la tienda; Haier
iMPoRtAnt Do not Return this Product to the Store if you have a problem with this product, please contact the “Customer Satisfaction Center” at 1-877-337-3639. DAtED PRoof of PuRCHASE REQuiRED foR WARRAnty SERViCE iMPoRtAnt ne pas Réexpédier ce Produit au Magasin Pour tout problème concernant ce pro...