Page 2 - We thank you for your
We thank you for your trust and the purchase of our appliance. This detailed instruction manual is supplied to make the use of this product easier. The instructions should allow you to learn about your new appliance as quickly as possible. Make sure you have received an undamaged appliance. If you d...
Page 3 - CONTENTS
3 CONTENTS 503536 MAINTENANCE & CLEANING TROUBLE-SHOOTING 4 THE ELECTRIC OVEN 8 Control unit 10 Technical specifications 11 IMPORTANT SAFETY INSTRUCTIONS 12 Before connecting the oven: 13 BEFORE USING THE APPLIANCE FOR THE FIRST TIME 14 STEPS OF THE COOKING PROCESS (1–6) 14 Step 1: SWITCHING ON ...
Page 4 - THE ELECTRIC OVEN; (DESCRIPTION OF THE OVEN AND EQUIPMENT – DEPENDING ON
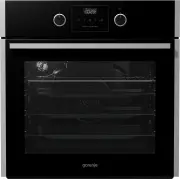
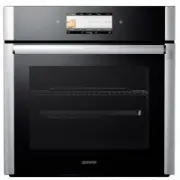
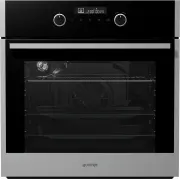
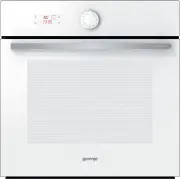
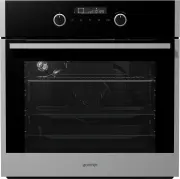
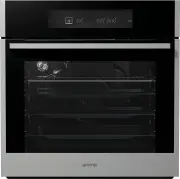
4 THE ELECTRIC OVEN (DESCRIPTION OF THE OVEN AND EQUIPMENT – DEPENDING ON THE MODEL) 4 3 2 1 Control unit Oven door Oven handle Guides - Cooking levels Door switch 503536 The figure represents one of the built-in appliance models. Since the appliances for which these instructions were drawn up may h...
Page 8 - CONTROL UNIT
8 CONTROL UNIT 1 COOKING SYSTEM SELECTOR KNOB 2 CHILD LOCK KEY 3 VALUE DECREASE KEY 4 CLOCK KEY NOTE: Symbols of cooking systems may be located on the knob or on the front panel (depending on the appliance model). 503536
Page 10 - TECHNICAL SPECIFICATIONS; xxxxxx
10 TECHNICAL SPECIFICATIONS (DEPENDING ON THE MODEL) 3.5 kW xxxxxx SER. Nr: XXXXXX ART. Nr: max TN XXXXX Pn : TYPE: XXXXXX 220-240V ~ 220V-240V, 50/60Hz 503536 The rating plate indicating the basic information about the appliance is located at the edge of the oven and it is visible when the oven doo...
Page 12 - BEFORE CONNECTING THE OVEN
12 503536 Do not use steam cleaners or high pressure cleaners to clean the appliance as this may result in an electric shock. The appliance is not intended to be controlled with external timers or special control systems. The appliance is intended for household use. Do not use it for any other purpo...
Page 14 - CHANGING THE CLOCK SETTING; STEP 1: SWITCHING ON AND SETTINGS; SETTING THE CLOCK
14 1 Touch the and keys to set the time of day. If you press and hold the value adjustment key, the rate at which the set value is being changed will increase. CHANGING THE CLOCK SETTING Clock settings may be changed when no timer function is activated. To set the current time (clock), touch the CLO...
Page 15 - STEP 2: CHOOSING THE COOKING SYSTEM
15 STEP 2: CHOOSING THE COOKING SYSTEM Rotate the knob (left and right) to select the cooking system (see program table). Settings can also be changed during the cooking process. SYSTEM DESCRIPTION SUGGESTED TEMPERATURE °C COOKING SYSTEMS RAPID PREHEAT Use this function if you wish to heat the oven ...
Page 17 - STEP 3: CHOOSING THE SETTINGS; ADJUSTING THE COOKING TEMPERATURE
17 Rotate the knob to set the desired TEMPERATURE. When using the oven system with the large grill and grill, set the temperature knob to position . After switching on the appliance by touching the START key, the temperature icon is displayed on the display unit. To switch on the appliance, press th...
Page 18 - TIMER FUNCTIONS
18 Setting the cooking time In this mode, you can define the duration of oven operation (cooking time). Set the desired cooking time. First set the minutes, then the hours. Icon and cooking time are displayed on the display unit. Setting the delayed start In this mode, you may specify the duration o...
Page 19 - Setting the minute minder
19 Setting the minute minder The minute minder can be used independently of the oven operation. The longest possible setting is 24 hours.During the last minute, the minute minder is displayed in seconds. 503536 After the set time expires, the oven will automatically stop operating (end of cooking). ...
Page 20 - OVEN LIGHTING
20 STEP 4: SELECTING ADDITIONAL FUNCTIONS/EXTRAS CHILD LOCK! Activate it by touching the CHILD LOCK key. " Loc " will appear on the display unit for 5 seconds. Touch the key again to deactivate the child lock. If the child lock is activated with no timer function engaged (only clock is displ...
Page 21 - ACOUSTIC SIGNAL; DECREASING THE DISPLAY CONTRAST; STANDBY
21 ACOUSTIC SIGNAL Loudness of the acoustic signal can be set when no timer function is activated (only the time of day is displayed). Press the key and hold it for five seconds. First, " Vol " will appear on the display unit, followed by two fully lit bars. Touch the and keys to choose one ...
Page 24 - COOKING SYSTEMS; UPPER AND BOTTOM HEATER
24 503536 COOKING SYSTEMS Roasting meat: Use enamel coated, tempered glass, clay, or cast iron pan or tray. Stainless steel trays are not suitable as they strongly reflect the heat. Use enamel coated, tempered glass, clay, or cast iron pan or tray. Stainless steel trays are not suitable as they stro...
Page 29 - Cooking with the rotisserie
29 503536 Cooking with the rotisserie (depending on the model) 1 Insert the skewer support into the 3rd guide from the bottom and place the deep tray into the bottom (1st) guide to serve as a drip tray. 2 Impale the meat on the skewer and tighten the screws. 3 Place the skewer handle on the front sk...
Page 30 - GRILL WITH FAN
30 Type of food Weight (g) Guide level (from the bottom) Temperature (°C) Cooking time (min) MEAT Duck * 2000 2 150-170 80-100 Pork roast 1500 2 160-170 60-85 Pork shoulder 1500 2 150-160 120-160 Pork shank 1000 2 150-160 120-140 Half of chicken 600 2 180-190 25 (one side) 20 (other side) Chicken* 1...
Page 31 - HOT AIR AND BOTTOM HEATER
31 503536 Food Guide (from the bottom) Temperature (°C) Cooking time (minutes) Cheesecake, short crust 2 150-160 65-80 Pizza * 2 200-210 15-20 Quiche Lorraine, shortcrust 2 180-200 35-40 Apple pie, leavened dough 2 150-160 35-40 Apple strudel, phyllo dough 2 170-180 45-65 HOT AIR AND BOTTOM HEATER T...
Page 32 - HOT AIR
32 503536 Roasting meat: Use enamel coated, tempered glass, clay, or cast iron pan or tray. Stainless steel trays are not suitable as they strongly reflect the heat. Provide enough liquid during the cooking process to prevent the meat from burning. Turn the meat during roasting. The roast will remai...
Page 34 - PRESERVATION; BOTTOM HEATER AND FAN
34 503536 Type of food Guide (from the bottom) Temperature (°C) Cooking time (minutes) FRUIT Strawberries 2 180 20-30 Stone fruits 2 180 25-40 Fruit mush 2 180 25-40 VEGETABLES Pickled gherkins 2 180 25-40 Beans/carrots 2 180 25-40 PRESERVATION Prepare the food to be preserved and jars as usual. Use...
Page 36 - TOP AND BOTTOM HEATER WITH FAN
36 503536 TOP AND BOTTOM HEATER WITH FAN It is used for baking of all types of pastry, for defrosting, and for drying fruit and vegetables. Before placing the food into the preheated oven, wait for the light to go off for the first time. For best results, only bake on one shelf (level).The oven shou...
Page 38 - DEFROSTING
38 Turn the COOKING SYSTEM SELECTOR KNOB to defrosting. Touch the START/STOP key to start the defrosting process. 503536 DEFROSTING In this mode, the air will circulate without any heaters operating.Food suitable for defrosting includes cakes with heavy cream or butter-based cream, cakes and pastry,...
Page 39 - MAINTENANCE & CLEANING; Aluminium finish
39 MAINTENANCE & CLEANING 503536 Be sure to unplug the appliance from the power supply and wait for the appliance to cool down. Children should not clean the appliance or perform maintenance tasks without proper supervision. Aluminium finish Clean the aluminium finish with non-abrasive liquid cl...
Page 40 - CONVENTIONAL OVEN CLEANING
40 503536 CONVENTIONAL OVEN CLEANING You may use the standard cleaning procedure to clean stubborn dirt in the oven (using cleaners or an oven spray). After such cleaning, rinse the cleaner residues thoroughly. Clean the oven and the accessories after each use to prevent the dirt from burning into t...
Page 43 - INSTALLING THE CATALYTIC INSERTS
43 503536 INSTALLING THE CATALYTIC INSERTS Only use conventional cleaners to clean the guides. Remove the wire guides or extendible guides. 1 Mount the guides onto the catalytic insert. 2 Hang the inserts with guides attached using the holes provided, and pull upwards. When installing fully extendib...
Page 44 - CLEANING THE OVEN CAVITY CEILING
44 503536 CLEANING THE OVEN CAVITY CEILING (depending on the model) Upper grill heater is foldable to allow easier cleaning of the oven cavity ceiling. Before cleaning the oven, remove the trays, the grid, and the guides. Pull the heater until the cross bar is released from the supports on the left ...
Page 48 - REPLACING THE BULB
48 503536 REPLACING THE BULB The bulb is a consumable and therefore not covered by warranty. Before changing the bulb, remove the trays, the grid, and the guides. (Halogen lamp: G9, 230 V, 25 W; regular bulb E14 25W 230V) Use a flat screwdriver to release the bulb cover and remove it. Remove the bul...
Page 49 - TROUBLESHOOTING TABLE
49 TROUBLESHOOTING TABLE If the problems persist despite observing the advice above, call an authorized service technician. Repair or any warranty claim resulting from incorrect connection or use of the appliance shall not be covered by the warranty. In this case, the user will cover the cost of rep...
Page 50 - DISPOSAL
50 DISPOSAL 503536 Packaging is made of environmentally friendly materials that can be recycled, disposed of, or destroyed without any hazard to the environment. To this end, packaging materials are labelled appropriately. The symbol on the product or its packaging indicates that the product should ...
Page 51 - COOKING TEST; Conventional baking
51 503536 COOKING TEST Food tested in compliance with the EN 60350-1 standard. Conventional baking Dish Equipment Guide (from the bottom) System Tempera- ture (°C) Cooking time (minutes) Cookies – single level Shallow enamel-coated baking sheet 3 140-150 * 25-40 Cookies – two levels Shallow enamel-c...
Page 52 - Grill
52 503536 Grill Dish Equipment Guide (from the bottom) System Tempera- ture (°C) Cooking time (minutes) Toast Wire shelf/grid 4 240 * 1:00-5:00 Minced meat patty (pljeskavica) Wire shelf (support grid) + shallow baking sheet as drip tray 4 240 30-40 ** * Preheat for 6 minutes. Do not use fast prehea...