GE JV338HWW - Manuals

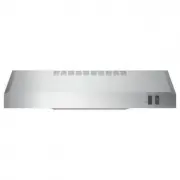
User Manual GE JV338HWW


Summary
Operating Instructions Safety Instructions Consumer Support Installation Instructions READ AND FOLLOW THIS SAFETY INFORMATION CAREFULLY. READ AND SAVE THESE INSTRUCTIONS SAFETY PRECAUTIONS IMPORTANT SAFETY INFORMATION.READ ALL INSTRUCTIONS BEFORE USING. WARNING – TO REDUCE THE RISK OF FIRE, ELECTRIC...
Installation Instructions Consumer Support Safety Instructions Operating Instructions LISEZ ET SUIVEZ ATTENTIVEMENT CES INSTRUCTIONS. LISEZ ET CONSERVEZ CES INSTRUCTIONS PRÉCAUTIONS EN MATIÈRE DE SÉCURITÉ INSTRUCTIONS DE SÉCURITÉ IMPORTANTES.LISEZ TOUTES LES INSTRUCTIONS AVANT D’UTILISER. AVERTISSEM...
Operating Instructions Safety Instructions Consumer Support Installation Instructions Using the hood controls. Throughout this manual, features and appearance may vary from your model. FAN Control Turn to HI , MED or LO as needed. Continuous use of the fan system while cooking helps keep the kitchen...
GE Range Hoods Manuals
-
 GE JN327HBB
User Manual
GE JN327HBB
User Manual
-
 GE JN327HWW
User Manual
GE JN327HWW
User Manual
-
 GE JVW5301BJTS
User Manual
GE JVW5301BJTS
User Manual
-
 GE JVW5301EJES
User Manual
GE JVW5301EJES
User Manual
-
 GE JVW5301FJDS
User Manual
GE JVW5301FJDS
User Manual
-
 GE JVW5301SJSS
User Manual
GE JVW5301SJSS
User Manual
-
 GE JVW5361EJES
User Manual
GE JVW5361EJES
User Manual
-
 GE JVW5361FJDS
User Manual
GE JVW5361FJDS
User Manual
-
 GE JVW5361SJSS
User Manual
GE JVW5361SJSS
User Manual
-
 GE JVX3240DJWW
User Manual
GE JVX3240DJWW
User Manual
-
 GE JVX3240SJSS
User Manual
GE JVX3240SJSS
User Manual
-
 GE JVX3300DJBB
User Manual
GE JVX3300DJBB
User Manual
-
 GE JVX3300DJWW
User Manual
GE JVX3300DJWW
User Manual
-
 GE JVX3300SJSS
User Manual
GE JVX3300SJSS
User Manual
-
 GE JVX5300EJES
User Manual
GE JVX5300EJES
User Manual
-
 GE JVX5300SJSS
User Manual
GE JVX5300SJSS
User Manual
-
 GE JVX5305DJBB
User Manual
GE JVX5305DJBB
User Manual
-
 GE JVX5305DJWW
User Manual
GE JVX5305DJWW
User Manual
-
 GE JVX5305SJSS
User Manual
GE JVX5305SJSS
User Manual
-
 GE JVX5360SJSS
User Manual
GE JVX5360SJSS
User Manual