Page 2 - THANK YOU FOR MAKING GE APPLIANCES A PART OF YOUR HOME.; card included in the packing material.
2 49-5000634 Rev. 0 THANK YOU FOR MAKING GE APPLIANCES A PART OF YOUR HOME. Whether you grew up with GE Appliances, or this is your first, we’re happy to have you in the family. We take pride in the craftsmanship, innovation and design that goes into every GE Appliances product, and we think you wil...
Page 3 - IMPORTANT SAFETY INFORMATION; READ ALL INSTRUCTIONS BEFORE USING THE APPLIANCE; SAFETY; ONLY; WARNING; Additional safety precautions must be followed.; WARNING; USE OF EXTENSION CORDS
49-5000634 Rev. 0 3 IMPORTANT SAFETY INFORMATION READ ALL INSTRUCTIONS BEFORE USING THE APPLIANCE SAFETY INFORMA TION READ AND SAVE THESE INSTRUCTIONS WARNING For your safety, the information in this manual must be followed to minimize the risk of fire, electric shock or personal injury. ■ Use this ...
Page 4 - READ AND SAVE THESE INSTRUCTIONS; HOW TO CONNECT ELECTRICITY; Draining The Unit
4 49-5000634 Rev. 0 SAFETY INFORMA TION IMPORTANT SAFETY INFORMATION READ ALL INSTRUCTIONS BEFORE USING THE APPLIANCE READ AND SAVE THESE INSTRUCTIONS HOW TO CONNECT ELECTRICITY Do not, under any circumstances, cut or remove the third (ground) prong from the power cord. For personal safety, this app...
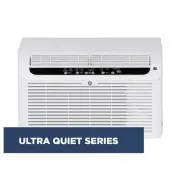
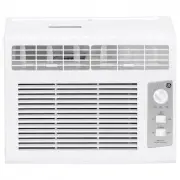
Page 5 - USING THE; Controls; Features and appearance will vary.; Remote Control
49-5000634 Rev. 0 5 USING THE AIR CONDITIONER: Controls Controls Features and appearance will vary. Lights beside the touch pads on the air conditioner control panel indicate the selected settings. Remote Control Air Conditioner Controls 1. Power Pad Turns air conditioner on and off. When turned on,...
Page 6 - Using the Air Conditioner; SLEEP
6 49-5000634 Rev. 0 Using the Air Conditioner Remote Control ■ To ensure proper operation, aim the remote control at the signal receiver on the air conditioner. ■ The remote control signal has a range of up to 20 feet. ■ Make sure nothing is between the air conditioner and the remote control that co...
Page 7 - Air Direction; Default Setting; Care and Cleaning; Filters; CAUTION; Grille and Case
49-5000634 Rev. 0 7 Using the Air Conditioner Air Direction Use the levers to adjust the air direction up and down. USING THE AIR CONDITIONER / CARE AND CLEANING Sound ON/OFF The Sound ON/OFF Mode will be able to turn On and Off the beep function by the user. Beep will be active when Sound ON. Beep ...
Page 8 - Outdoor Coils; How to Insert the Batteries in the Remote Control; Draining the Unit; Normal Operating Sounds
8 49-5000634 Rev. 0 Care and Cleaning CARE AND CLEANING Outdoor Coils The coils on the outdoor side of the air conditioner should be checked regularly. If they are clogged with dirt or soot, they may be professionally cleaned. How to Insert the Batteries in the Remote Control 1. Remove the battery c...
Page 10 - PARTS INCLUDED
10 49-5000634 Rev. 0 Installation Instructions INST ALLA TION INSTRUCTIONS PARTS INCLUDED (Appearance may vary) Type B (1) 3/4” or 1/2” screw Sash Lock (1) Air Conditioner (1) Power Speed Mode Quiet Delay Remote Control (1) Foam Spacer (1) (only needed if window sill/trim does not stick out 0.5”) Cu...
Page 11 - CONDITIONER; INST; WINDOW REQUIREMENTS; IF; Outside
49-5000634 Rev. 0 11 2. PREPARE THE AIR CONDITIONER • Measure the width of the window opening and mark the center of the window opening. • Center the Foam Mounting Support in the window opening, remove adhesive backing and install the necessary amount of Foam Mounting Supports needed to raise the un...
Page 12 - Adjusting the Chase-Way; PULL; WALL REQUIREMENTS
12 49-5000634 Rev. 0 Installation Instructions INST ALLA TION INSTRUCTIONS 4. PREPARE THE AIR CONDITIONER Adjusting the Chase-Way • Measure window depth from interior to exterior. Use the table from Section 3 to determine the corresponding chase-way position. • Remove 4 locking screws that hold the ...
Page 13 - Attaching Side Panels; Installation Instructions; INSTALL UNIT IN WINDOW; Using a level, check that the unit
49-5000634 Rev. 0 13 6. INSTALLING SIDE FILLER PANELS Attaching Side Panels • Close the window and draw a line where the front edge of the window meets the top of the unit. Raise the window back up. • Remove adhesive backing from the Side Panel Brackets. Place them onto unit so that the front edges ...
Page 14 - INSTALL WEATHER STRIPPING
14 49-5000634 Rev. 0 Installation Instructions INST ALLA TION INSTRUCTIONS 7. INSTALL WEATHER STRIPPING FOAM ADHESIVE • Cut the Adhesive Weather Stripping Foam to the width of the window. Peel off the backing and lay the foam across the width of the window, over the unit and side panels (following t...
Page 15 - Wood
49-5000634 Rev. 0 15 8. INSTALL WINDOW WEDGE, SASH LOCK, AND FOAM TOP WINDOW GASKET A. A Window Wedge is supplied to provide easy access to open window when desired. DISCLAIMER: The Window Wedge is primarily a convenience option and is not meant to be used for security. For something more secure, pl...
Page 16 - Troubleshooting
16 49-5000634 Rev. 0 Problem Possible Causes What To Do Unit displays error code “P1” and shuts unit off The pump has had a problem or failed. Drain indoor side of unit per instructions in the Care and Cleaning, Draining the Unit section. Hold down the SLEEP button for 3 seconds to clear error messa...
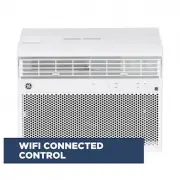
Page 18 - GE Appliances SmartHQ (for customers in the United States); GE Appliances SmartHQ Enabled; How it Works; Getting Started; connected; Questions about SmartHQ; WIFI SETUP
18 49-5000634 Rev. 0 GE Appliances SmartHQ (for customers in the United States) GE Appliances SmartHQ Enabled*. If your Air Conditioner (AC) has a Connected Appliance Information label located on the outside as shown below, your AC is GE Appliances SmartHQ Enabled . A WiFi communication card is buil...
Page 20 - Notes
Page 21 - GE Appliances Air Conditioner; Haier
49-5000634 Rev. 0 21 LIMITED W ARRANTY GE Appliances Air Conditioner - One-Year Limited Warranty EXCLUSION OF IMPLIED WARRANTIES - Your sole and exclusive remedy is product repair as provided in this Limited Warranty. Any implied warranties, including the implied warranties of merchantability or fit...
Page 22 - GE Appliances Website; Register Your Appliance; servicing may cause unsafe operation.; Contact Us
22 49-5000634 Rev. 0 CONSUMER SUPPORT Consumer Support GE Appliances Website Have a question or need assistance with your appliance? Try the GE Appliances Website 24 hours a day, any day of the year! You can also shop for more great GE Appliances products and take advantage of all our on-line suppor...
Page 23 - ACCONDICIONADORES DE AIRE; PARA SALA; Antes de comenzar
ACCONDICIONADORES DE AIRE PARA SALA INFORMACIÓN DE SEGURIDAD . . .3 INSTRUCCIONES DE OPERACIÓN . . . . . . . . . . . . . . . . . . .5 CUIDADO Y LIMPIEZA . . . . . . . . . . . . .8 INSTRUCCIONES DE INSTALACIÓN . . . . . . . . . . . . . . . . . .9 CONSEJOS PARA LA SOLUCIÓN DE PROBLEMAS . . . . . . . ....
Page 24 - GRACIAS POR HACER QUE GE APPLIANCES SEA PARTE DE SU HOGAR.; tenerlo en la familia.
2 49-5000634 Rev. 0 GRACIAS POR HACER QUE GE APPLIANCES SEA PARTE DE SU HOGAR. Ya sea que haya crecido usando GE Appliances, o que ésta es su primera vez, nos complace tenerlo en la familia. Sentimos orgullo por el nivel de arte, innovación y diseño de cada uno de los electrodomésticos de GE Applian...
Page 25 - Se deben seguir las precauciones adicionales de seguridad.; ADVERTENCIA; LEA Y GUARDE ESTAS INSTRUCCIONES; USO DE PROLONGADORES
49-5000634 Rev. 0 3 Para su seguridad, siga las instrucciones de este manual a fin de minimizar riesgos de incendio, descargas eléctricas o heridas personales. ■ Use este electrodoméstico sólo para su propósito original, como se describe en el Manual del Propietario. ■ Este acondicionador de aire se...
Page 26 - CÓMO CONECTAR LA ELECTRICIDAD; IMPORTANTE
4 49-5000634 Rev. 0 LEA Y GUARDE ESTAS INSTRUCCIONES INFORMACIÓN IMPORTANTE DE SEGURIDAD LEA TODAS LAS INSTRUCCIONES ANTES DE USAR INFORMACIÓN DE SEGURIDAD CÓMO CONECTAR LA ELECTRICIDAD Nunca, bajo ninguna circunstancia, corte o elimine el tercer cable (tierra) del cable de corriente. Para su seguri...
Page 27 - USO; Controles; Control Remoto
49-5000634 Rev. 0 5 USO DEL ACONDICIONADOR DE AIRE: Controles Controles Las funciones y la apariencia podrán variar.Las luces al lado de las teclas táctiles del panel de control del acondicionador de aire indican las configuraciones seleccionadas. Control Remoto Controles del Acondicionador de Aire ...
Page 28 - Uso del Acondicionador de Aire; Velocidad Automática del Ventilador; Dry Mode
6 49-5000634 Rev. 0 Uso del Acondicionador de Aire Control Remoto ■ Para asegurar un uso apropiado, apunte el control remoto al receptor de señal del acondicionador de aire. ■ La señal del control remoto cuenta con un alcance de hasta 20 pies. ■ Asegúrese de que no haya obstrucciones entre el acondi...
Page 29 - Dirección del Aire; USO DEL; Sonido Encendido/ Apagado; Cuidado y limpieza; Parrilla y Caja; PRECAUCIÓN
49-5000634 Rev. 0 7 Uso del Acondicionador de Aire Dirección del Aire Use las palancas para ajustar la dirección del aire hacia arriba y abajo. USO DEL ACONDICIONADOR DE AIRE/ CUIDADO Y LIMPIEZA Sound ON/OFF (Sonido Encendido/ Apagado) El modo Sound ON/OFF le permitirá al usuario encender y apagar l...
Page 30 - Bobinas Exteriores; Cómo insertar las pilas en el control remoto; Drenaje de la Unidad
8 49-5000634 Rev. 0 CUIDADO Y LIMPIEZA Bobinas Exteriores Las bobinas del lado exterior del acondicionador de aire se deberán controlar de forma regular. Si se encuentran atascadas con tierra u hollín, deberán ser limpiadas por un profesional. Cuidado y limpieza Cómo insertar las pilas en el control...
Page 31 - ¿Preguntas? Visite nuestra página en la red en: GEAppliances.com
49-5000634 Rev. 0 9 INSTRUCCIONES DE INST ALACIÓN Instrucciones de instalación ¿Preguntas? Visite nuestra página en la red en: GEAppliances.com ANTES DE INICIAR Lea estas instrucciones completa y cuidadosamente. • IMPORTANTE — Guarde estas instrucciones para uso del inspector local. • IMPORTANTE — O...
Page 32 - PARTES INCLUIDAS
10 49-5000634 Rev. 0 Instrucciones de instalación INSTRUCCIONES DE INST ALACIÓN PARTES INCLUIDAS (Apariencia puede variar) Tornillos de 3/4” o 1/2” Tipo B (2) Pasador giratorio (1) Acondicionador de aire (1) Power Speed Mode Quiet Delay Control Remoto (1) Panel Lateral de Gomaespuma cortado a medida...
Page 33 - PREPARE EL ACONDICIONADOR; REQUISITOS PARA LA VENTAN; Exterior; Interior
49-5000634 Rev. 0 11 INSTRUCCIONES DE INST ALACIÓN Instrucciones de instalación 1. REQUISITOS PARA LA VENTAN ■ Estas instrucciones son para una ventana estándar de dos pliegues. Usted necesitará modificar el proceso para otros tipos de ventanas. ■ El acondicionador de aire se puede instalar sin los ...
Page 34 - PREPARE EL ACONDICIONADOR; Ajuste de la Ruta del Cableado; REQUISITOS SOBRE LA PARED
12 49-5000634 Rev. 0 Instrucciones de instalación INSTRUCCIONES DE INST ALACIÓN 4. PREPARE EL ACONDICIONADOR DE AIRE Ajuste de la Ruta del Cableado • Mida la profundidad de la ventana del interior al exterior. Use la tabla de la Sección 3 para determinar la posición correspondiente de la ruta del ca...
Page 35 - INSTALE LOS PANELES DE; Adhiera los Paneles Laterales; INSTALE LA UNIDAD EN LA
49-5000634 Rev. 0 13 INSTRUCCIONES DE INST ALACIÓN Instrucciones de instalación 6. INSTALE LOS PANELES DE RELLENO LATERALES Adhiera los Paneles Laterales • Cierre la ventana y dibuje una línea donde el extremo frontal de la ventana se una con la parte superior de la unidad. Vuelva a subir la ventana...
Page 36 - INSTALE EL ADHESIVO DE
14 49-5000634 Rev. 0 Instrucciones de instalación INSTRUCCIONES DE INST ALACIÓN 7. INSTALE EL ADHESIVO DE GOMAESPUMA PARA EL BURLETE • Corte la Gomaespuma del Burlete Adhesivo del ancho de la ventana. Pele la parte trasera y coloque la gomaespuma sobre todo el ancho de la ventana, sobre la unidad y ...
Page 37 - DESCARGO DE RESPONSABILIDAD:; Madera; INSTRUCCIONES DE INST
49-5000634 Rev. 0 15 8. INSTALE LA CUÑA DE LA VENTANA, EL BLOQUEO DEL MARCO Y LA JUNTA DE GOMAESPUMA DE LA PARTE SUPERIOR DE LA VENTANA A. Se brinda una Cuña de Ventana a fin de proveer un fácil acceso para abrir la ventana cuando se desee. DESCARGO DE RESPONSABILIDAD: La Cuña de la Ventana es princ...
Page 39 - Sonidos de Funcionamiento Normal
49-5000634 Rev. 0 17 Solucionar problemas SOLUCIONAR PROBLEMASN Sonidos de Funcionamiento Normal ■ Es posible que escuche un sonido metálico ocasionado por el agua recogida y arrojada contra el condensador en días lluviosos o cuando el nivel de humedad sea alto. Esta función ayuda a eliminar la hume...
Page 40 - Configuración WiFi; GE Appliances SmartHQ; CONFIGURACIÓN WIFI; Cómo Funciona; Puesta en marcha; Los datos de todos los electrodomésticos; Preguntas acerca de SmartHQ
18 49-5000634 Rev. 0 Configuración WiFi GE Appliances SmartHQ (Para clientes en Estados Unidos) GE Appliances SmartQ Habilitado* Si su acondicionador de aire posee una etiqueta de Información del Electrodoméstico Conectado ubicada en la parte externa como se muestra a continuación, su acondicionador...
Page 41 - INFORMACIÓN REGULATORIA
49-5000634 Rev. 0 19 Configuración WiFi INFORMACIÓN REGULATORIA Declaración de Cumplimiento con FCC/ IC: 1. Este dispositivo no podrá causar interferencias perjudiciales.2. Este dispositivo debe aceptar cualquier interferencia recibida, incluidas las interferencias que puedan provocar un funcionamie...
Page 42 - Notas
Page 43 - Garantía de su acondicionador de aire—garantía limitada de un año.; Qué No Será Cubierto:; modelo y número de serie.
49-5000634 Rev. 0 21 GARANTÍA LIMIT ADA Garantía de su acondicionador de aire—garantía limitada de un año. Abroche su recibo aquí. Para acceder al servicio técnico de acuerdo con la garantía deberá contar con la prueba de la fecha original de compra. EXCLUSIÓN DE GARANTÍAS IMPLÍCITAS—Su única y excl...
Page 44 - Sitio Web de GE Appliances; Contáctenos
22 49-5000634 Rev. 0 SOPORTE P ARA EL CONSUMIDOR Soporte para el Consumidor Sitio Web de GE Appliances ¿Desea realizar una consulta o necesita ayuda con su electrodoméstico? ¡Intente a través del Sitio Web de GE Appliances las 24 horas del día, cualquier día del año! Usted también puede comprar más ...


 GE AHC08LY
User Manual
GE AHC08LY
User Manual
 GE AHD08LZ
User Manual
GE AHD08LZ
User Manual
 GE AHLE06CA
User Manual
GE AHLE06CA
User Manual
 GE AHP08LX
User Manual
GE AHP08LX
User Manual
 GE AHQ06LYC
User Manual
GE AHQ06LYC
User Manual
 GE AHQ06LZ
User Manual
GE AHQ06LZ
User Manual
 GE AHS05LX
User Manual
GE AHS05LX
User Manual
 GE AHS10AX
User Manual
GE AHS10AX
User Manual
 GE AHTR10AC
User Manual
GE AHTR10AC
User Manual
 GE AHTT06BC
User Manual
GE AHTT06BC
User Manual
 GE AHY08LZ
User Manual
GE AHY08LZ
User Manual
 GE AJCQ12AWJ
User Manual
GE AJCQ12AWJ
User Manual
 GE AJCQ12DWH
User Manual
GE AJCQ12DWH
User Manual
 GE AKCQ08ACJ
User Manual
GE AKCQ08ACJ
User Manual
 GE APCA10YBMW
User Manual
GE APCA10YBMW
User Manual
 GE APCA14YBMW
User Manual
GE APCA14YBMW
User Manual
 GE APCD08JASW
User Manual
GE APCD08JASW
User Manual