Page 2 - family
2 IntroductIon IntroductIon Welcome to our family Thank you for bringing Frigidaire into your home! We see your purchase as the beginning of a long relationship together .This manual is your resource for the use and care of your product . Please read it before using your appliance . Keep it handy fo...
Page 3 - defInItIonS
3 Important Safety InStructIonS defInItIonS This is the safety alert symbol . It is used to alert of potential personal injury hazards . Obey all safety messages that follow this symbol to avoid possible injury or death . WarnInG Indicates a potentially hazardous situa- tion which, if not avoided, m...
Page 4 - Important Safety InStructIonS; Important InStructIonS for; Important; WARNING; Tip Over Hazard; WarnInG
4 Important Safety InStructIonS Important InStructIonS for unpacKInG and InStaLLatIon Important Read and follow the below instructions and precautions for unpacking, installing, and servicing your appliance . Remove all tape and packaging before us- ing the appliance . Destroy the carton and plastic...
Page 5 - GroundInG InStructIonS
5 Important Safety InStructIonS GroundInG InStructIonS WarnInG • Avoid fire hazard or electrical shock . Failure to follow this warning may cause serious injury, fire, or death . • Avoid fire hazard or electrical shock . Do not use an adapter plug, use an extension cord, or remove grounding prong fr...
Page 6 - Important InStructIonS for uSInG
6 Important Safety InStructIonS Important InStructIonS for uSInG tHe appLIance WarnInG • Storage In or On Appliance—Flamma- ble materials should not be stored in an oven or microwave, near surface burners or elements, or in the stor- age or warmer drawer (if equipped) . This includes paper, plastic,...
Page 7 - cautIon
7 Important Safety InStructIonS cautIon • Wear proper apparel - Loose-fitting or hanging garments should never be worn while using the appliance . Do not let clothing or other flammable materials contact hot surfaces . • Do not touch surface burners or ele- ments, areas near these burners or el- eme...
Page 9 - Important InStructIonS for SeLf
9 Important Safety InStructIonS Important InStructIonS for SeLf cLeanInG oVenS cautIon Before using self clean, remove the broil- er pan, any food, utensils, and cookware from the oven, storage drawer or warm- ing drawer (if equipped) . Remove oven racks unless otherwise instructed . Do not clean th...
Page 10 - Bakeware; material; cooKInG recommendatIonS
10 cooKInG recommendatIonS Bakeware The material of bakeware affects how evenly and quickly it transfers heat from the pan to the food . material attributes recommendation Shiny metal bakeware Shiny, aluminum, and non-coat- ed bakeware is the best for even heating . It is suitable for all baked good...
Page 11 - cooking conditions
11 cooKInG recommendatIonS cooking conditions Conditions in your kitchen can affect the performance of your appliance when cooking food . condition attributes recommendation Aging cookware As pans age and become discolored, cooking times may need to be reduced slightly . If food is too dark or overc...
Page 12 - convection cooking
12 cooKInG recommendatIonS material recommendation Broiling / roasting Broiling pan For best results when broiling, use a broil pan with a broil pan insert de- signed to drain the fat from the food, help avoid spatter, and reduce smok- ing . The broiler pan will catch grease spills, and the insert h...
Page 13 - assembly of the Burner caps; figure 1: Gently move cap for proper placement; Burner caps
13 Before SettInG Surface controLS Before SettInG Surface controLS assembly of the Burner caps Make sure that all of the surface burner caps and surface burner grates are installed correctly and at the correct locations .Remove all packing material from the cooktop area .Make sure burner head and ca...
Page 14 - Before SettInG Surface controLS; using proper cookware
14 Before SettInG Surface controLS using proper cookware The size and type of cookware used will influence the heat setting needed for best cooking results . Be sure to follow the recommendations for using proper cookware as illustrated in “Figure 2: Testing cookware” and “Figure 3: Proper cookware”...
Page 15 - Installing Burner Grates; Gas surface burner types; figure 4: place burner grates carefullyafter
15 Before SettInG Surface controLS Installing Burner Grates To install burner grates, place the grates flat-side down and align them into the cooktop recess . Important • Make sure the burner grates are properly placed on the cooktop before using the sur- face burners (Figure 4) . The grates are de-...
Page 16 - Setting surface controls
16 SettInG Surface controLS SettInG Surface controLS Setting surface controls The ability to heat food quickly and in large vol- umes increases as the burner size increases . Your gas appliance may be equipped with many differ- ent sized surface burners .It is important to select cookware that is su...
Page 17 - SettInG Surface controLS; Set proper burner flame size; figure 6: proper burner flame; Setting the oval burner; oval Burner
17 SettInG Surface controLS Set proper burner flame size The color of the flame is the key to proper burner adjustment . A good flame is clear, blue and hardly visible in a well-lighted room . Each cone of flame should be steady and sharp . Adjust or clean the burner if flame is yellow-orange . for ...
Page 18 - do not; Home canning; figure 7: cast iron griddle
18 SettInG Surface controLS cooking with a griddle (some models) The griddle is a versatile accessory that is perfect for cooking foods that require large flat surfaces such as pancakes, French toast, grilled sandwiches, bacon, and also for cooking different foods at the same time .• After use, let ...
Page 19 - types of oven rack; • flat oven racks; racks; remove; oven Vent Location; figure 9: oven rack types
19 Before SettInG oVen controLS Before SettInG oVen controLS types of oven rack figure 8: oven vent • flat oven racks may be used for most cooking needs and may be placed in most oven rack positions . • air fry tray - Designed especially for air frying in a tray that fits inside the Air Fry rack . •...
Page 20 - Before SettInG oVen controLS; removing and replacing the Glide racks
20 Before SettInG oVen controLS removing and replacing the Glide racks The fully extendable Glide rack makes food prepa- ration easier . This oven rack has glide tracks that allow the rack to be pulled away from the oven without rubbing the sides of the oven wall . to remove - Make sure the baking r...
Page 21 - oVen temp SettInGS
21 SettInG oVen controLS SettInG oVen controLS oven minimum and maximum control Settings Feature Min . Temp/Time Max . Temp/Time BAKE 170°F (77°C) 550°F (288°C) POWER+PREHEAT 170°F (77°C) 550°F (288°C) AIR FRY 170°F (77°C) 550°F (288°C) CONV BAKE 170°F (77°C) 550°F (288°C) CONV ROAST 170°F (77°C) 55...
Page 22 - SettInG oVen controLS; Setting the clock; tImer; to set the correct time of day:; note
22 SettInG oVen controLS Setting the clock The clock icon is used to access the time of day setting . When the oven is first plugged in or if there has been an interruption in power to the range, 12:00 will flash in the display . oven Light The oven light will turn on automatically when the oven doo...
Page 23 - continuous Bake or 12 Hour energy; to set the oven for continuous cooking:; Setting control for Silent operation; default setting for oven control sounds
23 SettInG oVen controLS continuous Bake or 12 Hour energy Saving The oven is preset to cook up to 12 hours and to shut off automatically . For longer periods of cook- ing, this feature can be changed to continuous cooking by setting the user preference and turning the energy saving feature off . to...
Page 24 - to set the preheat temperature for 350°f:
24 SettInG oVen controLS power+ preheat Power+ Preheat is available for single rack baking with packaged and convenience foods and can be programmed for temperatures between 170°F and 550°F . Follow the recipe or package directions for food preparation time and temperature . When quick preheat is co...
Page 25 - Setting Bake
25 SettInG oVen controLS Setting Bake Bake cooks with heat that rises from the oven bottom . The heat and air circulate naturally in the oven . A reminder tone will sound indicating when the set bake temperature is reached and to place the food in the oven . Bake may be set for any oven temperature ...
Page 26 - air fry
26 SettInG oVen controLS air fry The Air Fry feature works best for single rack bak- ing with packaged and convenience foods and can be programmed for temperatures between 170°F and 550°F . Follow the recipe or package directions for food preparation quantity, time, and tempera- ture . Important: • ...
Page 27 - convection Bake
27 SettInG oVen controLS convection Bake Convection Bake uses a fan to circulate the oven’s heat uniformly around the oven . This improved heat distribution allows for even cooking and browning results . Heated air flows around the food from all sides . Convection bake may be set for any oven temper...
Page 28 - convection roast
28 SettInG oVen controLS convection roast Convection roast combines a cook cycle with the convection fan and element to rapidly roast meats and poultry . Heated air circulates around the meat from all sides, sealing in juices and flavors . Meats cooked with this feature are crispy and brown on the o...
Page 30 - using the Broil feature; broil; open door BroIL SHutoff
30 SettInG oVen controLS using the Broil feature Use the broil feature to cook meats requiring direct exposure to radiant heat for optimum browning results . Broiling is direct heat cooking and may produce smoke . If smoke is excessive, place food further away from the element . Broil is preset to 5...
Page 32 - meat probe; prb; If
32 SettInG oVen controLS meat probe Use the probe feature for best results when cook- ing foods such as roasts, hams or poultry, using a probe to check internal temperature is the safest method to ensure properly cooked food . Before using the meat probe read the important information listed here: S...
Page 33 - off; proper placement of probe in food.
33 SettInG oVen controLS to set probe:note: The minimum setting is 140ºF (60ºC); the maximum is 210ºF (99ºC) . Default is 170ºF (77ºC) .1 . Insert the probe into the food . Place prepared food on the desired oven rack position and slide into the oven . 2 . Plug the connector end of the probe into th...
Page 34 - table 3: uSda recommended minimum internal
34 SettInG oVen controLS handle probe cable probe sensor handle receptacle probe connector Parts of the probe table 3: uSda recommended minimum internal cooking temperaturesfood type Internal temp. Ground meat and meat mixtures Beef, Pork, Veal, Lamb 160°F (71°C) Turkey, Chicken 165°F (74°C) fresh b...
Page 35 - trailing Keep Warm with meat probe; oVen mode
35 SettInG oVen controLS trailing Keep Warm with meat probe When the meat probe reaches the target tempera- ture, the oven will automatically switch to keep warm (170°F) and remain on for up to 3 hours before turning off automatically . The display will continue to show the meat probe temperature un...
Page 36 - Setting the Sabbath feature for the
36 SettInG oVen controLS Setting the Sabbath feature for the Jewish Sabbath and Holidays For further assistance, guidelines for proper usage, and a complete list of models with the Sabbath feature, please visit the web at www .star-k .org .Sabbath mode disables all audible tones or visual display ch...
Page 37 - adjusting the oven temperature; to adjust the oven temperature:
37 SettInG oVen controLS adjusting the oven temperature The temperature in the oven is pre-set at the fac- tory . When first using the oven, be sure to follow recipe times and temperatures . If you think the oven is cooking too hot or too cool for the temperature you select, you can adjust the actua...
Page 38 - Self clean; figure 14: clean around the oven door gasket
38 SettInG oVen controLS Self clean A self cleaning oven cleans itself with high tem- peratures (well above normal cooking tempera- tures), which eliminate soils completely or reduces them to a fine powdered ash you can wipe away afterwards with a damp cloth . This function can be programmed for cle...
Page 39 - to set a self clean cycle:
39 SettInG oVen controLS to set a self clean cycle: If you are planning to use the oven directly after a self clean cycle, remember to allow time for the oven to cool down and the oven door to unlock . This normally takes about one hour . A 3 hour self clean cycle will actually take about 4 hours to...
Page 40 - figure 16: use cleaners with caution
40 care and cLeanInG care and cLeanInG Remove spills and any heavy soiling as soon as possible . Regular cleaning will reduce the difficulty of major cleaning later . figure 16: use cleaners with caution Surface or area cleaning recommendation Aluminum and vinyl Using a soft cloth, clean with mild d...
Page 41 - care and cLeanInG; Surface or area; aluminum foil and utensils
41 care and cLeanInG Surface or area cleaning recommendation Porcelain-enameled broiler pan and insertPorcelain door linerPorcelain body parts Rinse with clean water and a damp cloth . Scrub gently with a soapy, non-abrasive scouring pad to remove most spots . Rinse with a 50/50 solution of clean wa...
Page 42 - cleaning the sealed oval burners; to clean oval burner heads:; figure 17: ares of sealed burner to clean; cleaning burners with removable heads; to clean burner heads:
42 care and cLeanInG cleaning the sealed oval burners To avoid possible burns, do not attempt cleaning before turning off all surface burners and allowing them to cool .Any additions, changes, or conversions required in order for this appliance to satisfactorily meet the application needs must be ma...
Page 43 - replacing the oven lights; replacing the interior light bulbs:; removing the Storage drawer; figure 19: Storage drawer closed
43 care and cLeanInG burner cap burner head igniter orifice cautIon Be sure the range is unplugged and all parts are COOL before replacing oven light . Wear a leath- er-faced glove for protection against possible broken glass or burns . replacing the oven lights The oven light bulbs are located at t...
Page 44 - caring for your Glide racks; to lubricate the glide rack:
44 care and cLeanInG caring for your Glide racks caution: Handle oven racks only when they are cool . After cooking or after the clean cycle, racks will be very hot and can cause burns . Important notes: • Remove all oven racks, including ladder racks, before starting a clean cycle . • Do not use co...
Page 45 - removing and replacing the oven door; to remove the oven door:; Door frame flush; figure 24: remove door position
45 care and cLeanInG Important Special door care instructions - The door is heavy . For safe, temporary storage, lay the door flat with the inside of the door facing down . Most oven doors contain glass that can break . Do not close the oven door until all the oven racks are positioned correctly in ...
Page 46 - oven Baking; causes
46 Before you caLL Before you caLL oven Baking For best cooking results, preheat the oven before baking cookies, breads, cakes, pies, pastries, etc . There is no need to preheat the oven for roasting meat or baking casseroles . The cooking times and tempera- tures needed to bake a product may vary s...
Page 47 - Before you caLL; problem
47 Before you caLL 1-800-265-8352 (Canada) frigidaire.ca 1-800-374-4432 (United States) frigidaire.com Let us help you troubleshoot your concern! This section will help you with common issues . If you need us, visit our website, chat with an agent, or call us . We may be able to help you avoid a ser...
Page 51 - Warranty; exclusions; dIScLaImer of ImpLIed WarrantIeS LImItatIon of remedIeS; If you need Service; canada
51 Warranty Your appliance is covered by a one year limited warranty . For one year from your original date of purchase, Electrolux will pay all costs for repairing or replacing any parts of this appliance that prove to be defective in materials or workmanship when such appliance is installed, used ...
Page 52 - welcome; home; owner support; Our home is your home. Visit us if you; registration
welcome home Frigidaire.com 1-800-374-4432 Frigidaire.ca 1-800-265-8352 owner support accessories service Our home is your home. Visit us if you need help with any of these things: registration (See your registration card for more information.)


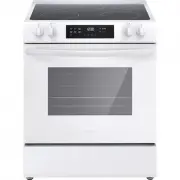
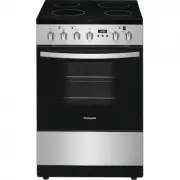 Frigidaire FCFE2425AS
User Manual
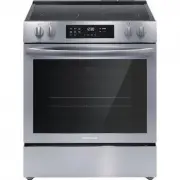
Frigidaire FCFE2425AS
User Manual
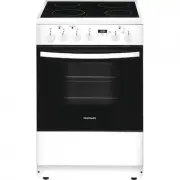 Frigidaire FCFE2425AW
User Manual
Frigidaire FCFE2425AW
User Manual
 Frigidaire FCFE3062AB
User Manual
Frigidaire FCFE3062AB
User Manual
 Frigidaire FCFE3062AS
User Manual
Frigidaire FCFE3062AS
User Manual
 Frigidaire FCFE3062AW
User Manual
Frigidaire FCFE3062AW
User Manual
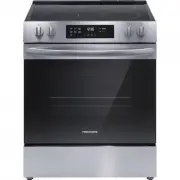
 Frigidaire FCFE3083AS
User Manual
Frigidaire FCFE3083AS
User Manual
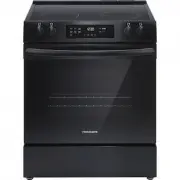
 Frigidaire FCFE308LAF
User Manual
Frigidaire FCFE308LAF
User Manual
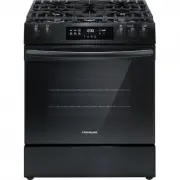 Frigidaire FCFG3062AB
User Manual
Frigidaire FCFG3062AB
User Manual
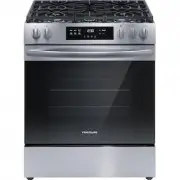 Frigidaire FCFG3062AS
User Manual
Frigidaire FCFG3062AS
User Manual
 Frigidaire FCFG3062AW
User Manual
Frigidaire FCFG3062AW
User Manual