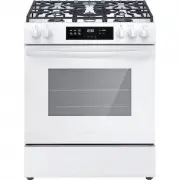
Page 2 - family; Installation Checklist
2 INTRODUCTION INTRODUCTION Welcome to our family Thank you for bringing Frigidaire into your home! We see your purchase as the beginning of a long relationship together. This manual is your resource for the use and care of your product. Please read it before using your appliance. Keep it handy for ...
Page 3 - DEFINITIONS; WARNING
3 IMPORTANT SAFETY INSTRUCTIONS DEFINITIONS This is the safety alert symbol. It is used to alert of potential personal injury hazards. Obey all safety messages that follow this symbol to avoid possible injury or death. WARNING Indicates a potentially hazardous situa-tion which, if not avoided, may r...
Page 4 - Tip Over Hazard; Range
4 IMPORTANT SAFETY INSTRUCTIONS IMPORTANT INSTRUCTIONS FOR UNPACKING AND INSTALLATION IMPORTANT Read and follow the below instructions and precautions for unpacking, installing, and servicing your appliance. Remove all tape and packaging before us-ing the appliance. Destroy the carton and plastic ba...
Page 5 - IMPORTANT SAFETY INSTRUCTIONS; GROUNDING INSTRUCTIONS; • Avoid
5 IMPORTANT SAFETY INSTRUCTIONS GROUNDING INSTRUCTIONS WARNING • Avoid fi re hazard or electrical shock. Failure to follow this warning may cause serious injury, fi re, or death. • Avoid fi re hazard or electrical shock. Do not use an adapter plug, use an extension cord, or remove grounding prong from ...
Page 10 - Bakeware; COOKING RECOMMENDATIONS
10 COOKING RECOMMENDATIONS Bakeware The material of bakeware aff ects how evenly and quickly it transfers heat from the pan to the food. Material Attributes Recommendation Shiny metal bakeware Shiny, aluminum, and non-coat-ed bakeware is the best for even heating. It is suitable for all baked goods....
Page 11 - Cooking Conditions
11 COOKING RECOMMENDATIONS Cooking Conditions Conditions in your kitchen can aff ect the performance of your appliance when cooking food. Condition Attributes Recommendation Aging cookware As pans age and become discolored, cooking times may need to be reduced slightly. If food is too dark or overco...
Page 13 - BEFORE SETTING SURFACE CONTROLS; Gas surface burner types; Assembly of the Burner Caps; CAUTION
13 BEFORE SETTING SURFACE CONTROLS Gas surface burner types The cooktop is equipped with gas surface burners with diff erent BTU ratings. The ability to heat food quickly and in large amounts increases as the burn-er size increases. • Small burners are best used for low-fl ame heat-ing of small amoun...
Page 14 - Using Proper Cookware; IMPORTANT
14 BEFORE SETTING SURFACE CONTROLS Using Proper Cookware The size and type of cookware used will infl uence the heat setting needed for best cooking results. Be sure to follow the recommendations for using proper cookware as illustrated in “Figure 2: Testing cookware” and “Figure 3: Proper cookware”....
Page 15 - Install Burner Grates; Home Canning
15 BEFORE SETTING SURFACE CONTROLS Install Burner Grates To install burner grates, place the grates fl at-side down and align them into the cooktop recess.. IMPORTANT • Make sure the burner grates are proper-ly placed on the cooktop before using the surface burners (Figure 4). The grates are designed...
Page 16 - SETTING SURFACE CONTROLS; Setting surface controls; NOTES
16 SETTING SURFACE CONTROLS Setting surface controls The ability to heat food quickly and in large vol-umes increases as the burner size increases. Your gas appliance may be equipped with many diff er-ent sized surface burners. It is important to select cookware that is suitable for the amount and t...
Page 17 - Set proper burner fl ame size
17 SETTING SURFACE CONTROLS Set proper burner fl ame size The color of the fl ame is the key to proper burner adjustment. A good fl ame is clear, blue and hardly visible in a well-lighted room. Each cone of fl ame should be steady and sharp. Adjust or clean the burner if fl ame is yellow-orange. For most...
Page 19 - BEFORE SETTING OVEN CONTROLS; Types of Oven Rack; flat; Oven Vent Location
19 BEFORE SETTING OVEN CONTROLS Types of Oven Rack Figure 8: Oven rack types Flat oven racks may be used for most cooking needs and may be placed in most oven rack posi-tions. flat oven rack Removing, Replacing, and Arranging Flat or Off set Oven Racks Always arrange the oven racks when the oven is ...
Page 20 - SETTING OVEN CONTROLS
20 SETTING OVEN CONTROLS 1. Bake is for delicate foods that need heat to rise and move gently in the oven. 2. Broil is for broiling and grilling foods under direct, high heat. 3. Conv Bake circulates the oven heat continuously for baking. 4. Keep Warm Use to keep cooked foods at serving temperature ...
Page 21 - Setting the Clock
21 SETTING OVEN CONTROLS Setting the Clock When the appliance is fi rst plugged in or when the pow-er supply to the appliance has been interrupted, the display will fl ash 12:00. It is recommended to always set the clock for the correct time of day before using the appliance. To set the clock: 1. Pres...
Page 23 - Oven Lock; Setting the minute timer
23 SETTING OVEN CONTROLS Oven Lock The control can be programmed to lockout the oven control keys and lock the oven door. To activate the lockout feature: 1. Press and hold the lock key for 3 seconds. 2. The door lock mechanism will lock the door in about 15 seconds. Do not attempt to open door whil...
Page 24 - Setting Bake
24 SETTING OVEN CONTROLS Setting Bake Bake cooks with heat that rises from the oven bottom. The heat and air circulate naturally in the oven. A reminder tone will sound indicating when the set bake temperature is reached and to place the food in the oven. The convection fan will turn on in preheat a...
Page 25 - Convection Bake
25 SETTING OVEN CONTROLS Convection Bake Convection Bake uses a fan to circulate the oven's heat uniformly around the oven. This improved heat distribution allows for even cooking and browning results. Heated air fl ows around the food from all sides. The convection fan will turn on in preheat and re...
Page 26 - Setting Broil; NOTE
26 SETTING OVEN CONTROLS Setting Broil Use the broil function to cook foods that require di-rect exposure to radiant heat for optimum brown-ing results. Broiling may produce smoke. If smoke is excessive, place food further away from the fl ames. Broil is preset to 550°F and may be set to any temperat...
Page 28 - Self Clean
28 SETTING OVEN CONTROLS Self Clean Self Clean cleans with very high temperatures (well above normal cooking temperatures), eliminat-ing soils completely or reducing them to very fi ne powdered ashes you can wipe away afterwards with a damp cloth. This function can be programmed for clean times betwe...
Page 29 - Setting Self Clean
29 SETTING OVEN CONTROLS • The kitchen area should be well ventilated using an open window, ventilation fan, or exhaust hood during the fi rst self clean cycle. This will help eliminate the normal odors. • Do not attempt to open the oven door when the OVEN LOCK indicator light is fl ashing. Allow abou...
Page 30 - Keep Warm
30 SETTING OVEN CONTROLS Keep Warm Keep Warm should only be used with foods that are fully cooked and at serving temperatures. Keep Warm will keep foods warm and ready for serving at 170° F (77°C). If needed, arrange oven racks and place cooked food in oven. To set Keep Warm: 1. Press Keep Warm : (I...
Page 31 - CARE AND CLEANING
31 CARE AND CLEANING Remove spills and any heavy soiling as soon as possible. Regular cleaning will reduce the diffi culty of major cleaning later. Figure 10: Use cleaners with caution Surface or Area Cleaning Recommendation Aluminum and vinyl Using a soft cloth, clean with mild dish detergent and w...
Page 33 - Cleaning the surface burners
33 CARE AND CLEANING Cleaning the surface burners To avoid possible burns, do not attempt cleaning before turning off all surface burners and allowing them to cool. Any additions, changes, or conversions required in order for this appliance to satisfactorily meet the application needs must be made b...
Page 34 - General Cleaning
34 CARE AND CLEANING General Cleaning Refer to the table at the beginning of this chapter for more information about cleaning specifi c parts of the oven. Follow these cleaning precautions: • Allow the oven to cool before cleaning. • Wear rubber gloves when cleaning the appli-ance manually. Remove so...
Page 35 - Replacing the Oven Light
35 CARE AND CLEANING Aluminum Foil, Aluminum Utensils, and Oven Liners WARNING Never cover any slots, holes, or passages in the oven bottom or cover an entire oven rack with materials such as aluminum foil. Doing so blocks air fl ow through the oven and may cause carbon monoxide poisoning. Aluminum f...
Page 36 - Removing and Replacing the Oven Door
36 CARE AND CLEANING Removing and Replacing the Oven Door Figure 13: Door hinge location To remove the oven door: 1. Open oven door completely, horizontal with fl oor (Figure 13). 2. Pull up the lock located on each hinge support toward front of the oven until the lock stops. You may have to apply a ...
Page 37 - BEFORE YOU CALL; Oven Baking
37 BEFORE YOU CALL Oven Baking For best cooking results, preheat the oven before baking cookies, breads, cakes, pies, pastries, etc. There is no need to preheat the oven for roasting meat or baking casseroles. The cooking times and tempera-tures needed to bake a product may vary slightly from your p...
Page 41 - WARRANTY
41 WARRANTY Your appliance is covered by a one year limited warranty. For one year from your original date of purchase, Electrolux will pay all costs for repairing or replacing any parts of this appliance that prove to be defective in materials or workmanship when such appliance is installed, used a...
Page 42 - welcome; home; owner support
welcome home Frigidaire.com 1-800-374-4432 Frigidaire.ca 1-800-265-8352 owner support accessories service Our home is your home. Visit us if you need help with any of these things: registration (See your registration card for more information.)