Fisher & Paykel DW60UD6X - Manuals
User Manual Fisher & Paykel DW60UD6X


Summary
1 IMPORTANT! SAVE THESE INSTRUCTIONS The models shown in this user guide may not be available in all markets and are subject to change at any time. For current details about model and specification availability in your country, please go to our website www.fisherpaykel.com or contact your local Fish...
2 IMPORTANT SAFETY INSTRUCTIONS WARNING! When using your dishwasher, follow basic precautions, including the following: z Read all instructions before using the dishwasher. z The information in this manual must be followed to minimise the risk of fire or explosion or to prevent property damage, pers...
3 SAFETY AND WARNINGS IMPORTANT SAFETY INSTRUCTIONS Maintenance z Disconnect the appliance from the power supply before any cleaning or maintenance. z When disconnecting the appliance pull the plug rather than the power supply cord or junction of cord to avoid damage. z Do not repair or replace any ...
Fisher & Paykel Dishwashers Manuals
-
 Fisher & Paykel DD24DAX9 N
User Manual
Fisher & Paykel DD24DAX9 N
User Manual
-
Fisher & Paykel DD24DCHTX9N
User Manual
-
Fisher & Paykel DD24DCTX9N
User Manual
-
Fisher & Paykel DD24DDFTX9N
User Manual
-
Fisher & Paykel DD24DHTI9N
User Manual
-
Fisher & Paykel DD24DI9N
User Manual
-
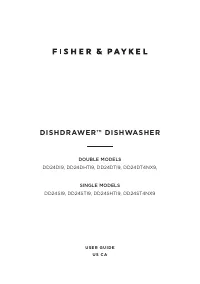 Fisher & Paykel DD24DT4NX9
User Manual
Fisher & Paykel DD24DT4NX9
User Manual
-
Fisher & Paykel DD24DTI9N
User Manual
-
 Fisher & Paykel DD24DTX6HI1
User Manual
Fisher & Paykel DD24DTX6HI1
User Manual
-
Fisher & Paykel DD24DTX6I1
User Manual
-
 Fisher & Paykel DD24DTX6PX1
User Manual
Fisher & Paykel DD24DTX6PX1
User Manual
-
Fisher & Paykel DD24DV2T9N
User Manual
-
Fisher & Paykel DD24SAX9N
User Manual
-
Fisher & Paykel DD24SCTX9N
User Manual
-
Fisher & Paykel DD24SDFTX9N
User Manual
-
Fisher & Paykel DD24SHTI9N
User Manual
-
Fisher & Paykel DD24SI9N
User Manual
-
Fisher & Paykel DD24STI9 N
User Manual
-
Fisher & Paykel DD24STX6HI1
User Manual
-
Fisher & Paykel DD24STX6I1
User Manual