Fisher & Paykel CI905DTB1 - Manuals
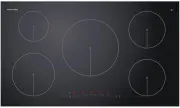
User Manual Fisher & Paykel CI905DTB1


Summary
1 Contents Safety and warnings 2 Installation instructions 6 Introduction 12 Choosing the right cookware 14 Using your induction cooktop 15 Using your cooktop’s special features 18 Cooking guidelines 28 Care and cleaning 30 Troubleshooting 31 Warranty and service 33 Important! SAVE THESE INSTRUCTION...
2 Safety and warnings Your safety is important to us. Please read this information before using your cooktop. Installation WARNING! Electrical Shock Hazard Disconnect the appliance from the mains electricity supply before carryingout any work or maintenance on it.Connection to a good earth wiring sy...
3 Safety and warnings Important safety instructions Read these instructions carefully before installing or using this appliance. No combustible material or products should be placed on this appliance at any time. Please make this information available to the person responsible for installing the app...
Fisher & Paykel Hobs Manuals
-
 Fisher & Paykel CDV3-365HN
User Manual
Fisher & Paykel CDV3-365HN
User Manual
-
 Fisher & Paykel CE244DTB1
User Manual
Fisher & Paykel CE244DTB1
User Manual
-
Fisher & Paykel CE304DTB1
User Manual
-
 Fisher & Paykel CG244DLPX1N
User Manual
Fisher & Paykel CG244DLPX1N
User Manual
-
Fisher & Paykel CG244DNGX1N
User Manual
-
 Fisher & Paykel CG301DLPGB4
User Manual
Fisher & Paykel CG301DLPGB4
User Manual
-
 Fisher & Paykel CG302DLPGB1
User Manual
Fisher & Paykel CG302DLPGB1
User Manual
-
 Fisher & Paykel CG302DLPGB4
User Manual
Fisher & Paykel CG302DLPGB4
User Manual
-
 Fisher & Paykel CG302DNGGB1
User Manual
Fisher & Paykel CG302DNGGB1
User Manual
-
 Fisher & Paykel CG302DNGGB4
User Manual
Fisher & Paykel CG302DNGGB4
User Manual
-
Fisher & Paykel CG305DLPX1N
User Manual
-
Fisher & Paykel CG305DNGX1N
User Manual
-
 Fisher & Paykel CG365DLPRX2N
User Manual
Fisher & Paykel CG365DLPRX2N
User Manual
-
Fisher & Paykel CG365DLPX1N
User Manual
-
Fisher & Paykel CG365DNGRX2N
User Manual
-
Fisher & Paykel CG365DNGX1N
User Manual
-
 Fisher & Paykel CG451DLPGB1
User Manual
Fisher & Paykel CG451DLPGB1
User Manual
-
 Fisher & Paykel CG603DLPGB1
User Manual
Fisher & Paykel CG603DLPGB1
User Manual
-
 Fisher & Paykel CG603DLPGB4
User Manual
Fisher & Paykel CG603DLPGB4
User Manual
-
 Fisher & Paykel CG603DNGGB4
User Manual
Fisher & Paykel CG603DNGGB4
User Manual