Fisher & Paykel CG604CWFW1 - Manuals
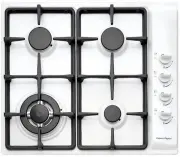
User Manual Fisher & Paykel CG604CWFW1


Summary
1 Contents Safety and warnings 2 Installation instructions 6 Introduction 16 Using your cooktop 18 Care and cleaning 22 Troubleshooting 26 Warranty and service 27 Important! SAVE THESE INSTRUCTIONS The models shown in this user guide may not be available in all markets and are subject to change at a...
2 Important safety instructions Installation Read these instructions carefully before installing or using this product. Please make this information available to the person responsible for installing the product as it could reduce your installation costs. This appliance shall only be installed and s...
4 Safety and warnings WARNING! Hot Surface Hazard This appliance becomes hot during use.Do not touch the cooktop components, burners, trivets, pan supports or the base when hot.Before cleaning, turn the burners off and make sure the whole cooktop is cool. Failure to follow this advice may result in ...
Fisher & Paykel Hobs Manuals
-
 Fisher & Paykel CDV3-365HN
User Manual
Fisher & Paykel CDV3-365HN
User Manual
-
 Fisher & Paykel CE244DTB1
User Manual
Fisher & Paykel CE244DTB1
User Manual
-
Fisher & Paykel CE304DTB1
User Manual
-
 Fisher & Paykel CG244DLPX1N
User Manual
Fisher & Paykel CG244DLPX1N
User Manual
-
Fisher & Paykel CG244DNGX1N
User Manual
-
 Fisher & Paykel CG301DLPGB4
User Manual
Fisher & Paykel CG301DLPGB4
User Manual
-
 Fisher & Paykel CG302DLPGB1
User Manual
Fisher & Paykel CG302DLPGB1
User Manual
-
 Fisher & Paykel CG302DLPGB4
User Manual
Fisher & Paykel CG302DLPGB4
User Manual
-
 Fisher & Paykel CG302DNGGB1
User Manual
Fisher & Paykel CG302DNGGB1
User Manual
-
 Fisher & Paykel CG302DNGGB4
User Manual
Fisher & Paykel CG302DNGGB4
User Manual
-
Fisher & Paykel CG305DLPX1N
User Manual
-
Fisher & Paykel CG305DNGX1N
User Manual
-
 Fisher & Paykel CG365DLPRX2N
User Manual
Fisher & Paykel CG365DLPRX2N
User Manual
-
Fisher & Paykel CG365DLPX1N
User Manual
-
Fisher & Paykel CG365DNGRX2N
User Manual
-
Fisher & Paykel CG365DNGX1N
User Manual
-
 Fisher & Paykel CG451DLPGB1
User Manual
Fisher & Paykel CG451DLPGB1
User Manual
-
 Fisher & Paykel CG603DLPGB1
User Manual
Fisher & Paykel CG603DLPGB1
User Manual
-
 Fisher & Paykel CG603DLPGB4
User Manual
Fisher & Paykel CG603DLPGB4
User Manual
-
 Fisher & Paykel CG603DNGGB4
User Manual
Fisher & Paykel CG603DNGGB4
User Manual