Euromaid ETTW800 - Manuals

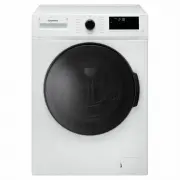
User Manual Euromaid ETTW800


Summary
Safety Precautions Explanation of the symbolsInstallation Installation requirements Install upper drain hose Changing the position of the drain hose Installation positionOperation Preparation instructions Reference of laundry quantity corresponding to different capacities Laundry volume and detergen...
-1- SAFETY PRECAUTION Safety Precaution For your safety, the information in this manual must be followed to minimize the risk of fire or explosion, electric shock, or to prevent property damage, personal injury or loss of life. This appliance is not intended for use by persons (including children) w...
-3- INSTALLATION Installation position In order to avoid electrical failure, discoloration and deformation, do not install the machine in the following places: • Locations exposed to direct sunlight • Locations exposed to rain or snow • Locations with uneven or unstable ground Installation Requireme...
Euromaid Washing Machines Manuals
-
 Euromaid E750FLW
User Manual
Euromaid E750FLW
User Manual
-
 Euromaid EBFW700
User Manual
Euromaid EBFW700
User Manual
-
 Euromaid EBFW800
User Manual
Euromaid EBFW800
User Manual
-
 Euromaid EBFW900
User Manual
Euromaid EBFW900
User Manual
-
 Euromaid EBFW900BK
User Manual
Euromaid EBFW900BK
User Manual
-
 Euromaid EFL700WPRO
User Manual
Euromaid EFL700WPRO
User Manual
-
 Euromaid EFL900WPRO
User Manual
Euromaid EFL900WPRO
User Manual
-
 Euromaid EFLP1000G
User Manual
Euromaid EFLP1000G
User Manual
-
 Euromaid EFLP1000W
User Manual
Euromaid EFLP1000W
User Manual
-
 Euromaid EFLP850G
User Manual
Euromaid EFLP850G
User Manual
-
 Euromaid EFLP850W
User Manual
Euromaid EFLP850W
User Manual
-
 Euromaid ETL1000FCW
User Manual
Euromaid ETL1000FCW
User Manual
-
 Euromaid ETL1000RCW
User Manual
Euromaid ETL1000RCW
User Manual
-
 Euromaid ETL550FCW
User Manual
Euromaid ETL550FCW
User Manual
-
 Euromaid ETL700FCW
User Manual
Euromaid ETL700FCW
User Manual
-
 Euromaid ETL800FCW
User Manual
Euromaid ETL800FCW
User Manual
-
 Euromaid EWD8045
User Manual
Euromaid EWD8045
User Manual
-
 Euromaid HTL55
User Manual
Euromaid HTL55
User Manual
-
 Euromaid HTL65
User Manual
Euromaid HTL65
User Manual
-
 Euromaid HTL80
User Manual
Euromaid HTL80
User Manual