Page 2 - CONTENTS; SHFLILFDWLRQV
2 CONTENTS 6$)(7<,16758&7,216 6DIHW\,QVWUXFWLRQV ,167$//$7,21 3URGXFW'HVFULSWLRQ,QVWDOODWLRQ 23(5$7,216 4XLFN6WDUW %HIRUH(DFK:DVK'HWHUJHQW'LVSHQVHU 2SWLRQ 2WKHU )XQFWLRQV 3URJUDP,QIRUPDWLRQ 0$,17(1$1&( &OHDQLQJ$QG&DUH 7URXEOH6KRRWLQJ7HFKQLFDO 6SHFLILFDWLRQV 0DQXIDFWXUHU*XDUDQWHH 3...
Page 5 - SAFETY INSTRUCTIONS
• Remove all packages and transport bolts before using the appliance. Otherwise, serious damage may result. • Glass door may be very hot during the operation. Keep kids and pets far away from the machine during theoperation very wet rooms as well as in the rooms withexplosive or caustic gas. • Plug ...
Page 8 - Accessories; Product Description
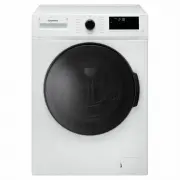
Accessories Product Description Transport plug hole Supply hose hot water (optional) Supply hosecold water Drain hose (optional support ) • The product line chart is for reference only, please refer to real product as standard. Note! Drum Power supply cord Control panel Detergent dispenser Service f...
Page 9 - Unpacking the washing machine; Make sure the small; Remove transport bolts
INSTALLATION Installation Before installing the machine, the location characterized follows shall be selected: 1.Rigid, dry, and level surface2.Avoid direct sunlight3.Sufficient ventilation4.Room temperature is above 0 ℃ 5.Keep far away from the heat resources such as coal or gas. as Unpacking the w...
Page 10 - INSTALLATION; Levelling the washing machine; Connection between ordinary tap and inlet hose.; Lock; Connection finished; Tap with threads and inlet hose; Connection between screw tap and inlet hose.
INSTALLATION 1. Check if the legs are closely attached to the cabinet. If not, please turn them to their original positions tighten the nuts. 2.Loosen the lock nut turn the feet until it closely contacts with the floor.3.Adjust the legs and lock them with a spanner, make sure the machine is steady. ...
Page 11 - Drain Hose
INSTALLATION Warning! ! Drain Hose There are two ways to place the end of drain hose:1.Put it into the water trough. 2.Connect it to the branch drain pipe of the trough. •• If drain hose is too long, do not force it into washing machine as it will cause abnormal noises. When installing drain hose, f...
Page 12 - Washing; Quick Start; “End”; OPERATIONS
Before washing, please make sure it’s installed properly. Before washing at first time, the washing machine shall be operated in one of the whole procedures without clothes in as follows. • • round 1. Before Washing Open tap Load Close door Plug in Add detergent Quick Start 3. After Washing “End” ...
Page 14 - Detergent Dispenser; Pull out the dispenser
Detergent Dispenser Pre wash detergentMain wash detergentSoftener I I I Pull out the dispenser Liquid detergent Powder detergent Caution! • Detergent only need to be added in " case I “after selecting pre-washing for machines with this function. OPERATIONS Dam-board Dam-board
Page 15 - Programme; HTXLUHG; • As for thick detergent or additive, before they are
OPERATIONS Programme Programme &RWWRQ(FR %ODQNHW &RWWRQ %DE\&DUH (DV\&DUH :RRO 0L[HG 6SRUW 'HOLFDWH 'DLO\([SUHVV :KLWHV 5DSLG &RORXU)DVW6SLQ2QO\5LQVH 6SLQ 5HTXLUHG ○ 2SWLRQDO Note! • As for thick detergent or additive, before they are poured into the detergent box, it is suggeste...
Page 16 - Start; Available according to the laundry type.; Option
Control Panel OPERATIONS 10 16 On/Off Product is switched On/Off. Start / Pause Press the button to start or pause the washing cycle. Programmes Available according to the laundry type. Option This allows you to select an additionalfunction and will light when selected. Note! The chart is for refere...
Page 19 - Press the button to change the speed.; Temp; Press the button to regulate the temperature(Cold,20
OPERATIONS 'HIDXOW $YDLODEOH 3URJUDP9DULDEOHV * * Speed Press the button to change the speed. 0-400-600-800-1000-1200-1400 Temp . ℃, Press the button to regulate the temperature(Cold,20 40 ℃, 60 ℃, 90 ℃)
Page 20 - Programmes are available according to the laundry type.; PDWLRQ
3URJUDPPHV 5DSLG :RRO 0L[HG &RWWRQ +DUGZHDULQJWH[WLOHVKHDWUHVLVWDQWWH[WLOHVPDGHRIFRWWRQ RUOLQHQ (YHU\GD\SURUJDPVXLWDEOHIRUOLJKWO\VRLOHGZDVKLQJDQGPHGLXPDPRXQWVRIODXQGU\ 0L[HGORDGFRQVLVWLQJRIWH[WLOHVPDGHRIFRWWRQDQGV\QWKHWLFV8WLOLWLHVKRWZDWHUWRDLGWKHUHPRYDORIVWDLQVIURPZKLWHV :DVKHVEULJKWO\FRORUHGFO...
Page 21 - Cleaning The Drum
MAINTENANCE • Before your maintenance starts, please unplug the machine and close the tap. Cleaning The Cabinet Formic acid and its diluted solvents or equivalent are forbidden, such as solvents or chemical products,etc. • alcohol, • Don’t put laundry in the washing machine during the drum cleaning....
Page 22 - Cleaning The Inlet Filter; • Inlet filter must be cleaned if there is less water.; Screw off the inlet pipe from the backside; Pull out the filter with long nose pliers; Clean The Detergent Dispenser; MAINTENANCE
Washing the filter in the tap1.Close the tap.2.Remove the water supply hose from the tap.3.clean the filter.4.Reconnect the . water supply hose Cleaning The Inlet Filter • Inlet filter must be cleaned if there is less water. • If the brush is not clean, you can pull out the filter washed separately;...
Page 23 - Cleaning The Drain Pump Filter
• Make sure that valve cap and emergency drain hose are reinstalled properly, cap plates should be inserted aligning to hole plates otherwise water may leak. • Some machines don’t have emergency drain hose, so step 2 and step 3 can be skipped. Rotate lower cover cap directly to make water run into b...
Page 25 - Model; Standard Water Pressure
Technical Specifications 850 595 565 MAINTENANCE Model Power SupplyWashing CapacityDimension(W*D*H)WeightRated Power Euromaid E750FLW 220-240V~ 50Hz , 7.5kg 595*565*850 68kg 20 00W MAX.Current 10A Standard Water Pressure 0.05MPa~1MPa
Page 27 - MANUFACTURER GUARANTEE
MANUFACTURER GUARANTEE This warranty is provided in Australia by Glen Dimplex Australia Pty Limited ABN 69 118 275 460 (Phone number 1300 556 816) and in New Zealand by Glen Dimplex New Zealand Limited NZBN 9429000069823 (Phone number 09 274 8265) in respect of the Euromaid product. 1. Euromaid Expr...
Page 30 - NOTES
NOTES ______________________________________________________ ______________________________________________________ ______________________________________________________ ______________________________________________________ ______________________________________________________ ___________________...