Esatto EUM52 - Manuals
User Manual Esatto EUM52


Summary
S E C T I O N Welcome SectionSafety InstructionsSpecificationsControlsInstallation RequirementsCleaning & MaintenanceTroubleshooting & Technical DataNotesWarrantyPurchase Details PA G E 24567910111214 C O N T E N T S
4 This rangehood must only be installed in accordance with the instructions provided. Incorrect installation may cause harm to persons, damage property and void the product’s warranty. Important Please ensure that you read the entire instructions before beginning the installation of your rangehood. ...
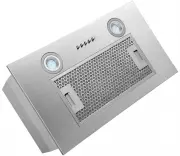
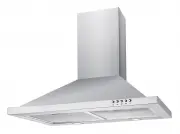
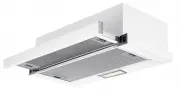
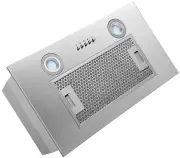
5 Specifications Model Product dimensions (W, D, H mm) EUM52 520mm × 280mm × 283mm EUM75 750mm × 280mm × 283mm EUM 90 900mm × 280mm × 283mm Model Extraction Other features: EUM 52 750m3/hr extraction – 3 speed push button control – 2 × 2 W LED Lamp – 1 × 5 layer aluminium grease filter with S.S Faci...
Esatto Range Hoods Manuals
-
 Esatto EFH60S
User Manual
Esatto EFH60S
User Manual
-
 Esatto EFH60W
User Manual
Esatto EFH60W
User Manual
-
 Esatto ERBC90BS
User Manual
Esatto ERBC90BS
User Manual
-
 Esatto ERC60S
User Manual
Esatto ERC60S
User Manual
-
 Esatto ERGF90S
User Manual
Esatto ERGF90S
User Manual
-
 Esatto ERHGC60
User Manual
Esatto ERHGC60
User Manual
-
 Esatto ERHGC90
User Manual
Esatto ERHGC90
User Manual
-
 Esatto ESL60D2S
User Manual
Esatto ESL60D2S
User Manual
-
 Esatto EUM75
User Manual
Esatto EUM75
User Manual
-
 Esatto EUM90
User Manual
Esatto EUM90
User Manual
-
 Esatto RH60
User Manual
Esatto RH60
User Manual
-
 Esatto RH62GB
User Manual
Esatto RH62GB
User Manual
-
 Esatto RH90
User Manual
Esatto RH90
User Manual
-
 Esatto RH91
User Manual
Esatto RH91
User Manual
-
 Esatto RH91B
User Manual
Esatto RH91B
User Manual
-
 Esatto RH92G
User Manual
Esatto RH92G
User Manual
-
 Esatto RH92GB
User Manual
Esatto RH92GB
User Manual
-
 Esatto RH94G
User Manual
Esatto RH94G
User Manual
-
 Esatto RIH90W
User Manual
Esatto RIH90W
User Manual
-
 Esatto RUM52
User Manual
Esatto RUM52
User Manual