Esatto ESL60D2S - Manuals
User Manual Esatto ESL60D2S


Summary
3 S E C T I O N Welcome SectionGeneral SafetyProduct OverviewInstallationOperating InstructionsFAQOther Useful InformationPurchase DetailsWarranty PA G E 4578 16 C O N T E N T S 17 14 13 12
Dear Customer, Congratulations on purchasing your new rangehood. The Esatto brand is proudly distributed within Australia by Residentia Group Pty Ltd. Please refer to the warranty card at the rear of this manual for information regarding your product’s parts and labour warranty, or visit us online a...
5 Read this manual thoroughly before first use, even if you are familiar with this type of product. The safety precautions enclosed herein reduce the risk of fire, electric shock and injury when correctly adhered to. Keep the manual in a safe place for future reference, along with the completed warran...
Esatto Range Hoods Manuals
-
 Esatto EFH60S
User Manual
Esatto EFH60S
User Manual
-
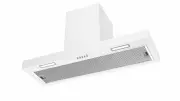
 Esatto EFH60W
User Manual
Esatto EFH60W
User Manual
-
 Esatto ERBC90BS
User Manual
Esatto ERBC90BS
User Manual
-
 Esatto ERC60S
User Manual
Esatto ERC60S
User Manual
-
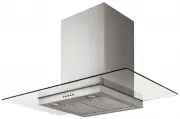
 Esatto ERGF90S
User Manual
Esatto ERGF90S
User Manual
-
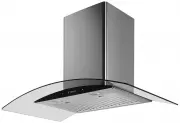
 Esatto ERHGC60
User Manual
Esatto ERHGC60
User Manual
-
 Esatto ERHGC90
User Manual
Esatto ERHGC90
User Manual
-
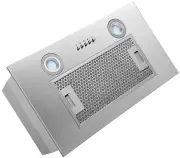
 Esatto EUM52
User Manual
Esatto EUM52
User Manual
-
 Esatto EUM75
User Manual
Esatto EUM75
User Manual
-
 Esatto EUM90
User Manual
Esatto EUM90
User Manual
-
 Esatto RH60
User Manual
Esatto RH60
User Manual
-
 Esatto RH62GB
User Manual
Esatto RH62GB
User Manual
-
 Esatto RH90
User Manual
Esatto RH90
User Manual
-
 Esatto RH91
User Manual
Esatto RH91
User Manual
-
 Esatto RH91B
User Manual
Esatto RH91B
User Manual
-
 Esatto RH92G
User Manual
Esatto RH92G
User Manual
-
 Esatto RH92GB
User Manual
Esatto RH92GB
User Manual
-
 Esatto RH94G
User Manual
Esatto RH94G
User Manual
-
 Esatto RIH90W
User Manual
Esatto RIH90W
User Manual
-
 Esatto RUM52
User Manual
Esatto RUM52
User Manual