Electrolux EWW14013 - Manuals
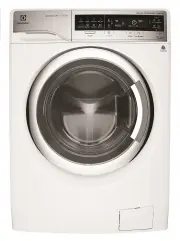
User Manual Electrolux EWW14013


Summary
Caution, risk of fire. 2 www.electrolux.com CONTENTS 1.1 Conditions Of Use 1.2 Child Safety 1.3 Child Safety Device (Door Block Button) 1.4 General Safety 1.5 Installation 1.6 Use 1. SAFETY INFORMATION .....................................................................................................
5 Make sure that children or pets do not climb into the drum. When you activate this device, you cannot close the door. This prevents children or pets being locked in the drum. To disable this device and restore the possibility of closing the door, rotate the button counter-clockwise until the groov...
6 www.electrolux.com ● ● ● As some duvets and eiderdowns should be washed/dried in large commercial machine because of their bulk, please check with the manufac- turer of the item before washing/drying in a domestic machine. Never tumble dry items which have had contact with chemicals such as dry cl...
Electrolux Washing Machines Manuals
-
 Electrolux E4WMSTPN1
User Manual
Electrolux E4WMSTPN1
User Manual
-
 Electrolux ELFW4222AW
User Manual
Electrolux ELFW4222AW
User Manual
-
Electrolux ELFW4222AW
Manual
-
 Electrolux ELFW7337AW
User Manual
Electrolux ELFW7337AW
User Manual
-
Electrolux ELFW7337AW
Manual
-
 Electrolux ELFW7437AG
User Manual
Electrolux ELFW7437AG
User Manual
-
 Electrolux ELFW7437AW
User Manual
Electrolux ELFW7437AW
User Manual
-
Electrolux ELFW7437AW
Manual
-
 Electrolux ELFW7537AT
User Manual
Electrolux ELFW7537AT
User Manual
-
Electrolux ELFW7537AT
Installation Manual
-
Electrolux ELFW7537AT
Manual
-
 Electrolux ELFW7537AW
User Manual
Electrolux ELFW7537AW
User Manual
-
Electrolux ELFW7537AW
Manual
-
 Electrolux ELFW7637AT
User Manual
Electrolux ELFW7637AT
User Manual
-
Electrolux ELFW7637AT
Manual
-
 Electrolux ELFW7637AW
User Manual
Electrolux ELFW7637AW
User Manual
-
Electrolux ELFW7637AW
Manual
-
 Electrolux ELTE7300AW
User Manual
Electrolux ELTE7300AW
User Manual
-
 Electrolux ELTE7600AT
User Manual
Electrolux ELTE7600AT
User Manual
-
 Electrolux ELTE7600AW
User Manual
Electrolux ELTE7600AW
User Manual