Electrolux EWW 14791 W - Manuals
Electrolux EWW 14791 W Washing Machine – Manual in PDF format online.
Manuals:
Manual Electrolux EWW 14791 W


Summary
Electrolux. Thinking of you. Share more of our thinking at www.electrolux.com Contents Safety information 2 Product description 4 Control panel 5 First use 7 Personalisation 8 Daily use 8 Use - Drying 11 Helpful hints and tips 12 Drying Hints 14 Drying Programmes 18 Care and cleaning 19 What to do i...
• Make sure that children or pets do not climb into the drum. To prevent childrenand pets becoming trapped inside thedrum the machine incorporates a specialfeature. To activate this device, rotate thebutton (without pressing it) inside the doorclockwise until the groove is horizontal. Ifnecessary us...
Detergent dispenser drawer Compartment for detergent used for pre- wash and soak phase or for stain removerused during the stain action phase (if availa-ble). The prewash and soak detergent isadded at the beginning of the wash pro-gramme. The stain remover is added duringthe stain action phase. Comp...
Electrolux Washing Machines Manuals
-
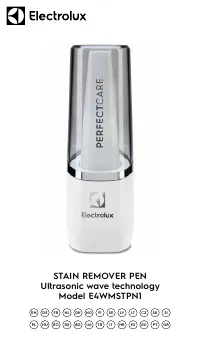 Electrolux E4WMSTPN1
User Manual
Electrolux E4WMSTPN1
User Manual
-
 Electrolux ELFW4222AW
User Manual
Electrolux ELFW4222AW
User Manual
-
Electrolux ELFW4222AW
Manual
-
 Electrolux ELFW7337AW
User Manual
Electrolux ELFW7337AW
User Manual
-
Electrolux ELFW7337AW
Manual
-
 Electrolux ELFW7437AG
User Manual
Electrolux ELFW7437AG
User Manual
-
 Electrolux ELFW7437AW
User Manual
Electrolux ELFW7437AW
User Manual
-
Electrolux ELFW7437AW
Manual
-
 Electrolux ELFW7537AT
User Manual
Electrolux ELFW7537AT
User Manual
-
Electrolux ELFW7537AT
Installation Manual
-
Electrolux ELFW7537AT
Manual
-
 Electrolux ELFW7537AW
User Manual
Electrolux ELFW7537AW
User Manual
-
Electrolux ELFW7537AW
Manual
-
 Electrolux ELFW7637AT
User Manual
Electrolux ELFW7637AT
User Manual
-
Electrolux ELFW7637AT
Manual
-
 Electrolux ELFW7637AW
User Manual
Electrolux ELFW7637AW
User Manual
-
Electrolux ELFW7637AW
Manual
-
 Electrolux ELTE7300AW
User Manual
Electrolux ELTE7300AW
User Manual
-
 Electrolux ELTE7600AT
User Manual
Electrolux ELTE7600AT
User Manual
-
 Electrolux ELTE7600AW
User Manual
Electrolux ELTE7600AW
User Manual