Electrolux ELFW4222AW - Manuals
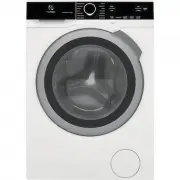
Electrolux ELFW4222AW Washing Machine – User Manual, Manual in PDF format online.
Manuals:
User Manual Electrolux ELFW4222AW


Manual Electrolux ELFW4222AW


Summary
8 3 2 1 6 5 7 9 11 4 10 Important Safety Instructions Read all instructions before using this appliance. This book contains valuable information about:• Operation• Care• ServiceKeep it in a safe place. This Use & Care Guide provides general operating instructions for your dryer. It also contains...
Important Safety Instructions Definitions This is the safety alert symbol. It is used to alert you to potential personal injury hazards. Obey all safety messages that follow this symbol to avoid possible injury or death. Recognize Safety Symbols, Words and Labels Safety items throughout this manual ...
Important Safety Instructions WARNING DO NOT continue to use the dryer if you hear squeaking, grinding, rubbing or other unusual noises. This could be a sign of mechanical breakdown and lead to fire or serious injury. Contact a qualified technician immediately. • Failure to comply with these warning...
Electrolux Washing Machines Manuals
-
 Electrolux E4WMSTPN1
User Manual
Electrolux E4WMSTPN1
User Manual
-
 Electrolux ELFW7337AW
User Manual
Electrolux ELFW7337AW
User Manual
-
Electrolux ELFW7337AW
Manual
-
 Electrolux ELFW7437AG
User Manual
Electrolux ELFW7437AG
User Manual
-
 Electrolux ELFW7437AW
User Manual
Electrolux ELFW7437AW
User Manual
-
Electrolux ELFW7437AW
Manual
-
 Electrolux ELFW7537AT
User Manual
Electrolux ELFW7537AT
User Manual
-
Electrolux ELFW7537AT
Installation Manual
-
Electrolux ELFW7537AT
Manual
-
 Electrolux ELFW7537AW
User Manual
Electrolux ELFW7537AW
User Manual
-
Electrolux ELFW7537AW
Manual
-
 Electrolux ELFW7637AT
User Manual
Electrolux ELFW7637AT
User Manual
-
Electrolux ELFW7637AT
Manual
-
 Electrolux ELFW7637AW
User Manual
Electrolux ELFW7637AW
User Manual
-
Electrolux ELFW7637AW
Manual
-
 Electrolux ELTE7300AW
User Manual
Electrolux ELTE7300AW
User Manual
-
 Electrolux ELTE7600AT
User Manual
Electrolux ELTE7600AT
User Manual
-
 Electrolux ELTE7600AW
User Manual
Electrolux ELTE7600AW
User Manual
-
 Electrolux ELTG7300AW
User Manual
Electrolux ELTG7300AW
User Manual
-
Electrolux ELTG7600AT
User Manual