Dimplex DC10RCDH - Manuals
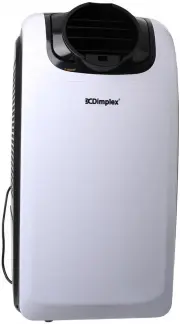
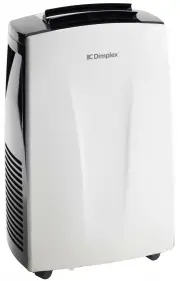
User Manual Dimplex DC10RCDH


Summary
3 CONTROLS AND DISPLAY 1. POWER Press the POWER button to turn the unit "ON" or "OFF". ※ The portable air conditioner is fitted with a compressor delay protection circuit. This protects the unit from possible damage due to rapid starting and stopping of its compressor. Compressor ope...
6 set the number of hours required by using the TIMER function. The hours set will be shown on the display by pressing either the TEMP+ or TEMP- buttons. REMOTE CONTROL FUNCTION On/Off switch Function “MODE” selector Hourly programming Automatic fan speed Turbo fan speed High fan speed Low fan speed...
7 INSTALLATION Unit Setup 1. Remove the water tank and take out the exhaust hose. 2. Remove the outlet grille and install the exhaust tube by rotating it clockwise onto the rear air outlet. Please ensure it is fully inserted before use. To remove the exhaust hose, please rotate in an anti-clockwise ...
Dimplex Air Conditioners Manuals
-
 Dimplex DC09MINI
User Manual
Dimplex DC09MINI
User Manual
-
 Dimplex DC10RC
User Manual
Dimplex DC10RC
User Manual
-
 Dimplex DC12PAC
User Manual
Dimplex DC12PAC
User Manual
-
 Dimplex DC12RCBW
User Manual
Dimplex DC12RCBW
User Manual
-
 Dimplex DC12RCDH
User Manual
Dimplex DC12RCDH
User Manual
-
 Dimplex DC15RCBW
User Manual
Dimplex DC15RCBW
User Manual
-
 Dimplex DC17
User Manual
Dimplex DC17
User Manual
-
 Dimplex DC18
User Manual
Dimplex DC18
User Manual
-
 Dimplex DCB05C
User Manual
Dimplex DCB05C
User Manual
-
 Dimplex DCB07
User Manual
Dimplex DCB07
User Manual
-
 Dimplex DCB07C
User Manual
Dimplex DCB07C
User Manual
-
 Dimplex DCB09
User Manual
Dimplex DCB09
User Manual
-
 Dimplex DCB09C
User Manual
Dimplex DCB09C
User Manual
-
 Dimplex DCB14
User Manual
Dimplex DCB14
User Manual
-
 Dimplex DCES09
User Manual
Dimplex DCES09
User Manual
-
 Dimplex DCES09B
User Manual
Dimplex DCES09B
User Manual
-
 Dimplex DCES09WIFI
User Manual
Dimplex DCES09WIFI
User Manual
-
 Dimplex DCES12
User Manual
Dimplex DCES12
User Manual
-
 Dimplex DCES18
User Manual
Dimplex DCES18
User Manual
-
 Dimplex DCES18B
User Manual
Dimplex DCES18B
User Manual