DeLonghi DDS30COMBI - Manuals
User Manual DeLonghi DDS30COMBI


Summary
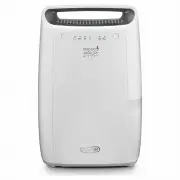
11 en intRoduCtion Thank you for choosing a De’Longhi product.Take a few minutes to read these instructions for use. This will avoid danger or damage to the machine. Symbols used in these instructions The important warnings are represented by the symbols li-sted here below.It is vital to observe the...
12 en use use in compliance with its intended use This appliance is intended for domestic use only. Use this appliance only as described herein. These instructions do not intend to cover every possible con-dition and situation that may arise. Common sense and cau-tion should be applied when installi...
13 en Nota Bene: When carrying out these operations be careful not o incline the appliance by more than 45°; in any case, once the castors have been assembled, wait at least one hour before turning it on. draining the condensate water The condensate can be drained in 2 ways: a) draining into the tan...
DeLonghi Air Dryers Manuals
-
 DeLonghi CF05M
User Manual
DeLonghi CF05M
User Manual
-
 DeLonghi DD230P
User Manual
DeLonghi DD230P
User Manual
-
 DeLonghi DD30P
User Manual
DeLonghi DD30P
User Manual
-
DeLonghi DD30P
Manual
-
 DeLonghi DDS25
User Manual
DeLonghi DDS25
User Manual
-
 DeLonghi DDSX220WF
User Manual
DeLonghi DDSX220WF
User Manual
-
 DeLonghi DDSX225
User Manual
DeLonghi DDSX225
User Manual
-
 DeLonghi DES16EW
User Manual
DeLonghi DES16EW
User Manual
-
 DeLonghi DEX214F
User Manual
DeLonghi DEX214F
User Manual
-
DeLonghi DEX214F
Manual
-
 DeLonghi DEXD216F
User Manual
DeLonghi DEXD216F
User Manual