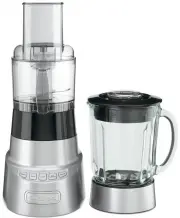
Cuisinart BFP-703BC - Manuals
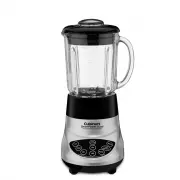
User Manual Cuisinart BFP-703BC


Summary
2 IMPORTANT SAFEGUARDS When using an electrical appliance, basic safety precautions should always be followed, including the following:1. READ ALL INSTRUCTIONS BEFORE USING. 2. To protect against the risk of electrical shock, do not put motor base of blender/food processor in water or other liquids....
3 SAVE THESE INSTRUCTIONS FOR HOUSEHOLD USE ONLY NOTICE This appliance is of the grounded type. If you use an extension cord, it should be a grounded type 3-wire cord. If the plug does not fit, contact a qualified electrician. Do not modify the plug in any way.This appliance comes with a resettable ...
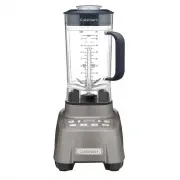
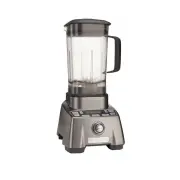
5 d. Ice Crush Button Press Ice Crush and begin crushing. This button is the best speed for crushing ice. e. Pulse Button Allows you to pulse at High, Low or Ice Crush speeds, so you can blend ingredients only as much as needed. 8. Heavy-duty Motor Base Is so sturdy and stable, it will not “walk” on...
Cuisinart Blenders Manuals
-
 Cuisinart 46190
User Manual
Cuisinart 46190
User Manual
-
 Cuisinart 46196
User Manual
Cuisinart 46196
User Manual
-
 Cuisinart 46201
User Manual
Cuisinart 46201
User Manual
-
 Cuisinart 46218
User Manual
Cuisinart 46218
User Manual
-
 Cuisinart 46219
User Manual
Cuisinart 46219
User Manual
-
 Cuisinart 46246
User Manual
Cuisinart 46246
User Manual
-
 Cuisinart 46250
User Manual
Cuisinart 46250
User Manual
-
 Cuisinart 46780
User Manual
Cuisinart 46780
User Manual
-
 Cuisinart 46781
User Manual
Cuisinart 46781
User Manual
-
 Cuisinart 46782
User Manual
Cuisinart 46782
User Manual
-
 Cuisinart CBT-1500P1
User Manual
Cuisinart CBT-1500P1
User Manual
-
 Cuisinart CBT-2000
User Manual
Cuisinart CBT-2000
User Manual
-
 Cuisinart CBT-2000P1
User Manual
Cuisinart CBT-2000P1
User Manual
-
 Cuisinart CPB-380P1
User Manual
Cuisinart CPB-380P1
User Manual
-
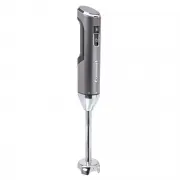
 Cuisinart CSB-175P1
User Manual
Cuisinart CSB-175P1
User Manual
-
 Cuisinart RPB-100
User Manual
Cuisinart RPB-100
User Manual