Cosmo COS-2PKG-075 - Manuals
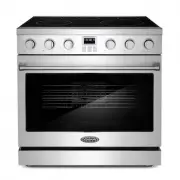
User Manual Cosmo COS-2PKG-075


Summary
2 3 THANK YOU FOR YOUR PURCHASE. Thank you for your purchase. We know that you have many brands and products to choose from and we are honored to know that you have decided to take one of our products into your home and hope that you enjoy it. COSMO appliances are designed according to the strictest...
5 4 Safety & Warning s WARNINGS These are the most critical warnings summarized below. • If the instructions in this manual are not followed exactly, a fire or explosion may result, causing property damage, personal injury or death. • Do not store or use gasoline or other flammable substances an...
Safety & 7 6 Safety & Warning s Before You Start ✓ Make sure that the anti-tip device of the range has been properly installed. ✓ Find the model and serial numbers on the CSA label in the bottom right hand corner of the backboard. Write these numbers down for future reference and keep it wit...
Cosmo Ranges Manuals
-
 Cosmo COS-244AGC
User Manual
Cosmo COS-244AGC
User Manual
-
 Cosmo COS-2PKG-087
User Manual
Cosmo COS-2PKG-087
User Manual
-
 Cosmo COS-2PKG-171
User Manual
Cosmo COS-2PKG-171
User Manual
-
 Cosmo COS-2PKG-172
User Manual
Cosmo COS-2PKG-172
User Manual
-
 Cosmo COS-2PKG-173
User Manual
Cosmo COS-2PKG-173
User Manual
-
 Cosmo COS-2PKG-174
User Manual
Cosmo COS-2PKG-174
User Manual
-
 Cosmo COS-2PKG-175
User Manual
Cosmo COS-2PKG-175
User Manual
-
 Cosmo COS-2PKG-176
User Manual
Cosmo COS-2PKG-176
User Manual
-
 Cosmo COS-305AERC
User Manual
Cosmo COS-305AERC
User Manual
-
 Cosmo COS-305AGC
User Manual
Cosmo COS-305AGC
User Manual
-
 Cosmo COS-965AGC
User Manual
Cosmo COS-965AGC
User Manual
-
 Cosmo COS-965AGFC
User Manual
Cosmo COS-965AGFC
User Manual
-
 Cosmo COS-DFR366
User Manual
Cosmo COS-DFR366
User Manual
-
 Cosmo COS-DFR486G
User Manual
Cosmo COS-DFR486G
User Manual
-
 Cosmo COS-EPGR244
User Manual
Cosmo COS-EPGR244
User Manual
-
 Cosmo COS-EPGR304
User Manual
Cosmo COS-EPGR304
User Manual
-
 Cosmo COS-EPGR366
User Manual
Cosmo COS-EPGR366
User Manual
-
 Cosmo COS-EPGR486G
User Manual
Cosmo COS-EPGR486G
User Manual
-
 Cosmo COS-ERC305WKTD
User Manual
Cosmo COS-ERC305WKTD
User Manual
-
 Cosmo COS-ERC365KBD
User Manual
Cosmo COS-ERC365KBD
User Manual