Page 3 - Save These Instructions
Index Important Safety Instructions � � � � � � � � � � � � � � � � � � � � � � � � � � � � � � � � � � � � � � � � � � � � � � � � � � � � � � � � � � � � � � � � � 2 Grounding Instructions � � � � � � � � � � � � � � � � � � � � � � � � � � � � � � � � � � � � � � � � � � � � � � � � � � � � � � �...
Page 4 - IMPORTANT SAFETY INSTRUCTIONS; SAVE THESE INSTRUCTIONS.
IMPORTANT SAFETY INSTRUCTIONS READ ALL INSTRUCTIONS BEFORE USING THIS APPLIANCE� This machine is not intended for use by persons (including children) with reduced physical, sensory or mental capabilities, or lack of experience and knowledge, unless they have been given supervision or instruction con...
Page 5 - Grounding Instructions
Grounding Instructions This appliance must be grounded� If it should malfunction or break down, grounding provides a path of least resistance for electric current to reduce the risk of electric shock� This appliance is equipped with a cord having an equipment-grounding conductor and grounding plug� ...
Page 8 - How to Assemble and Operate the Vacuum
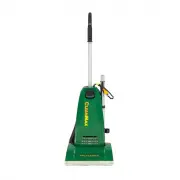
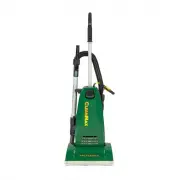
How to Attach the Handle to the Vacuum Cleaner (models CMPS-1T and CMPS-1N)The vacuum cleaner and the handle are packed separately�1� Remove the handle screw, insert handle into the hole on top of the vacuum cleaner� Make sure that the cord hook on the handle is positioned to the back of the vacuum ...
Page 11 - Handle Adjustments
The handle on this vacuum cleaner can be set to one of two positions – upright or reclined� How to Adjust the Handle1� To release the handle, step on the left rear corner of the vacuum cleaner (Fig� 1)�2� Upright position – for when cleaning tools are being used or for storage (Fig 2)� Handle locks ...
Page 13 - How to Replace the Vacuum Belt; On-Board Tool Cleaning
How to Replace the Vacuum Belt CAUTION: Unplug the vacuum cleaner before performing any of these steps� How to Remove the Bottom Plate1� Place the vacuum cleaner in the reclined position (see page 10)� Turn the vacuum over� 2� Slide the clips toward each other (Fig� 3)�3� Remove the bottom plate� Ho...
Page 15 - How to Clean the Nozzle Hose
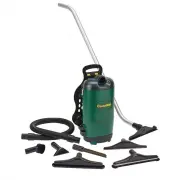
13 CAUTION:Unplug the vacuum cleaner� The nozzle hose, located on the back of the vacuum cleaner, carries the dirt from the nozzle to the vacuum bag� The hose inlet also functions as the attachment accessory opening� (models CMPS-1T and CMPS-1N only)� If the hose should become clogged: Models: CMPS-...
Page 17 - Owner’s Information
Owner’s Information The model and serial number of this product may be found on the bottom of the unit� You should note the model and serial number of your unit in the spaces provided below, and retain this book as a permanent record of your purchase� Date of purchase _______________________________...
Page 18 - Warranty
Warranty What is Covered:This warranty covers any defects in material and workmanship in your new CleanMax vacuum� How Long Coverage Lasts: Warranty coverage for your CleanMax vacuum lasts one year� What is Not Covered:• Damage to the vacuum which occurs from neglect, abuse, alterations, accident, m...
Page 19 - LEAN
©2017 CleanMax Vacuum Cleaners� CleanMax Vacuum Cleaners PO Box 730 Fenton, MO 63026 cleanmaxvacuums�com LEAN M AX C