Page 2 - IMPORTANT; READ ALL; Breville Recommends Safety First; Contents
2 BREVILLE RECOMMENDS SAFETY FIRST At Breville we are very safety conscious. We design and manufacture consumer products with the safety of you, our valued customer, foremost in mind. In addition we ask that you exercise a degree of care when using any electrical appliance and adhere to the followin...
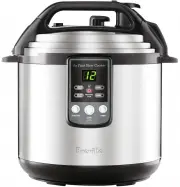
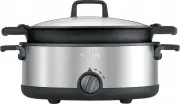
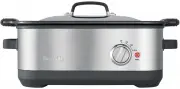
Page 10 - Components; Accessories
10 Components A. Lid handleB. Pressure release valve Controls rate at which steam vents out of cooker and subsequently degree of pressure inside the cover. C. Adjustable pressure control dial Choose from Low, Medium or High. D. Safety locking lid Can not be opened whilst pressure cooking. Not dishwa...
Page 13 - Quick Release
13 Using a wooden spoon to turn the pressure release valve into the open position will assist with a fast steam release, take care as the jet of steam may be hazardous. • Soups, stocks and recipes with a lot of liquid can force liquid through the pressure release valve during pressure release. Relea...
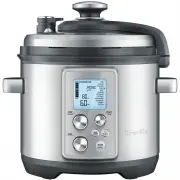
Page 14 - Side view; Top view
14 Side view OPEN Top view IMPORTANT Steam Release Button will be hot if pressed for prolonged period. Slow Release If the Steam release button is not depressed when cooking is finished, the cooker will slowly de-pressurize when the temperature drops towards room temperature. This method is recommen...
Page 16 - Quick Start Guide; This Quick Start Guide is designed for first time use.; Australia; MINIMUM
16 Quick Start Guide This Quick Start Guide is designed for first time use. For safety and more information, refer to your Instruction Booklet. 2 Wash silicone rubber gasket. 6 Refer to the Instruction Bookor Contact Customer Service. HELP! Australia 1300 139 798 New Zealand 0800 273 845 3 Select Pr...
Page 18 - Functions
18 Functions PREPARING THE FAST SLOW COOKER FOR USE 1. Before first use, remove all promotional labels and packing materials and discard in a safe place to avoid a choking hazard. 2. Remove the lid by taking hold of the handle, turning it counter clockwise and lifting the lid up and off the applianc...
Page 19 - PREPARING VEGETABLES
19 DO’S 9 9 Always thaw frozen meat and poultry before cooking. 9 9 Use dry oven mitts when lifting the removable bowl after cooking. 9 9 Always store Breville Fast Slow Cooker in a cool, dry place. DONT’S 9 8 Do not operate any of settings without removable cooking bowl in position. 9 8 Do not cook...
Page 20 - Hint and Tips
20 PREPARING DRIED PULSES (BEANS AND PEAS) Legumes and pulses can be cooked without prior soaking. To fasten the pressure cooking time, soak dried pulses in boiling water for 3 hours or overnight.Always wash and drain pulses before cooking. Remove any discoloured pulses.For best cooking results, pla...
Page 22 - How to Pressure Cook; NOTE; MINIMUM OF 1L
22 A BEGINNER’S GUIDE TO PRESSURE COOKING Pressure cookers are back in the forefront again. These time savers are wonderful for cooking succulent roasts, flavoursome casseroles, delicious soups and even desserts in a fraction of the time and energy they take by conventional methods. Pressure Cooking...
Page 24 - Side View; Top View
24 9. When LED displays 0 cooking has finished. Breville Fast Slow Cooker will sound 5 beeps. 10. To release pressure from pressure release valve, press pressure release button until initial bursts of steam have been released. Then you may either continue to press the pressure release button or rota...
Page 27 - PRESSURE COOKING LEGUMES; INGREDIENTS; TIP
27 PRESSURE COOKING LEGUMES 500g of dried legumes yields approximately 3–4 cups cooked legumes depending on type. INGREDIENTS 1 ½ cups dried beans or peas3 cups water for cooking METHOD 1. Add beans or peas and water to removable cooking bowl of Breville Fast Slow Cooker ensuring not to fill higher ...
Page 28 - PRESSURE COOKING VEGETABLES; Ingredients
28 PRESSURE COOKING VEGETABLES Ingredients 1kg prepared vegetables1 cup water or stock Method 1. Add vegetables and water or stock to bowl of Breville Fast Slow Cooker. Secure lid on. Pressure Cook Setting 2. Press FUNCTION button and select PRESSURE COOK, indicator light will illuminate. 3. Enter T...
Page 29 - HOW TO POT ROAST; Suitable meat cuts for pot roasting; POT ROAST
29 HOW TO POT ROAST The addition of liquid is required for pot roasting. Place meat in removable cooking bowl, then add sufficient liquid to cover up to a third of the meat. When using SLOW COOK or PRESSURE COOK settings meat will not brown during the pot roasting process, so for browner results sea...
Page 30 - HOW TO ROAST; Suitable meat cuts for roasting; BASIC ROAST
30 HOW TO ROAST Roasting meats using either PRESSURE COOK or SLOW COOK settings, creates tender, flavoursome results. Both cooking processes break down and soften the connective and muscle tissue within the meat, making it easier to slice. Meat will not be browned during PRESSURE COOK or SLOW COOK s...
Page 31 - Pressure Cook Setting
31 Pressure Cook Setting 1. Press FUNCTION button and select PRESSURE COOK, ensure indicator light illuminates. 2. Enter 13 minutes for rare or 15–18 minutes for medium to well done TIME, time is displayed on LED. 3. Pressure Release Valve is turned to PRESSURE position and Pressure Control Dial tur...
Page 33 - Using the Keep Warm Function; Automatically
33 5. Press FUNCTION button until SLOW COOK indicator light flashes red. 6. To set TIMER; press TIMER button and choose either 6 hours or 8 hours, 6H or 8H this will illuminate on LED display. When desired cooking time is displayed, press START/CANCEL button. The function indicator light will stop f...
Page 36 - Basic Steamed Vegetables
36 BASIC STEAMING CHART FOOD TIME BeetrootBrussels sproutsParsnipsPumpkin 2cm pieces 20–25 minutes8–10 minutes5–6 minutes10–12 minutes Basic Steamed Vegetables Select vegetable from basic steaming chart.1 litre water or stock.Place trivet into removable cooking bowl of Breville Fast Slow Cooker and ...
Page 38 - The Breville Customer Service Centre.
38 WARNING • Do not use abrasive cleaners, steel wool or scouring pads. • Do not immerse metal base or power cord in water or any other liquid as they may cause electrocution. • Ensure removable cooking bowl is correctly positioned in the base before you commence cooking. NOTE After cooking rice or ...
Page 40 - Troubleshooting; POSSIBLE
40 Troubleshooting POSSIBLE EASY SOLUTION EO is displayed on LED Screen • Check that lid is closed properly. • Check that the Pressure Release Valve is in the correct position. • Make sure the silicone rubber gasket is in good condition and attached properly to the gasket holder. E1 is displayed on ...
Page 42 - Notes
Page 44 - AUSTRALIA; Breville Customer Service Centre
Web: www.breville.co.nz Web: www.breville.com.au Breville is a registered trademark of Breville Pty. Ltd. A.B.N. 98 000 092 928. Copyright Breville Pty. Ltd. 2015. Due to continued product improvement, the products illustrated/photographed in this brochure may vary slightly from the actual product. ...